In Late 2019, the Bill and Melinda Gates Foundation co-hosted a pandemic exercise that simulated a global coronavirus outbreak. The findings are extremely disturbing in light of the current Coronavirus outbreak that started in Wuhan China last month. […]
The Friends of the Smokies has just announced the schedule for their Classic Hikes of the Smokies series in 2020. The year-long series will include 10 hikes in Great Smoky Mountains National Park this upcoming year, and will feature interpretation of the trail, history, and park projects supported by Friends of the Smokies. Moreover, these hikes will help support restoration and rehabilitation of some of the park’s most impacted trails through the Trails Forever program.
Please note that pre-registration is required to participate. Here’s a rundown of the hikes included in this year’s series:
Great Smoky Mountains National Park officials announced that the main access road into the Cataloochee area, Cove Creek Road, will be closed by the North Carolina Department of Transportation to conduct road repairs from February 10 through May 20.
The county roadway will be closed to stabilize a hillside just outside the park. The secondary access road into the area, Highway 284, will also be closed in the park throughout the duration of the construction project. Both roadways will be closed to all vehicles, cyclists, and horseback riders.
The secondary access road into the Cataloochee area, Highway 284, is a narrow, winding gravel road leading from the Big Creek area of the park into Cataloochee Valley. This gravel route is often seasonally closed during the winter months due to hazardous conditions and is not recommended for low clearance vehicles or trailers. This road will be closed throughout the closure period at the park boundary, approximately 2 miles north of Mt. Sterling Gap. During the closure, there will not be any potable water, restrooms, trash removal, or camping provided in the Cataloochee area.
Backcountry trails and campgrounds will remain open throughout the closure, but there will be no access to trailhead parking beyond the Big Creek area. Hikers and horseback riders should plan to start their itineraries from the Big Creek area or other areas across the park. The Cataloochee Campground, Group Camp, Horse Camp, and all services are expected to be operational by Memorial Day weekend.
There is a lot in the news about the outbreak in China and the increasing number of cases of the Wahun virus that are being seen in the United States. While there is reason to be concerned and take some … Continued
Shared housing can also be referred to as co-living spaces and they are rental spaces that have separate areas from the private bedrooms where the residents can meet together to share and co-live in....
When I was about 10 years old, my Grandfather made my brother and I each a gift – a wooden maul for splitting wood. It’s made from a large 8″ diameter x 4-foot hickory log. I remember when I could barely lift it. It was a practical gift and a true working man’s tool. While I didn’t appreciate the work that went into carving it at the time, it was the perfect tool for crushing the enemies of my favorite GI Joe and He-Man warriors. Almost 35 years later, I still have that maul. It’s as good now as the day I received it. It’s stained and a little beat up, but it’s a great tool that reminds me that all gifts don’t have to be bought. Some of the best ones are made.
So today, my gift to you is to show you how to make a wooden mallet or maul of your own or for a gift.
My 33-year-old hickory maul that my Grandpa made for me.
From driving in tent stakes to pounding a wedge for splitting wood, a solid wooden hand mallet has countless uses around base camp. Not only is it useful, it’s a really fun project. Besides, having a mallet on hand is always a good idea and packing in a hammer isn’t fun. You can make your own in just a few minutes, while the bread is rising in the dutch oven. While these can be made as large as you’d want, the tutorial below shows one that is a perfect size for light duty pounding.
Start with a solid, seasoned log that is approximately 3-4″ in diameter x 12-15″ long. The first step is to saw in what’s called a “stop cut” to form the head of the mallet. Saw all the way around the log and leave the center of the log untouched. This untouched area will ultimately form the handle of the mallet. The excess will be trimmed or batoned away in the following steps. Remember, you can always make the stop cut deeper but you can never put wood back in. Start by making the stop cut a little more shallow than you think you will need, especially if this is your first mallet.
4″ x 12″ log with stop cut all the way around.
Next, begin to trim away the excess wood from the handle portion of the mallet. The stop cut will prevent you from accidentally splitting off the head portion of the mallet.
Using a knife to split away excess wood from around handle.
Continue to split and carve away wood from around the handle until it’s the desired diameter.
Once the handle is close to the diameter you’re wanting, simply finish it off by carving away any rough edges or splinters. A final coat of linseed oil or beeswax will protect the wood and keep your mallet in working order for years to come.
What uses can you think of for a wooden maul or mallet in the woods?
Disclaimer: This material has been modified from the public domain US Military field manual, FM 5-80.
What is a Cravat Bandage?
Also known as the cravat bandage, triangular bandaging has
been used by the military since before the American Civil War. Although it is not the ideal bandage for any situation, it is a bandaging tool that, with
a little training, can bandage almost any area of the body.
The standard triangle bandage is a right triangle, with two
sides 40″ (about 102 cm) on each side, with the long side being about 56.6″
(about 144 cm) long. On the internet,
such bandages can be bought cheaply, generally with a couple of safety pins,
which are a necessary adjunct for some dressings. The exact dimensions are, however, not
important, nor is the material of which the bandage is made; traditionally,
unbleached muslin is used, but almost any other material will do; even a shirt
can be repurposed for a triangle bandage.
Folding the Cravat Bandage
To convert a triangle bandage into a cravat, take the right-angle
point of the bandage and put it to the middle of the long edge; the two flat
sides will be parallel. Take the shorter
of the two parallel sides and fold it over to the long side. Do that a second time, then a third
time. This will generate a band of
cloth, with as many as eight layers, about 3 ½” wide and a bit over 56″
across.
Folding a Cravat Bandage
Two such cravats can be used to make a tourniquet; four will
do nicely to lock a splint in place, tying two above the fracture and two below
it to anchor the splinting material to the extremity. The cravat can also be used in several other
ways.
In this, the first of several blogs on bandaging, let’s look
at using a triangle bandage for a sling.
Using a Cravat as a Sling
One of the easiest things to do out in the wild is to fall,
and the landing will often injure the arm or the shoulder—hopefully just a
sprain, possibly a fracture. Either way,
there will be need for a sling to support the wounded extremity. To make a triangle bandage into a sling,
start by putting the bandage with the right angle off to the side and just
above the elbow on the injured side with the long side going roughly up and
down, over the middle of the chest. Have
the victim hold the arm against the bandage to lock it in place. Move the victim’s hand up, so that the
knuckle of the fifth digit—the pinky finger—is about a hand’s breadth above the
crook of the injured elbow. That done,
take the lower end of the bandage upward and around the victim’s neck, on the
side away from the injured limb, bringing it behind the neck and tying it to
the other end of the bandage. To create
a pouch to support the elbow, bring the right angle of the bandage forward and
pin it to the front of the sling. The
whole should be just tight enough to lift the load of the arm off the shoulder. The diagram below gives a clearer picture of
how this works than my description does.
Using a Cravat as a Sling: Steps 1-3
There’s one problem with this sling: it puts pressure on the
collar bone on the injured side. If the
collar bone is broken, this just won’t do: the sling will be too painful to be
endured. Fortunately, there is a second
method of creating a sling that will get around the problem.
The starting point is the same: the triangle bandage is placed
on the front of the victim’s body, with the right angle of the bandage outside
the elbow on the injured side, and the long edge roughly up and down on the
chest, with the victim’s hand positioned so that the knuckle of the least, or
pinky, finger is about their hand width above the bend of the elbow. For this sling, the lower corner of the
bandage is brought up and threaded under the armpit on the injured side, to
meet the other corner across the uninjured
shoulder, and tied. As with the first
sling, the right angle is then brought forward and pinned to the front layer of
cloth to produce a pouch. Again, the
sling’s pouch should be created so that the weight of the injured arm is
supported by the sling, not the shoulder.
The diagram below should clarify things considerably.
Cravat Sling: Alternate Method
That’s enough for this blog.
Practice the slings on friends and fellow survivalists. Please do NOT practice tourniquets on other
people: use a phone pole or a 4″ PVC pipe or something.
The next blog in this series will be other bandaging techniques for the shoulder, arm and hand.
Jim Ausfahl is a physician in active medical practice, in Peoria Heights, Illinois, studying the art of surviving in a challenging environment and sharing the little he knows.
A wall tent could be a long term emergency shelter or a hunter’s home in a remote location. Thinking about getting one? Here’s what you need to know before investing.
Greetings Hiking Lady readers, Exciting news: I have some fantastic content in the works all about roof bars and roof boxes. Our growing family was desperately in need of a roof cargo carrier for our Jeep Grand Cherokee to make our adventures possible. First, stay tuned for a new in depth guide at Hiking 101: …
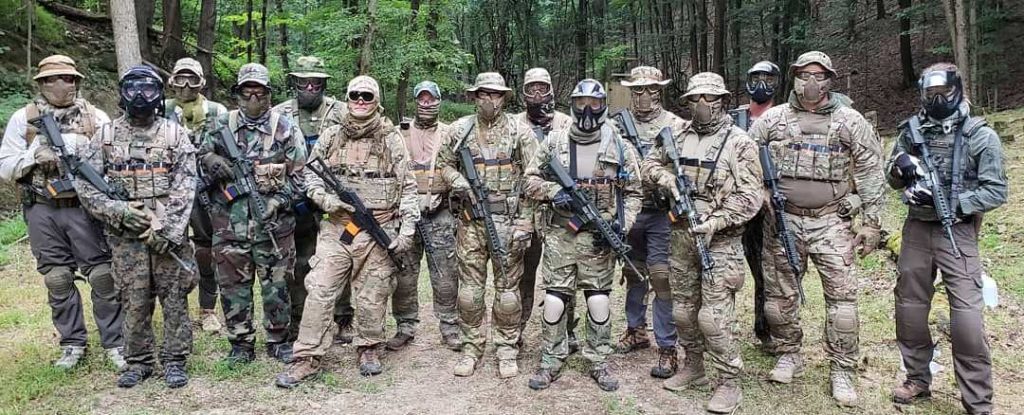
As we move into 2020, it is a good time to remind you of some classes that we have available. The Squad Tactics class is the successor to the excellent Combat Leader Course (CLC). We have adapted the CLC into a 4 Day class, where you have the option of being a squad member, or additionally taking on the role of Squad Leader and Team Leader.
With two full missions per day, force on force against dedicated OPFOR, you will be part of a squad which will plan, rehearse and then execute each mission in a fully simulated combat environment. This is the huge piece missing from a lot of training – the full aspect of planning and executing missions as a team.
In order to continue the excellent training offered by the CLC, the class has been replaced by HEAT Squad Tactics. Follow the link below to read more about this successor 4 day class.