Survival Gear Review: Benchmade 200 Puukko
Whether Buck, Bolo, or Bowie…Kukri, Kris or Katana, iconic knives are alive and well. Even as the world seems to spin faster by the day, age old knife designs still have a rock solid grip in our hands. The centuries of knife use has honed blades and handles into a near-perfect blend of design features to maximize its symbiotic relationship with humans.
By Doc Montana, contributing author to Survival Cache and SHTFblog
As one moves from the poles towards the equator, the food gets spicier and the blades get bigger. At least that’s what it seems like. So the most recognizable Scandanavian blade, forged far from the equator, is the humble Puukko, a knife with a blade that barely crosses a man’s palm. But oddly, given the near featureless design of the Puukko, knife aficionados and blade historians alike find ample content to argue over and plenty of ammunition from all kinds of sources. So when Benchmade jumped into the Puukko, two things would happen. First, Benchmade would make a very fine knife, and second, it would cause esoteric arguments about the undefined nuances of the Puukko concept. The camping knife lineup at BladeHQ’s website highlights the diversity of knives in that category. From the Otzi neck knife that will make you smile, to the El Chappo cleaver that will make you cringe, the immense number of choices will make you applaud the simplicity and tradition of the Benchmade Puukko 200.
When I see a puukko in the wild, I generally assume the best about the user. And the opposite when a bowie is unsheathed to gut a deer. Puukko knives just ooze utilitarian efficiency, design minimalism and general confidence by the user. Which is exactly why it’s so hard to get excited about the Puukko. Kind of like the thrill driving on new tires. The truck owner is thrilled, but the rest of us are underwhelmed by the sheer magnitude of mundane utility.
Is that a Knife in your Genes?
 That said, Puukko knives are primitively attractive. Deep down in human DNA shared through a thousand years of breeding has planted the seeds of the Puukko into our knife desires regardless of how bland and uneventful the design. Of course that means the Puukko has to try extra hard to capture our attention in the knife store. With no flashy pommel, bolster, guard or inlays, the humble Puukko is little more than a handle with a blade. Or perhaps a blade with a handle.
Benchmade jumped into the Puukko last year which is surprising either way you look at it begging the question, “Why?” And that would be “why so late to the Puukko party?” Or “why bother at all” given the saturated Puukko market? My guess is that the Benchmade’s answer is somewhere between this being the 21st century and there is room for Puukko improvement. And Benchmade makes knives and the Puukko is a knife. No matter the reason, the Benchmade 200 Puukko is here, and I for one am very glad it is.
Diverting from the ancient and traditional, the Benchmade 200 Puukko employs a thermoplastic elastomer handle rather than the usual birchwood. And a blade steel of semi-stainless 3V is a departure from traditional high carbon steels. The subtle differences in edge profile and grind are more a matter of splitting opinions rather than splitting hairs.
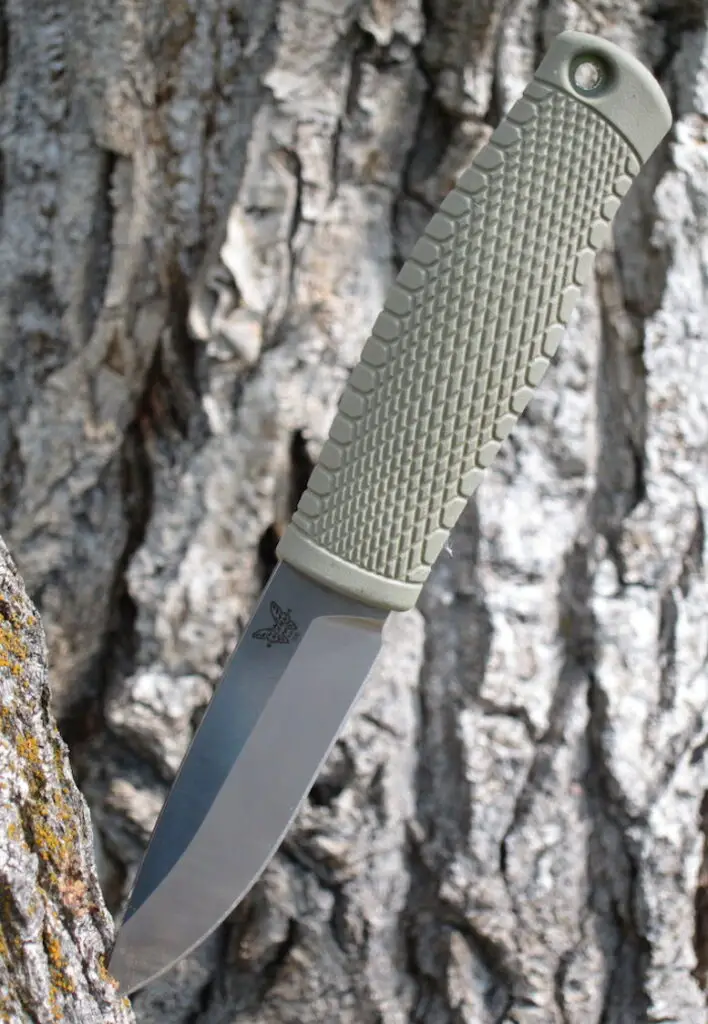
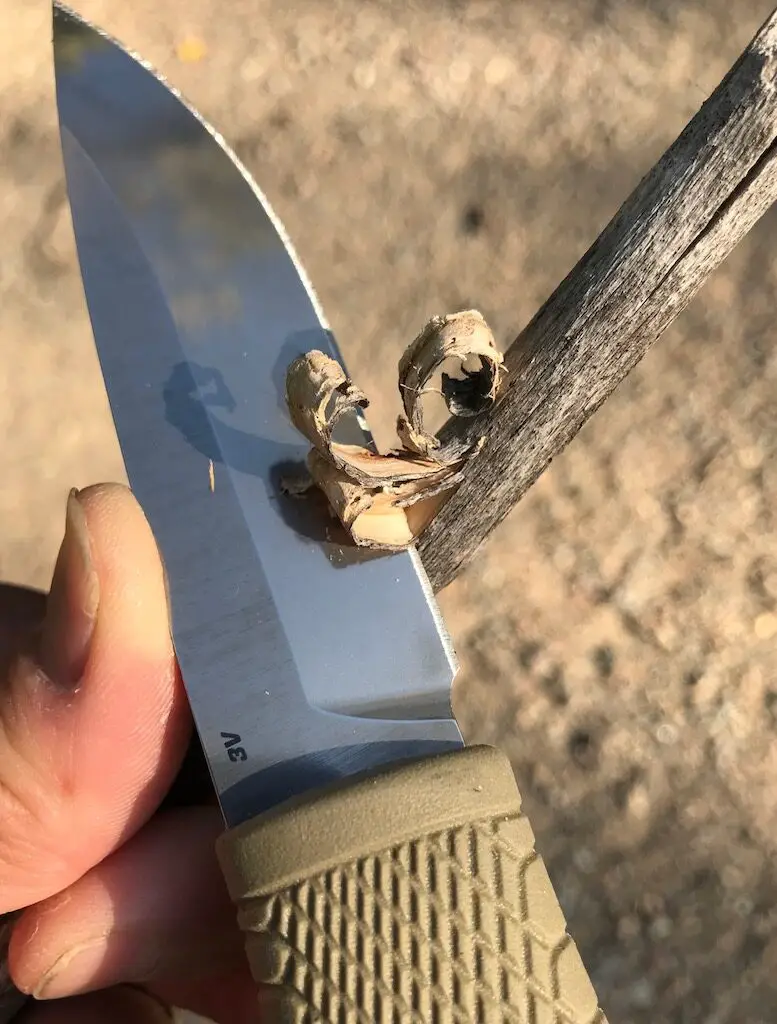
 The grind is not the traditional scandi, but a slightly more complex high flat grind with secondary bevel. The scandi grind is a simple machine that is easy to sharpen. But while the purists will sing the praises of the scandi, most blades that started as true scandi grinds slowly deviate to a more convex bevel as variations in human motion while sharpening gradually rounds the metal. Either way, the real question is does it cut?
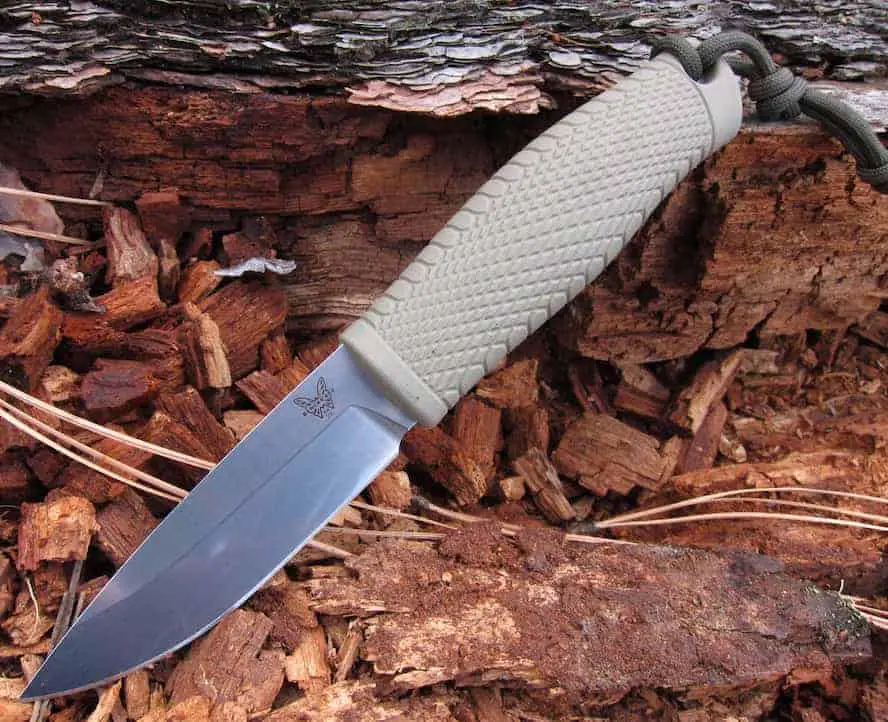
On the handle side of things, Benchmade used a Santoprene material that is extremely common in many other industries for many other purposes, but not that common in knife making. Frankly, reading the rich resume of Santoprene, it sure should be on more knives. The handle color that Benchmade calls Ranger Green, is a nice flat dark earth variant that I fell in love with on my Benchmade Bugout knife.
How Much Longer?
Overall, the Benchmade 200 Puukko is eight and a quarter inches long with just under half that in a drop point blade. It’s a full enclosed tang design with usable lanyard hole at the rear. The 0.14 inch thick blade is plenty of girth for anything this knife can do. Of course that’s circular logic, but in reality the size and design of this knife is an example of truly balanced engineering, with nothing missing and nothing extraneous. Anything you should do with this knife, you can do with this knife.
Related: Survival Gear Review: Benchmade Bushcrafter
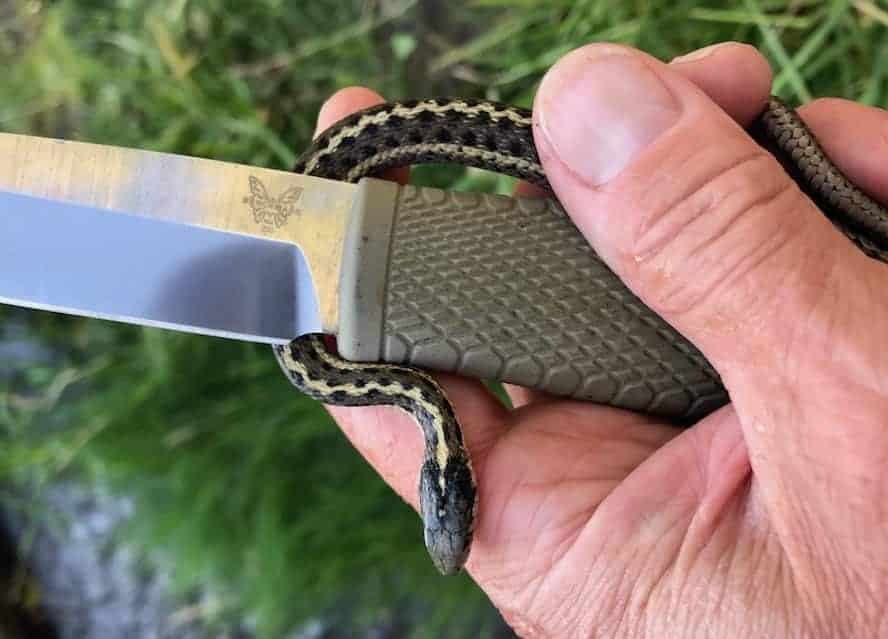
 The grip swells in two dimensions around the center of the palm giving a positive handhold shape on an already grippy grip. While not totally enough comfort to comfort those wanting some sort of physical guard between blade and handle, its well within specs of the Puukko. Thrusting, stabbing and fast poking are not what the Puukko is for so do so at your own risk. The Puukko is a utility knife that excels at cutting, carving, slicing, drilling, and other blade chores on the lower end of gross hand movements. Keep looking if you want a knife for fighting, prying, hacking, chopping or stabbing. In other words, the Puukko is exactly what you need for what you will be doing but not maybe the best single choice for wandering the dusty, sun-drenched post-apocalyptic hellscape of the future. But should you find yourself in need to stab with the Puukko, just roll your palm around to cover the butt of the handle that that should keep your hand from sliding onto the business side of the knife.
Steel This Knife
The choice of CPM-3V steel is interesting. On the Benchmade website, I get exactly four types of knives they produce that use the 3V steel. And oddly, there is very little in common among them, from a knife standpoint anyway. They include the Boost, the Bailout, the Outlast, and the Puukko with the Puukko as the only fixed blade in which Benchmade uses 3V steel. On the BladeHQ website, over 475 knife and tool choices are listed that use 3V steel with nearly 150 of them in stock and ready to ship.
 So what is 3V? In yesterday’s world it would be a full fledged member of the supersteel family, but today it’s more of a entry-level superish steel. Oddly, human civilization is often categorized into time eras named for the material used in cutting tools. Stone, copper, bronze, iron, and… now what? Steel? Supersteel? Super-duper steel? Basically we are splitting steel hairs over a few years compared to the absolutely massive leaps in cutting material technology over many centuries. So the differences we perceive between blade steels today are miniscule compared to those other civilizations experienced. All that said, the 3V choice made by Benchmade was a very good one. While not quite tradition of an original Puukko, it is a worthy choice for a Puukko knife that will likely still be used in the 22nd century.
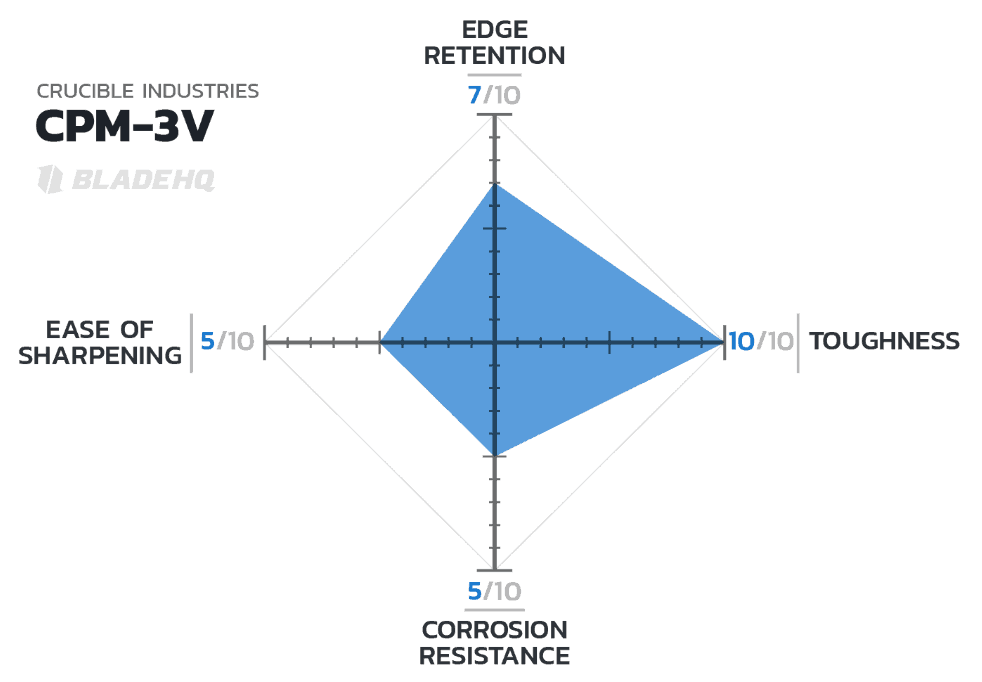
CPM-3V steel, as a near-stainless steel has some stainless characteristics, but not enough to ignore care and feeding. The knife strengths of CPM-3V steel include toughness and edge retention. Where 3V scores average in with ease of sharpening and corrosion resistance. Not a bad choice set when your lowest score is average and your best is perfect. Beyond its high grind, the point of the drop point (not the purpose but the actual point) makes a quick taper to its end allowing for a maximum retention of strength through thickness until the blade absolutely has to end. And that end is a very usable Puukko-quality tip that’s great for drilling, poking, tip slicing, and minor prying.
Hold Me Tight
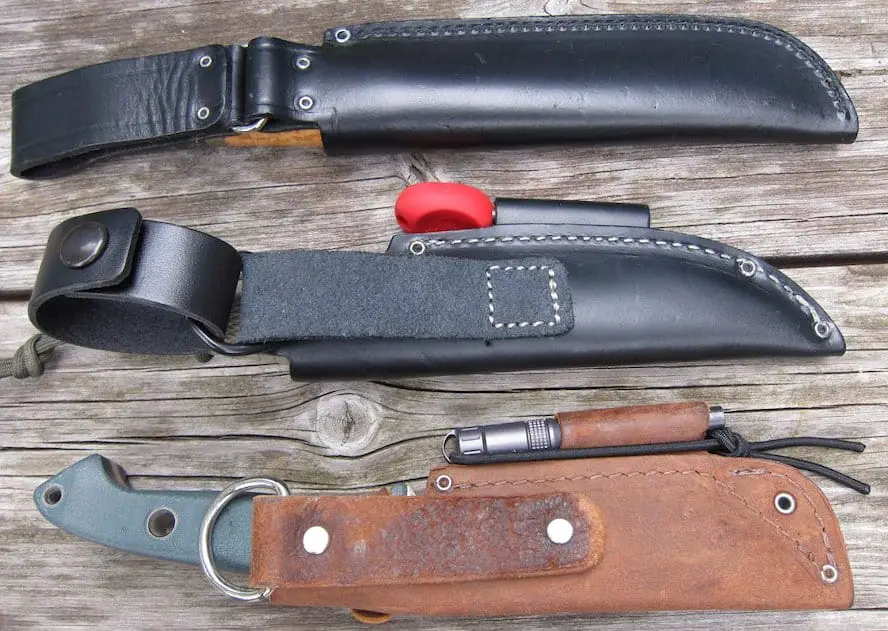
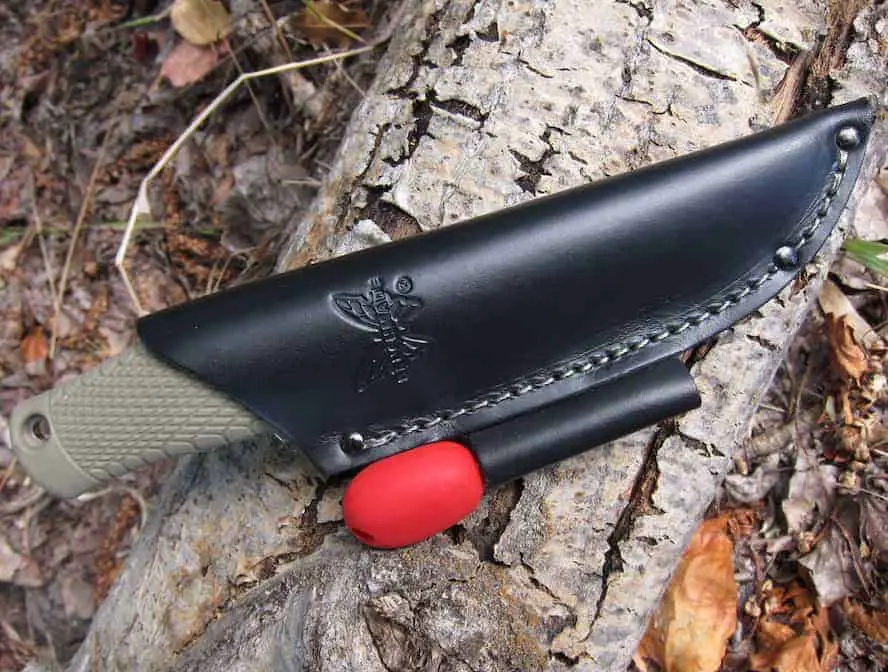 The sheath Benchmade includes with the Puukko 200 is actually much better than I expected. Benchmade has a mixed reputation on sheaths. I’ve had every one of Benchmade’s dive knives and exactly zero have good sheaths, with a couple downright dangerous disasters. The Puukko’s sheath is a single-stitched black leather slip-on with a firesteel loop. The standard belt loop is integrated, and an additional leather strap is included to make the sheath dangle for added comfort when sitting. Since the dangler loop is secured by a single snap, I chose to use the dangler strap with the snap wedged between belt and pants to give some added protection against loss.
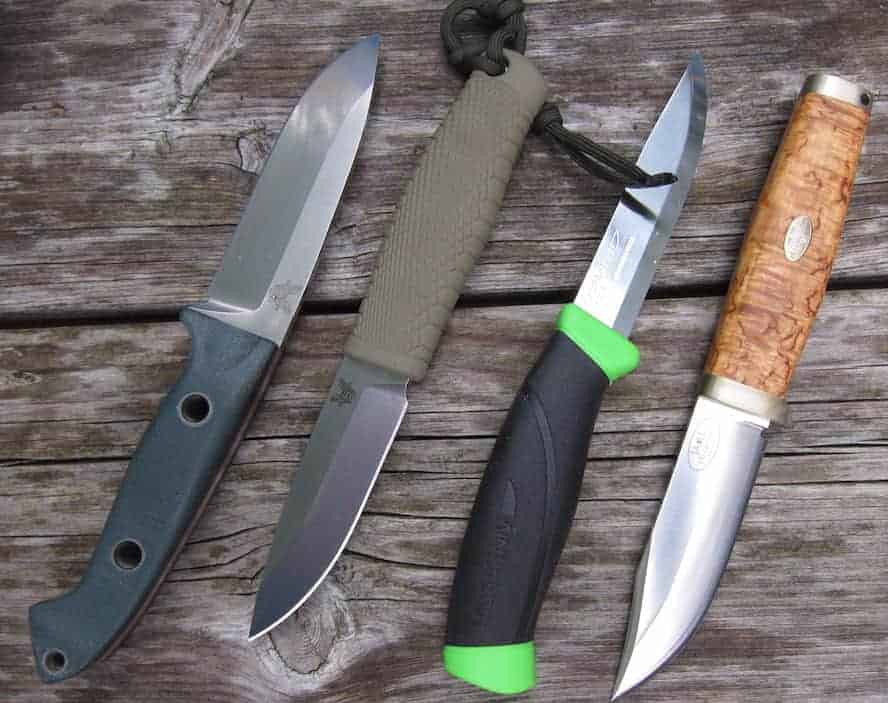
For reference, the Puukko’s sheath is a modified dangler. A pure dangler has dangling as it’s only carry option, while other sheaths have an included D-ring for an optional dangler strap. The difference actually may have more to do with the position of the knife in the sheath than the sheath attachment. The Benchmade Bushcrafter has a dangler option, but sits very high in the sheath causing extraction issues when dangling. A proper dangling sheath like that of the Fallkniven Jarl addresses much of the knife including the handle usually requiring a two-fingered pommel grip to slide the knife free enough to wrap a few more fingers around it. The Puukko falls much closer to a pure dangler thus committing more to it’s Puukko roots.
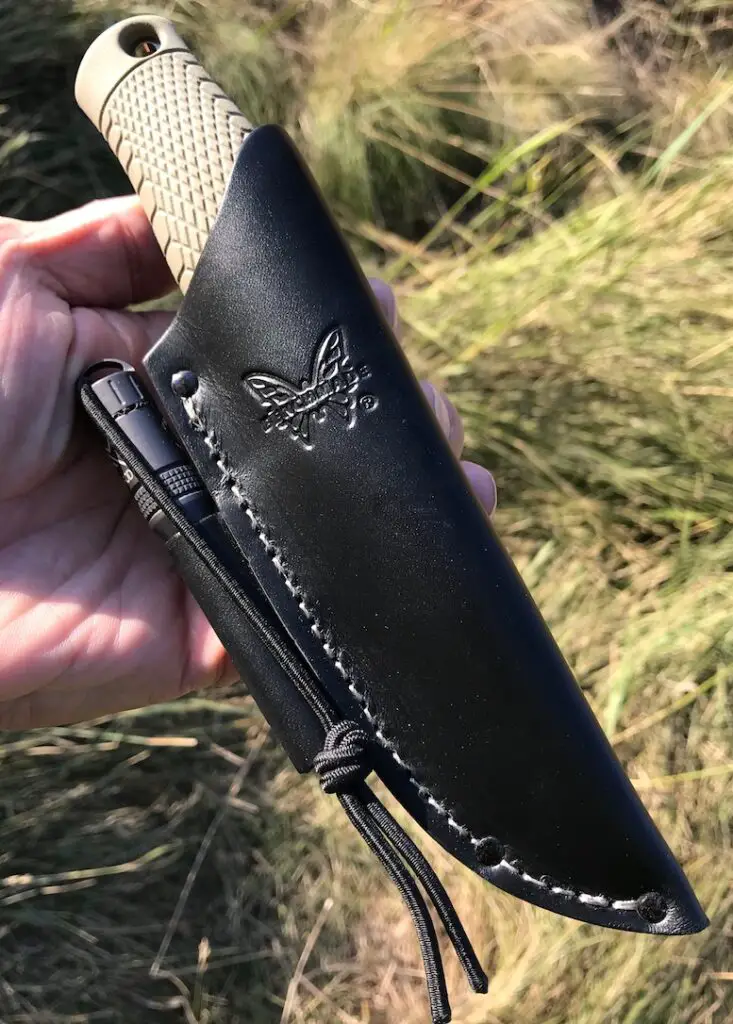 A plastic insert inside the sheath adds protection to the sheath from the Puukko’s blade, as well as a smooth hang-free insertion. The friction fit of the sheath snuggs up around the palm swell. Depending on your carry scenario, the sheath-grab may not be enough for your needs. In that case you can easily spend more money than the buck-and-a quarterish that the Puukko costs on a new fancy-smancy custom bushcraft sheath, or you can add some retention to the included sheath by either a O-ring addition to the belt loop, a horizontal strap to belt loop or dangler loop, or use the lanyard hole on the Puukko’s handle to string an additional rope or bungee cord. On mine, I tied in a short knotted lanyard that assists in retraction from the sheath. It works thus far, but I can see a length or loop adjustment in the future. Not sure which way just yet.
Part of a Balanced Diet
 Using the Benchmade Puukko 200 is a treat. The balance point is slightly handle-heavy where the knife will titer at about one inch back into the grip. This keeps the knife leaning into your hand which makes a solid footing for all the necessary tasks the Puukko excels at. The spine of the Puukko 200 is flat, as it should be, for additional thumb and palm pressure as needed. However, traditionalists might find the edges of the spine a fraction too rounded to efficiently scrape a firerod. The Benchmade Puukko 200 will throw sparks in its current configuration, but not with the ease of its sharp-spined brethren. A light spine grinding to sharpen the corners are fine if that floats your boat. However, the cutting edge throws sparks as well as anything, and pushing on the spine will likely happen much more often than the need to scrape a firerod. Err on the side of most-use.
 Probably the most surprising aspect of the Benchmade Puukko 200 is its price. BladeHQ advertises the Puukko 200 for only $127.50 with free shipping which is about the price of a Griptilian, often described as the affordable entry into the Benchmade lineup. The Puukko is an excellent example of how we can look to the past for help with survival in the future.
All photos by author unless noted
The post Survival Gear Review: Benchmade 200 Puukko appeared first on Survival Cache.
Survival Gear Review: Benchmade 200 Puukko Read More »