5 Best Kestrel for Shooting & Hunting [Hands-On]
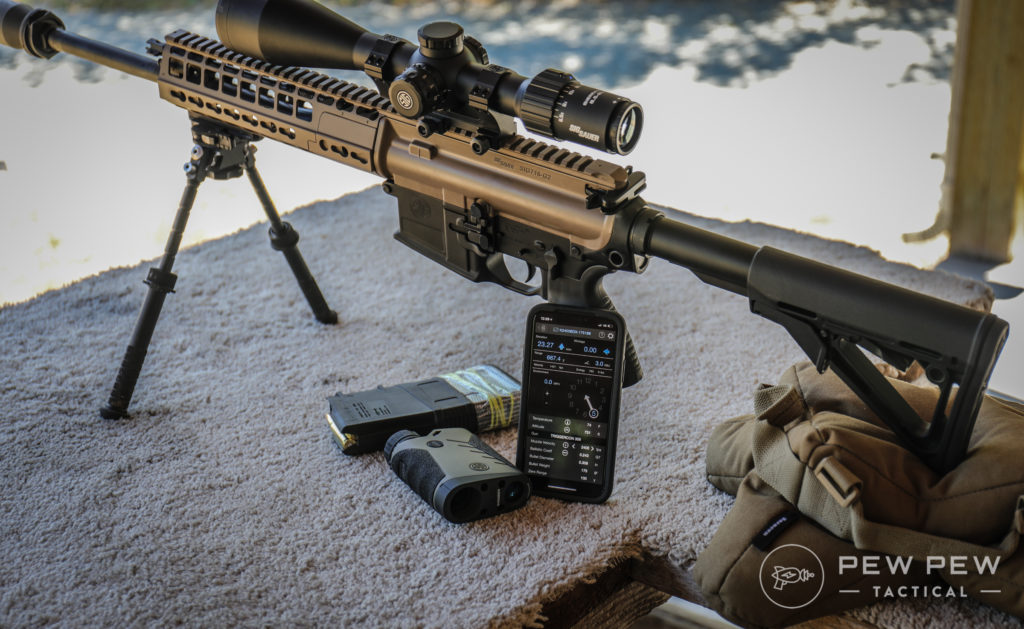
Shooting at long distance is part art, part science, and part magic.
But you can make it a lot easier if you just science the hell out of it.
Weather meters sound super boring, I know–but they are actually one of the most important pieces of equipment that a shooter can own.
With one tool you can gather an incredible amount of science, add a little magic, and predict the future… of where your shot will go.
Sounds awesome, right?
It’s time to demystify weather meters, so let’s take a look at the whole range of Kestrel Meters and look at how the right one can change your shooting life.
Table of Contents
Loading…
What Is A Kestrel Weather Meter?
Put simply, a Kestrel is a tool that (depending on the model) can gather data on the local weather and runs software that lets it use that data to give you critical information that you need as a shooter to tell how your bullet travels to the target.
I literally cannot list all of the data points that the proper Kestrel will gather for you, but here are some of the big ones:
- Wind speed
- Wind direction
- Humidity
- Dew point
- Temperature
- Altitude
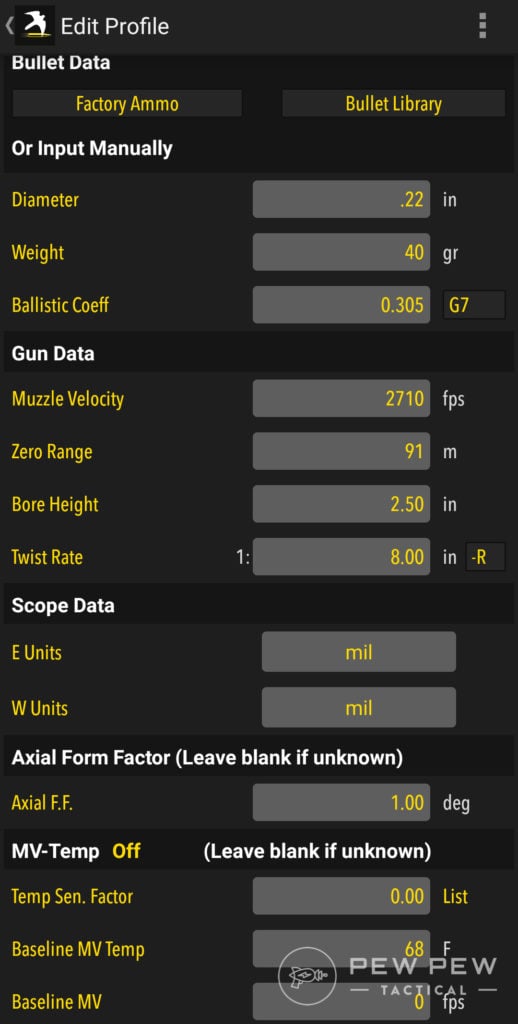
Get a powerful enough model and you’ll also get some very fancy software for ballistics.
Software that can take your data points and give you exact drop curves, tell you how much to dial in MOA or MILs for both elevation and windage, and a whole lot more.
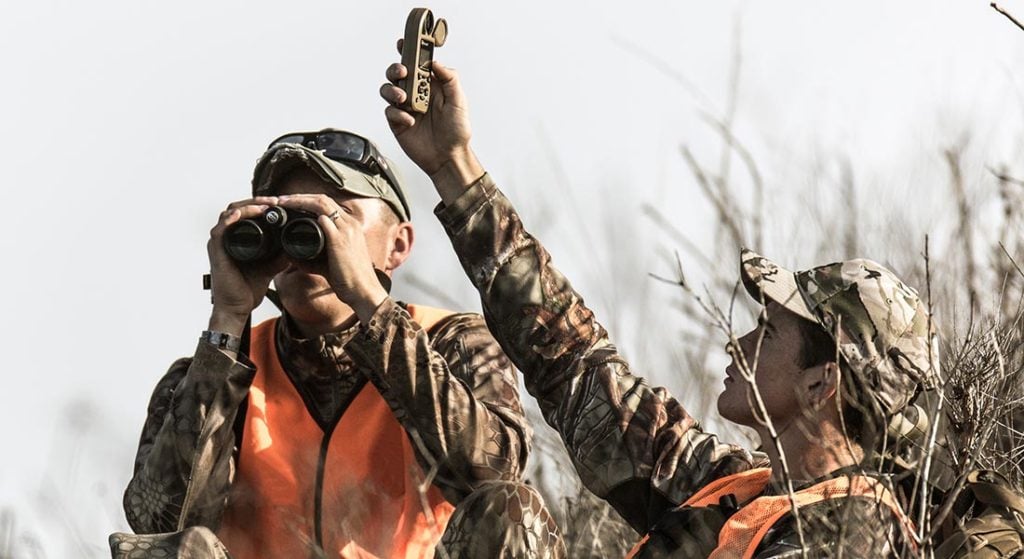
And Why Do I Need This?
There is a lot of factors that come to play when you take a shot.
Most of these factors don’t make a large single impact on the bullet, but add them together and multiply them by the distance you’re shooting and these small factors can cause huge changes.

Without knowing the exact conditions you’re shooting in, you can miss by feet at long enough range.
If you’re only shooting 100 yards or less, chances are you don’t really need something like a weather meter.
But if you’re commonly looking to take shots at 400, 500, 1,000, 1,500 yards or more–then you really need a weather meter.
I Don’t Need Skynet Telling Me How To Shoot!
Sure, you can make accurate hits without a weather meter. People have been doing it for a long time and people still do it today.
But like any good technology, a weather meter makes it a lot easier, a lot more predictable, and a lot more repeatable.
A good weather meter, accurate data on your rifle and cartridge, and you can make first-round long-range hits anywhere in the world. Try doing that with just a finger in the wind.
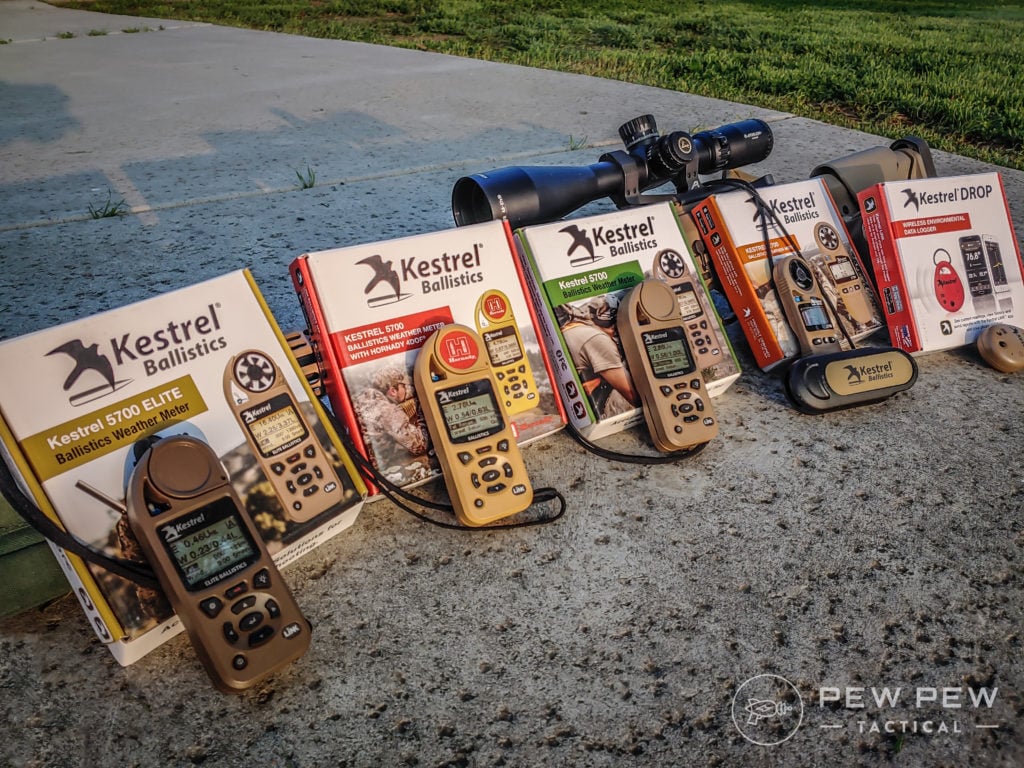
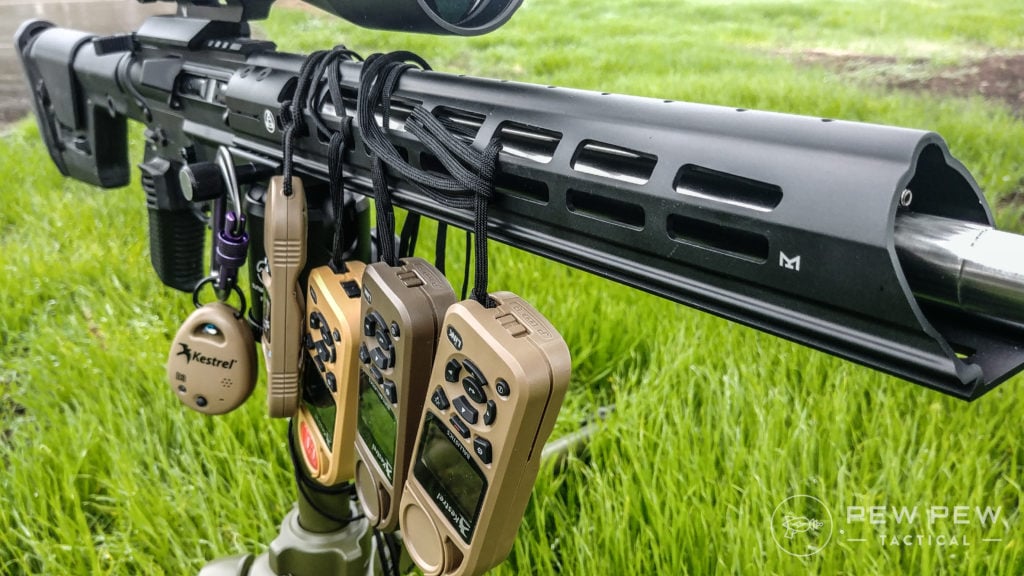
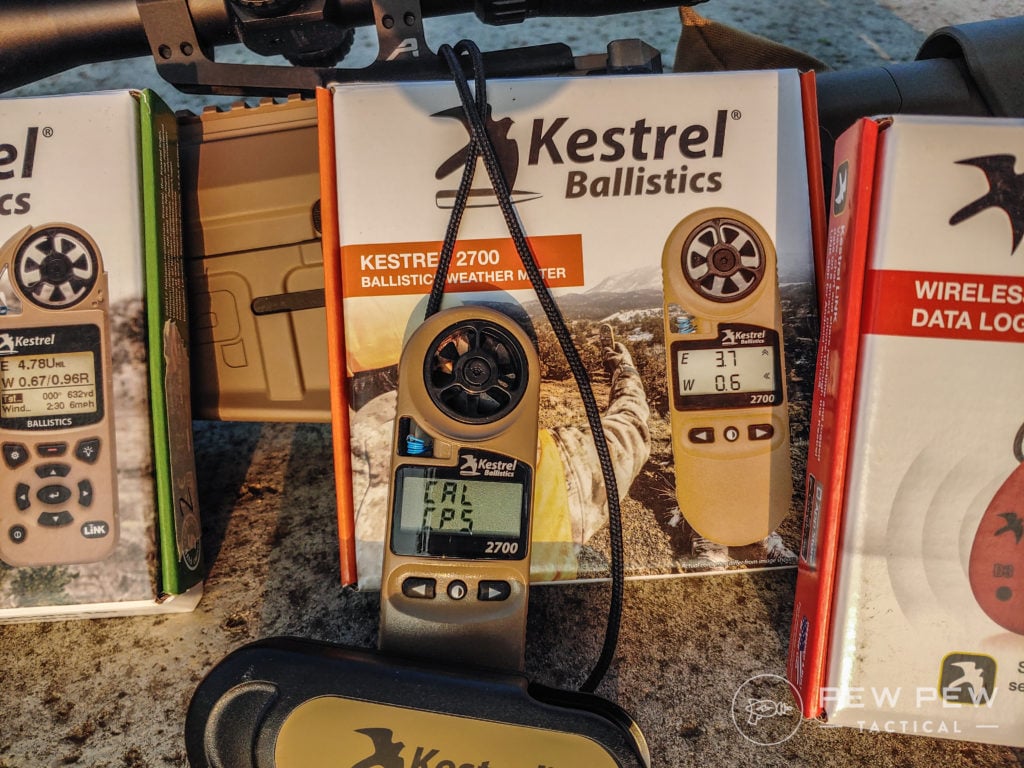
Best Kestrels for Shooting & Hunting
Kestrel was kind enough to send us a whole range of weather meters designed for shooters.
I’ve gotten to play with them for a few months now and I’m totally blown away with how useful and awesome they really are.
I’ll go over each one, and I’ll give you my recommendations on what you might want to choose depending on what kind of shooter you are, but first let’s go over some general information that was common across all of the models.
General Information
All of the Kestrel weather meters are durable.
I’ve dropped them from chest height onto concrete multiple times and none of them showed more wear than a mild scratch to the outer casing.
All of them come with simplistic packaging, but they include an Energizer Lithium-Ion battery ready to be installed–a huge win in my book when a brand doesn’t cheap out on the battery they send you!
All of these units are well made.
They each feel solid in the hand, have good firm controls, are well sealed, and exude quality when you use them.
The displays are easy to read, the controls take a little getting used to but aren’t bad, the buttons are firm and positive.
I really don’t have any complaints about any of them. Nothing happened to make me dislike them, just some models have features that make me like it more than its friends.
Now the one-by-one, in order of price low to high.
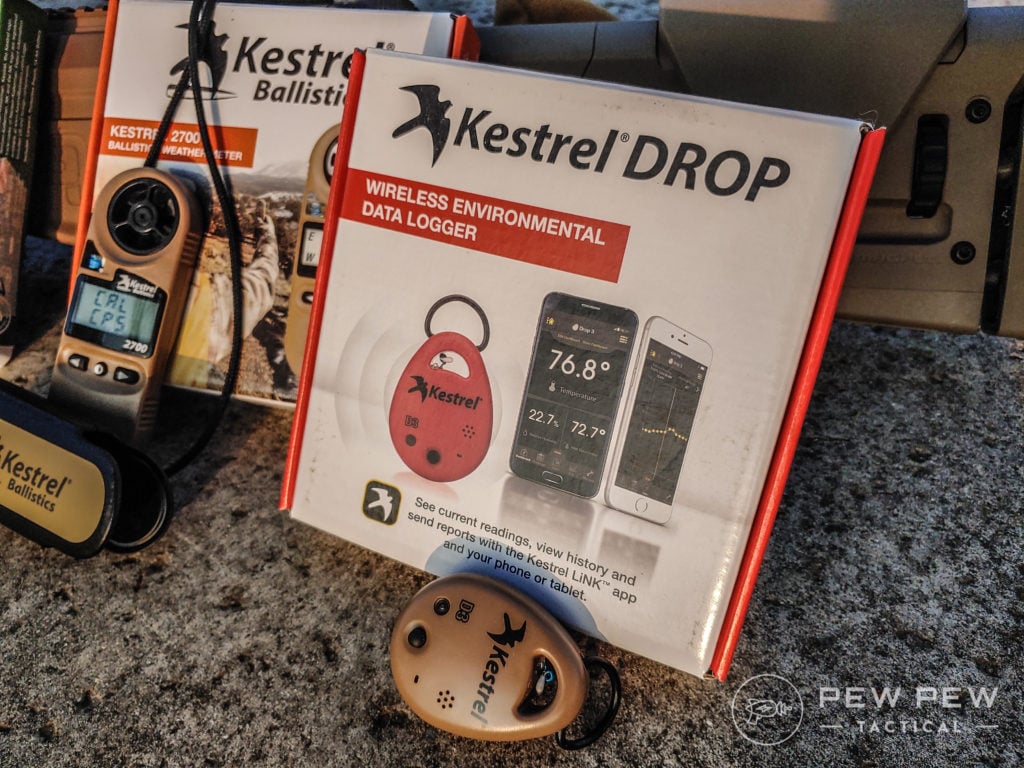
1. Kestrel Drop D3 Ballistics
Maybe I’m not the market for the Drop D3, but I honestly don’t know who is the market.
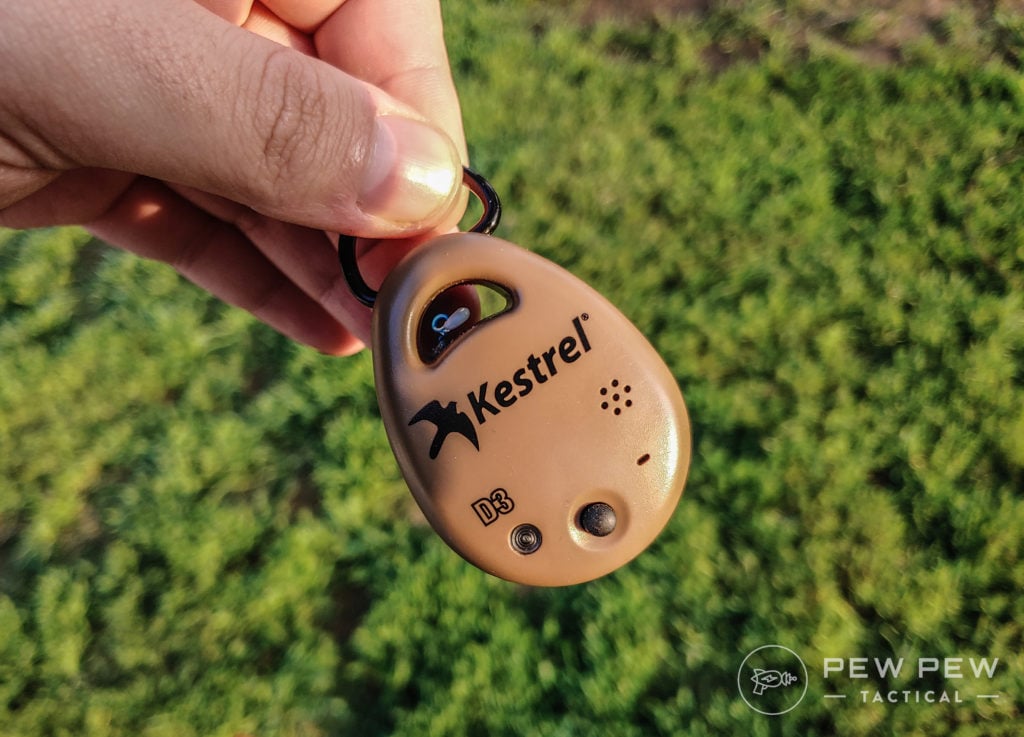
The Kestrel Drop D3 is the smallest and cheapest units offered from Kestrel for shooters, it is a passive tracker that takes snapshots of the weather around it… but it only tracks a few data points
- Temperature
- Relative Humidity
- Dew Point Temp.
- Heat Stress Index
- Station Pressure
- Density Altitude
It has no display, so to access the information you need the Kestrel app on your phone or you can export the data to an excel type program.
While some of these data points are useful, some of them aren’t (for shooters), and it is missing the most critical: wind.
The wind is the second most impactful force on your bullet, the first being gravity–but since gravity is constant it’s easy to account for.

Temperature and humidity will change your ballistics, but they are fairly minor forces. Running the numbers in a ballistic calculator, even using extreme spreads, the changes are minor at best inside of say 700 yards.
Station pressure is a bit more important and when combined with extreme spreads in temp and humidity can make a major change in ballistics.
However, if you know what altitude you’re going to be shooting at or at least know roughly, you can make a decent guess at this without the Drop D3.
Of course, you can still use the Drop D3 with a ballistic app to give you a firing solution–but that requires having your phone with you and that kind of defeats the point of having the lightest model… right?
Prices accurate at time of writing
Prices accurate at time of writing
var PPT_APS = PPT_APS || {};
PPT_APS[48016] = {
“id”: “48016”,
“title”: “Kestrel Drop D3”,
“img”: “https://www.pewpewtactical.com/wp-content/uploads/2019/12/Kestrel-Drop-D3-621×1024.jpg”,
“tag”: “”
};
Thankfully, the next level up in price gives us a lot more options and some really nice added features while also not costing that much more.
2. Kestrel 2700 Ballistics Weather Meter
If you’re a hunter or just getting your feet wet in long range shooting or maybe you’re just on a tight budget, the Kestrel 2700 is my top pick.
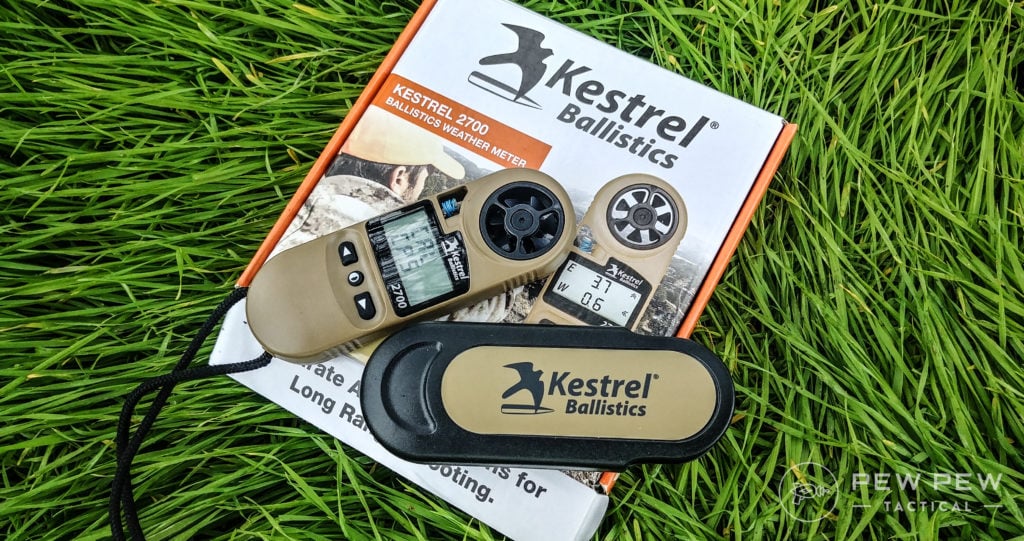
It has the core of what you need most but keeps the price down by omitting the fancy stuff.
Data gathered:
- Station Pressure (Absolute Pressure)
- Temperature
- Wind Direction
- Wind Speed/Air Speed
Less data than the Drop D3, but much more useful. This model feels really built for shooting now!
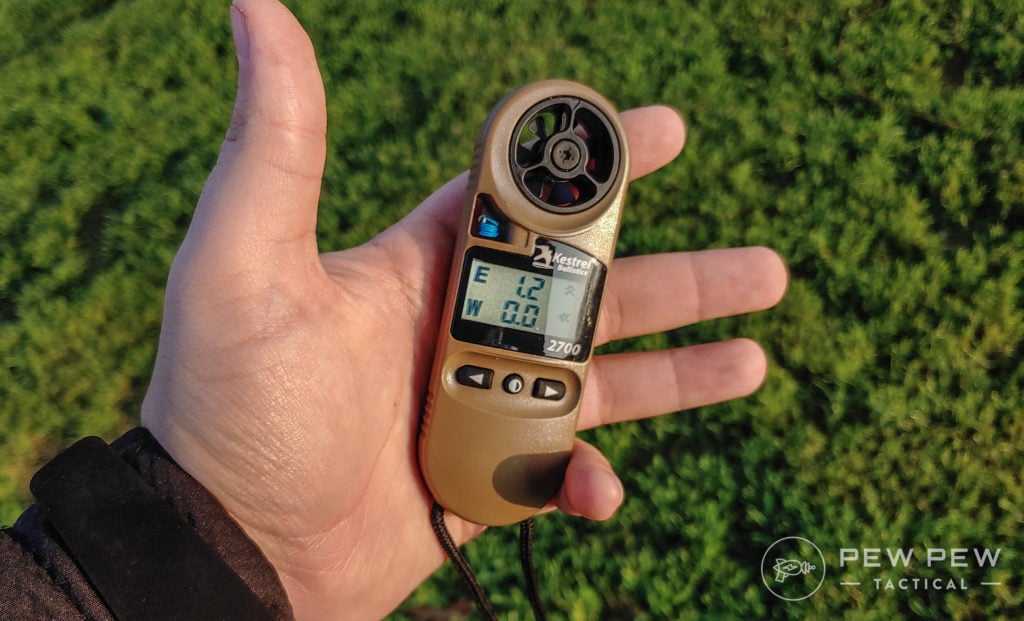
These environmental data points give you the stuff you really need and the 2700 can interface with Kestrel’s ballistic app, this lets you do a LOT such as setting up a custom profile, G1 and G7 ballistics solver, and more.
Prices accurate at time of writing
View Details
179
at Amazon
Prices accurate at time of writing
var PPT_APS = PPT_APS || {};
PPT_APS[48020] = {
“id”: “48020”,
“title”: “Kestrel 2700 Ballistics Weather Meter”,
“img”: “https://www.pewpewtactical.com/wp-content/uploads/2019/12/Kestrel-2700-Ballistics-Weather-Meter-105×300.jpg”,
“tag”: “”
};
Feed it all of the information, and it will tell you what adjustments you need to make to hit your target.
Limitations
This is the base model so it doesn’t come with all the bells. First, you’re limited to one gun profile.
And there is no backlighting.
And likely the biggest of all: you’re limited in range. Roughly 800 meters.
Missing on the 2700 are things like spindrift correction, Coriolis correction, muzzle velocity-temperature correction, zero hight/zero offset, and some more finer points of magic that make predictions past 800 much more accurate.
You can still hit things further than 800 meters, but it won’t be as accurate as with some of the better Kestrel models.
If you’re shooting to fill a freezer, close enough might be fine–but if you’re shooting for points, these missing features could matter a lot.
What’s your take on the Kestrel 2700?
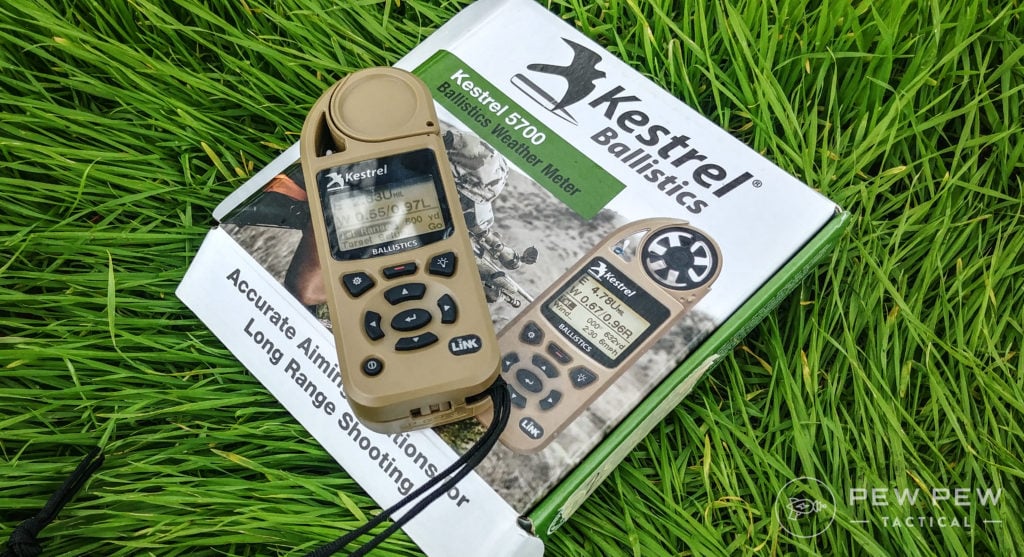
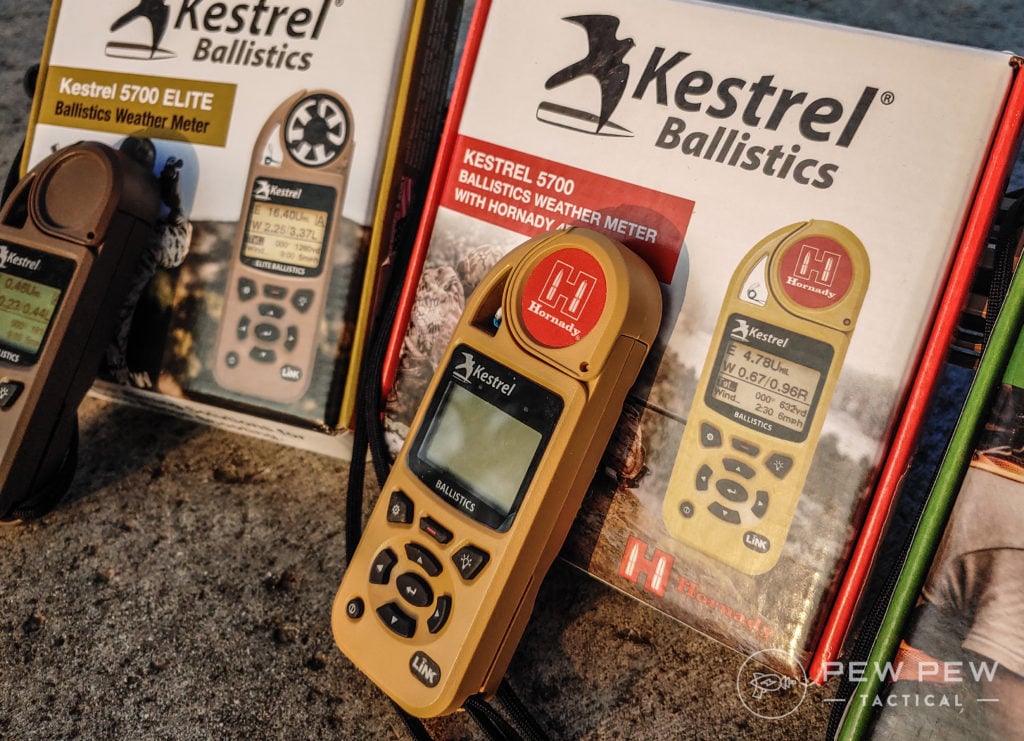
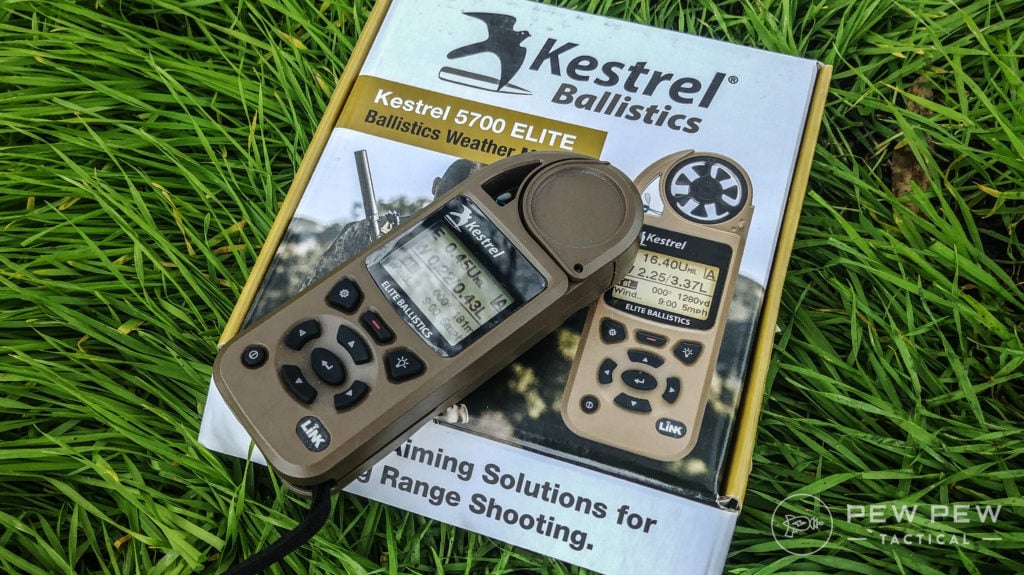
3. Kestrel 5700 Ballistics Weather Meter
Now we’re into the money and looking at a tool that is some meat on it!
Looking at the hardware, the 5700 is the same as the 5700 Elite, the difference is purely software.

A huge plus is that Kestrel will let you upgrade the base model 5700 to the Elite model by just paying the difference.
The 5700 gives you everything the 2700 did but it also gives you those finer points I mentioned that makes things more accurate past 800 meters. It also comes with a backlight, a huge plus in low-light or deep shadow.
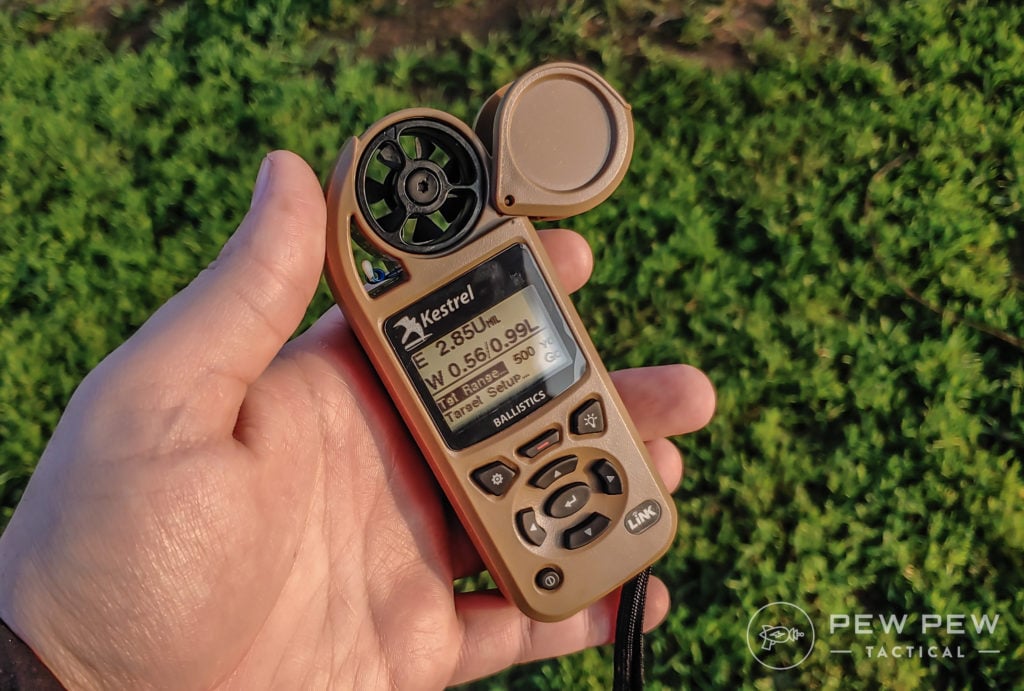
Packing on more features you now get 3 gun/bullet profiles instead of 1, a basic ballistics data table, and full environmental data (heat index, dewpoint, etc.)
If you’re using a MIL scope, it can also do the math for you to estimate your range to target–this isn’t as good as a proper laser range finder, but it’s handy in a pinch.
Prices accurate at time of writing
Prices accurate at time of writing
var PPT_APS = PPT_APS || {};
PPT_APS[48040] = {
“id”: “48040”,
“title”: “Kestrel 5700 Ballistics Meter with LiNK”,
“img”: “https://www.pewpewtactical.com/wp-content/uploads/2019/12/Kestrel-5700-Ballistics-Meter-with-LiNK-398×1024.jpg”,
“tag”: “”
};
If you want to shoot further than 800 meters regularly or want the best hardware while saving money before making the jump to the Elite software, this model is great.
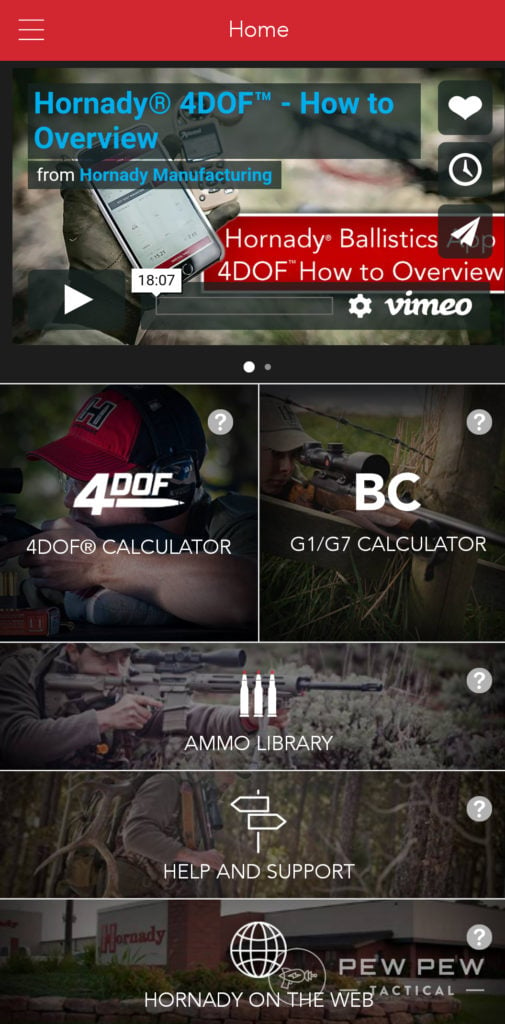
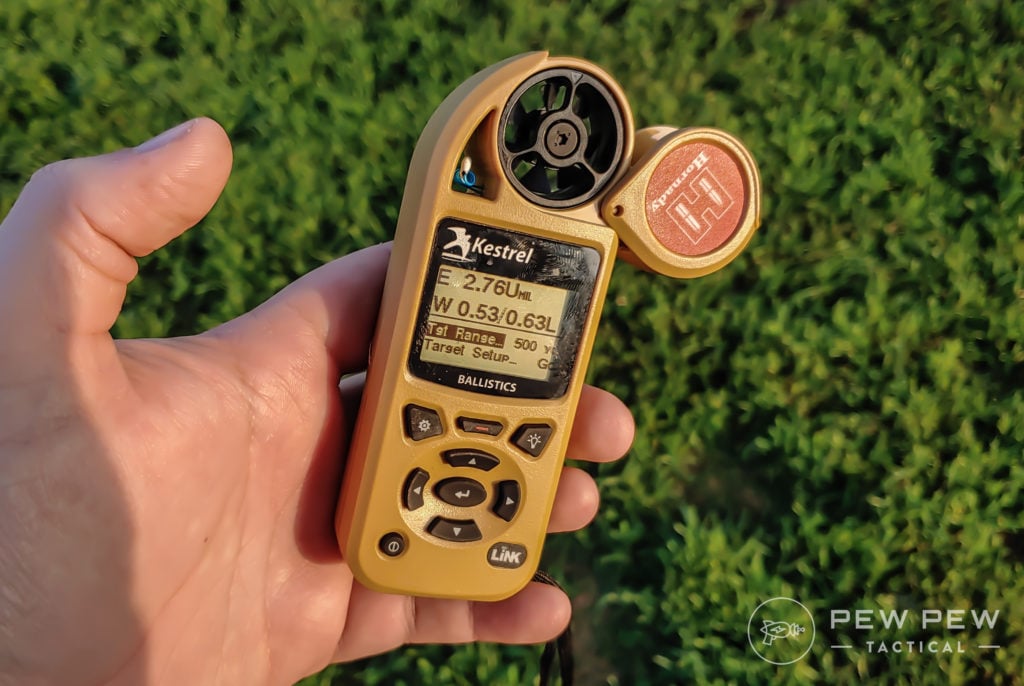
4. Kestrel 5700 with Hornady 4DOF
This and the Elite are tricky beasts.
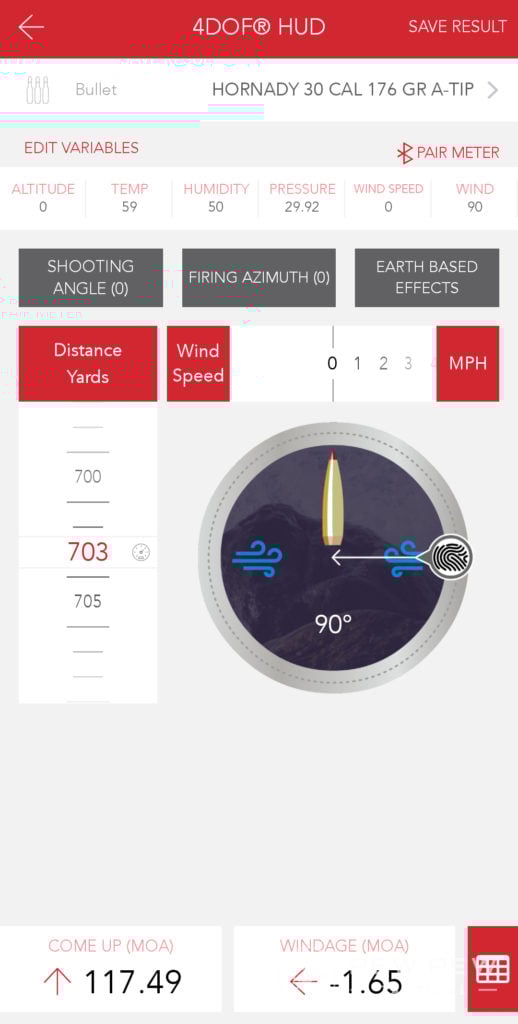
Again, this version of the 5700 has all the hardware of the base model. What it brings extra to the table is the Hornady 4DOF software.
Hornady 4DOF is a proprietary ballistic calculator developed by Hornady and is designed to kick major long-range ass.
Hornady put a huge amount of work and continues to put a huge amount of work into the 4DOF software. The super technical information is too long for me to write here, but there are two major highlights.
First, this was the first publicly available calculator to determine the vertical shift of a bullet in a crosswind. But the huge talking point is their shift away from using a Ballistic Coefficient to using a Drag Coefficient.
Basically, using Doppler radar and a LOT of math, Hornady has calculated the exact drag versus velocity curve for every projectile in the 4DOF library (a huge selection of bullets).
What they’ve done is honestly a huge amount of work… and they’ve found a way to package it in an easy to use, easy to understand manner that really delivers a lot to you.
var PPT_APS = PPT_APS || {};
PPT_APS[48033] = {
“id”: “48033”,
“title”: “Kestrel 5700 with Hornady 4DOF”,
“img”: “https://www.pewpewtactical.com/wp-content/uploads/2019/12/Kestrel-5700-with-Hornady-4DOF-117×300.jpg”,
“tag”: “”
};
I’ve found their software to be intuitive, useful, and pleasing. It isn’t as complete as the Elite software, but it covers a huge range of bullets and cartridges while also simplifying the process a little to make it much faster and easier to set up.
Plus, since I shoot a lot of Hornady factory ammo and use a lot of Hornady bullets for handloading, having their super awesome software is handy since they know their bullets better than anyone.
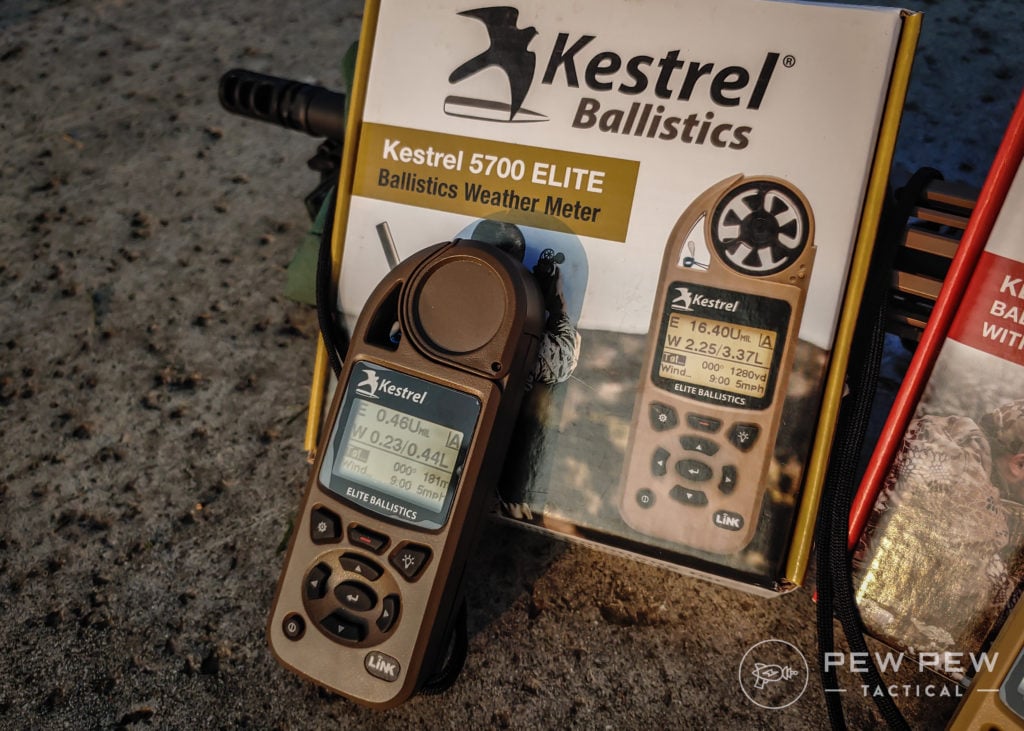
5. Kestrel 5700 Elite Applied Ballistics
The moment you’ve all been waiting for–the Kestrel 5700 Elite with Applied Ballistics!
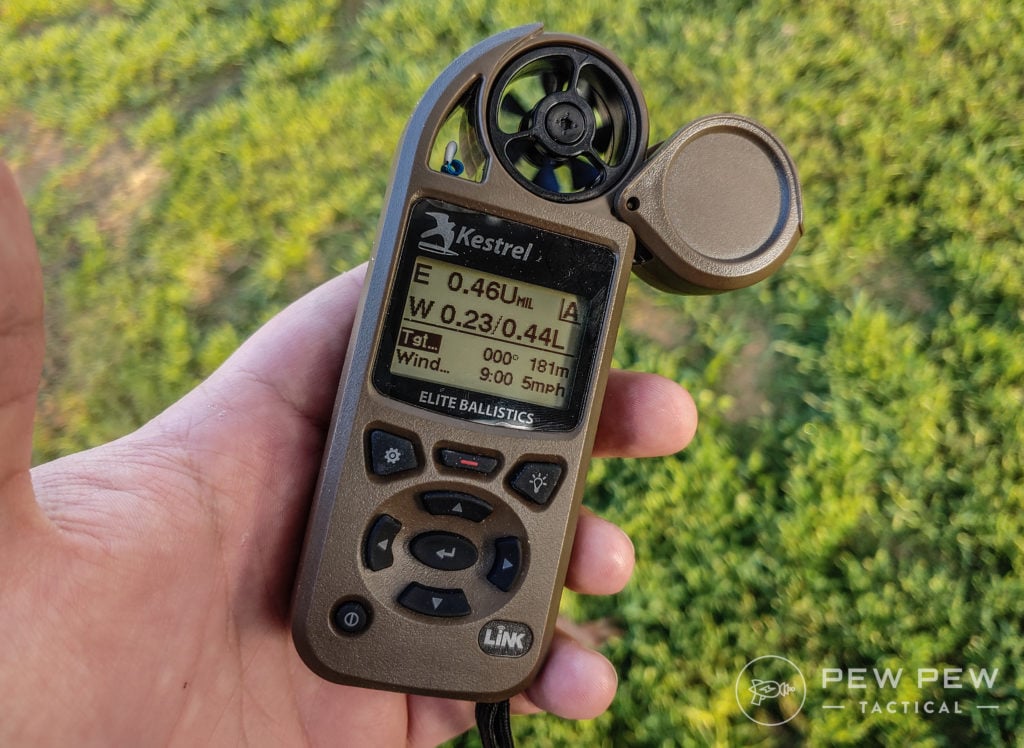
This is the top of the line weather meter.
A gold standard by which all others are judged. Hardware, it’s the same 5700 as before. But the software is nuclear space magic.
Before we talk Kestrel, we need to talk Applied Ballistics. If you haven’t heard of them, they are sort of the NASA of bullets. Or really, more like Space-X of bullets.
A huge amount of the science that long-range shooters have about ballistics, bullets, drag, and more comes from the work that AB has done. They are an R&D company, a software developer, an ammo manufacturer, and lab coats crunching numbers.
They are also the brains behind a host of groundbreaking and impressive products such as Sig Sauer’s BDX app, L3 STORM SLXE app, and multiple collaborations with DARPA.
A Kestrel Elite 5700 loaded with the Applied Ballistics software is the most powerful handheld ballistic weather tool you can own.
Besides powerful software, it also gives you access to a few more features like the Applied Ballistics Litz Custom Drag Model, 30 gun/bullet profiles, expanded ballistics data table, ability to make target cards, and Drop Scale Factor Calibration.
But… it all comes at a cost. First, this model isn’t cheap. Second, while the AB software is very powerful it is also very complex.
If you’re a newer long-range shooter, this can be incredibly intimidating and simply too many choices and too much science thrown at you at once.
This is one of the reasons why getting the base 5700 and then upgrading later is such an attractive option.
Prices accurate at time of writing
Prices accurate at time of writing
var PPT_APS = PPT_APS || {};
PPT_APS[48037] = {
“id”: “48037”,
“title”: “Kestrel 5700 Elite Ballistics Meter”,
“img”: “https://www.pewpewtactical.com/wp-content/uploads/2019/12/Kestrel-2700-Ballistics-Meter-189×300.jpg”,
“tag”: “”
};
But, if you’re a major shooter or looking to become one–this is the weather meter for you.
Kestrel Recommendations For You
Still on the fence what model to get? It’s okay, I know this is a lot to wade through (try reading 5 owner’s manuals for weather meters…). Based on my experience, here are my recommendations for you.
Mid to Long Range Hunter / Casual Plinker: Kestrel 2700.
If you’re only shooting inside of 1,000 meters for plinking and 800 or less for hunting, then this has 99% of what you need. It isn’t perfect, but it’s affordable and very useful.
Prices accurate at time of writing
View Details
179
at Amazon
Prices accurate at time of writing
var PPT_APS = PPT_APS || {};
PPT_APS[48020] = {
“id”: “48020”,
“title”: “Kestrel 2700 Ballistics Weather Meter”,
“img”: “https://www.pewpewtactical.com/wp-content/uploads/2019/12/Kestrel-2700-Ballistics-Weather-Meter-105×300.jpg”,
“tag”: “”
};
Long Range Enthusiast: Kestrel 5700 Base Model
You’re a long-range shooter that wants to take your game up a notch, maybe you shoot a few competitions and want to do more, maybe you just really like going out to long-range once a month or so and want to get the most out of it. Or maybe you just want to cheat a little.
Prices accurate at time of writing
Prices accurate at time of writing
var PPT_APS = PPT_APS || {};
PPT_APS[48040] = {
“id”: “48040”,
“title”: “Kestrel 5700 Ballistics Meter with LiNK”,
“img”: “https://www.pewpewtactical.com/wp-content/uploads/2019/12/Kestrel-5700-Ballistics-Meter-with-LiNK-398×1024.jpg”,
“tag”: “”
};
The 5700 gives you room to grow and is really the model I would recommend for most people. You can always turn this into the Elite down the road, but for now it gives you the tools you need to learn on without getting you too deep into the weeds.
Serious Competitor / Long Range Master: Kestrel 5700 Elite
If you want to “buy once, cry once” just get it over with and get the Elite.
If you’re looking to compete often or you enjoy trying a wide range of cartridges and loads, the Elite has the software and database to really let you do anything.
Prices accurate at time of writing
Prices accurate at time of writing
var PPT_APS = PPT_APS || {};
PPT_APS[48037] = {
“id”: “48037”,
“title”: “Kestrel 5700 Elite Ballistics Meter”,
“img”: “https://www.pewpewtactical.com/wp-content/uploads/2019/12/Kestrel-2700-Ballistics-Meter-189×300.jpg”,
“tag”: “”
};
For me, the big selling point is the 30 profiles–getting to set up that many different loads mean I can have a hunting, long-range, plinking, and match profile for each of my 3 or 4 main rifles all at the same time.
What About The Other Two?
The Drop D3 just doesn’t have the chops.
For an extra $50ish bucks, the 2700 is way more useful. Wind meter, not needing your phone with you, and just easier to use–the Kestrel 2700 beats the Drop D3 in every way possible for a tiny bump in price.
The 5700 with Hornady 4DOF, I don’t dislike it. In fact, I really like it and it’s normally the one I grab when I hit the range. But it has a couple of major limitations.
The lack of profiles hurts, only 3 Vs. the Elite’s 30. It’s also about $100 more than the base 5700 but can’t be upgraded to the Elite.
So with that in mind, why do I like it? Because it is easy.
And I shoot a lot of Hornady. Hornady Black, Hornady Match using ELD-M bullets, and Hornady American Gunner literally make up about 90% of my long-range ammo and so the 4DOF is perfect for my needs.
Coupled with the fact that it is just a bit easier and faster to use, and it works for me. But unless you find yourself in the same niche, I don’t think I would recommend it over the base 5700 or the 5700 Elite.
Conclusion
Any weather meter (even the Drop) is better than none. But the right one for you just depends on your shooting and how much you want to spend.

There are other models of Kestrel out there, some are discontinued and some are still in production.
But these cover the vast majority of what you will find on the market.
If you don’t have one, get one! Even if it is just the 2700, it will really help out.
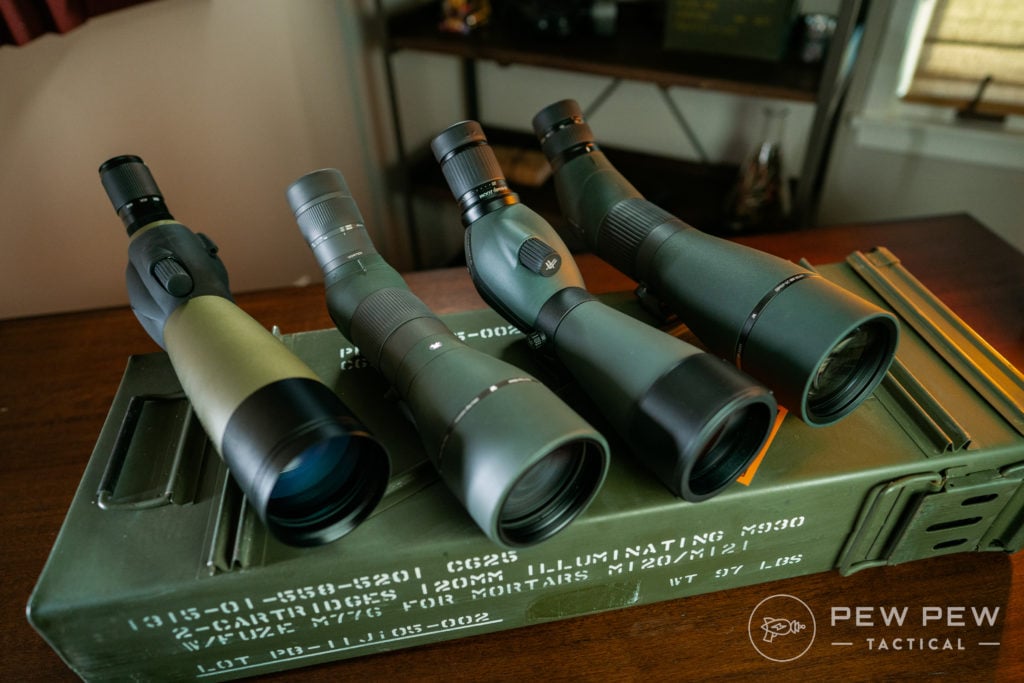
What kind of long-range shooter are you? Are you going to “Buy Once, Cry Once”? Let us know in the comments! Another bit of kit you’ll need to shoot long range is a good spotting scope so make sure to take a look at the Best Spotting Scopes!
The post 5 Best Kestrel for Shooting & Hunting [Hands-On] appeared first on Pew Pew Tactical.
5 Best Kestrel for Shooting & Hunting [Hands-On] Read More »