Home Safety

9 Shipwreck Survival Skills You Should Know About

You may have witnessed a shipwreck in the movies, in the news, on television, or the internet. But have you ever thought that if you do get shipwrecked, will you be able to survive it?

Surviving a shipwreck starts from the moment the vessel starts to take in water unnaturally – where it tilts and sinks in the process. There can be two scenarios you can find yourself in. Either you will be adrift at sea or you will end up on land. The end goal is to survive either one to the point where you can get rescued.

Shipwreck Survival Skills: Surviving the Deep Waters


1. Be Ready

Be Ready | Shipwreck Survival Skills You Should Know About
Always hope for the best but prepare for the worst. Have a bug out bag with you before taking a sea trip. There are tons of ways to build your own survival bag where you can be comfortable bringing it around with you. It will contain all the necessary essentials for your survival at sea. In case you might not be able to grab a life vest, learn how to stay afloat by taking swimming lessons.

2. Be Informed

Read the emergency signs all over the place once you board the ship. There are a few things you need to do before the ship heads out to sea. These are:

  • Determine where the nearest exit is from your room.
  • Familiarize yourself with the insides of the ship.
  • Find out where the life vests and life rafts are. Don’t forget to read the instructions on how to use a life vest and deploy a lifeboat.
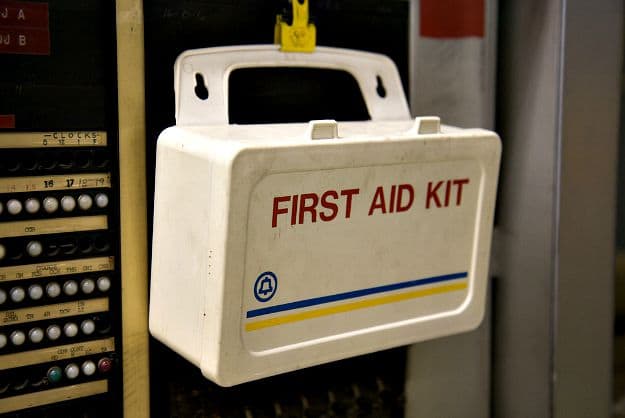
  • Locate where they place a first aid kit.

3. Stay Calm

Stay Calm | Shipwreck Survival Skills You Should Know About
Stay Calm Photo by Wikimedia Commons

You have to stay calm when evacuating the ship. You must keep a sound mind when doing this as there will be a lot of screaming and shouting going on. Pay attention to the instructions of the captain or crew over the PA system. If you’ve done the first step, you may already have a life vest on you and would be heading to the life raft. Make sure you leave everything else except your bug-out bag.

4. Jump up Top and Stay Away

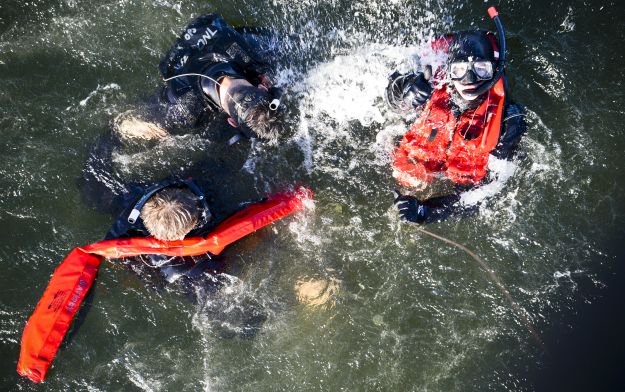
If you fail to get on a life raft and you have to jump off the ship, do this at the topmost part of the ship and at a spot away from everybody else. If you jump at the lower sections, someone might land on you hurting you or knocking you unconscious. Once in the water, swim farthest away from the ship and onto a raft or floating debris. Just watch out because there might be other people trying to grab you out of panic pulling you underwater.

5. Perform First Aid Treatment

Perform First Aid Treatment | Shipwreck Survival Skills You Should Know About
Perform First Aid Treatment Photo by Marcin Wichary via Flickr

If you have cuts or wounds, you can wrap them up to minimize or stop the bleeding. Add some extra layers of clothing on you to help your body cope with temperature changes in the water. Hypothermia can set in if you have very less clothing on you.
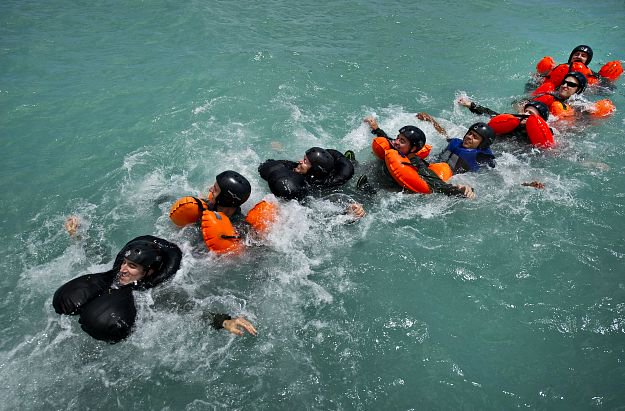
6. Stay Together

Tie all life rafts together. Staying in a group will increase your chances of survival. If life rafts are unavailable, put your arms over each other’s shoulder and form one huge ring of people. This will ease the efforts of floating on your own and be able to help those who don’t have life vests. It will also make you a bigger target for search and rescue teams above and on sea level.

7. Be Ready to Defend Yourselves

Being together will also give you the capability of defending each other especially from predators of the sea like sharks and killer whales. Grab any pole or a stick you can use to poke at them. If worse comes to worst, aim for the eyes and the gills.

8. Signal Rescue Units

Signal Rescue Units | Shipwreck Survival Skills You Should Know About
Signal Rescue Units Photo by Military.com

This is where your bug-out bag will come in handy. It will contain flares, light sticks, waterproof flashlights, and a signal mirror. It may also contain a cell phone and a two-way radio. You can use any of these to call or signal for help. If you’re on an uninhabited island, you can start a signal fire using the fire-starting kit in your bug out bag. You can use leaves and brightly colored clothing to form an SOS sign.

9. Head for the Nearest Island

If an island is in view, head off and start swimming or rowing for it. Other survival skills like starting a fire, building a temporary shelter, foraging or hunting for food, and acquiring drinkable water will come into play. If you’re on an uninhabited island, that is. If you are fortunate and land on an island with even the smallest of populations, then you’re more than blessed because an inhabited island will mean there may be forms of communication and a hospital.


Watch this video by AWE me on how to survive a shipwreck – EPIC HOW TO:

There are a lot of survival methods for castaways at sea or on an island. Ultimately, be of sound mind and never lose hope. Never allow your circumstance to weaken your morale or will to live. A person with a broken spirit is already a dead one.

Do you have any more suggestions or comments you might want to add about how to survive a shipwreck? Please add them in the comments section below!

Check out 9 Shipwreck Survival Skills You Should Know About at https://survivallife.com/shipwreck-survival-skills/

Up Next: Survival Skills | The Psychology Of Staying Alive


The contents of this article are for informational purposes only. Please read our full disclaimer here.


Editor’s Note: This post was originally published on March 21, 2017, and has been updated for quality and relevancy.


Featured Image by Want some Moore??!

9 Shipwreck Survival Skills You Should Know About Read More »

Heckler & Koch SP5

Heckler & Koch is proud to announce the US availability of the HK SP5, the only authentic sporting version of the legendary MP5 submachine gun available. The SP5 was developed by HK as a semiautomatic, civilian sporting pistol that matches the look and feel of the legendary MP5 submachine gun. “Our whole team is very […]

Heckler & Koch SP5 Read More »

7 Edible Insects You’ll Need to Know Before SHTF | Survival Life

In the wild, you can survive by making a meal out of edible insects. You’ll be glad to know they are actually nutritious and could fill your protein needs.

RELATED: How To Identify Edible Insects And Eat Like A King After TSHTF

7 Edible Insects to Survive Starvation Outdoors

Eating Insects in the Wild

Being stuck in the wild can make you think of crazy things like having insects for lunch. Disgusting as it may sound, this could actually save your life.

If you’re in no luck finding some edible wild plants outdoors, you might as well start looking for edible insects to get through your hunger problem. You’d be surprised to know of this edible insects list is, in fact, abundant with nutrients that can provide your cellular needs.

It’s better to be prepared and know what can help you survive in the wild, so go on and read along!

1. Ants

|

One great thing about ants is that you can find them in a lot of places. Dig among anthills and scoop up the ants into a container.

It is recommended for you to boil them first before eating to remove the bitter and vinegary taste it has. An ounce contains about 14 grams of proteins and 5.7ml of iron.


2. Termites

|

Termites can be found in hordes and fill your protein needs easily. 100 grams of termites is equivalent to 14.4 grams of protein.

A termite mound can feed a couple of people in one go. These edible bugs for humans are in damp climates like coastal areas and thick forests.


3. Maggots

|

If you ever find a corpse of an animal laying there and being fed on by maggots, never think of these maggots as a waste.

While the maggots are feeding upon the corpse of an animal, you may feed on those maggots in exchange and have the meat they’ve eaten for yourself. Maggots contain both protein and carbohydrates you would need for energy.

RELATED: 5 Beneficial Insects For The Garden: Good Bugs Vs. Bad Bugs

4. Slugs

|

These slimy creatures are rich in minerals which help maintain normal blood flow. Slugs are carriers of harmful parasites that can kill you so it would be wise to cook them first before eating it.

These edible insects can be found abundantly during the rainy season.


5. Cockroaches

|

These are the ones you can find in the wild and not those pesky little buggers that fly around your house. The ones found in the wild feed on fruits and vegetation which are rich in fibers and vitamins A and C.

Have them fried or boiled to kill any bacteria they might have.


6. Locusts

|

Locusts can actually save your life from hunger plus it is rich in both protein and calcium. They travel in swarms and are much bigger than the grasshoppers.

Locusts go to places that have fertile soil, thus, it would be best to look for these edible insects in those places.


7. Grasshoppers

|

Grasshoppers are very rich in protein — for every 100 grams of grasshoppers, there are around 20.6 grams of protein. They can be eaten raw or cooked. But, to add some palate of crunchiness, consider having them cooked.

You can find them on meadows and grassy fields.


Here’s what you need to know about eating edible insects by STORYHIVE:

When SHTF and you run out of food to eat or there are no edible plants in sight, hunt for these edible insects and you’ll get by. However, while these insects are quite nutritious, there are also some that can be poisonous.

Be aware of what you can eat or it could lead to having an upset stomach or something even worse. Make sure to know how these edible insects look like and not mistake them for a poisonous kind.

With that said, it’s also imperative to know how to identify edible insects for your safety.

Have you tried eating any of these edible insects? How was the experience? Share your survival stories in the comments section below!

Infographic | Edible Insects You Can Consume When Stuck In The Wild

UP NEXT:

Check out 7 Edible Insects You'll Need to Know Before SHTF | Survival Life at https://survivallife.com/edible-insects/

Follow us on FacebookInstagramTwitterPinterest, and Tumblr!

Edible Insects You Can Consume When Stuck In The Wild | https://survivallife.com/edible-insects/

Editor’s Note: This post was originally published on July 17, 2017, and has been updated for quality and relevancy.

7 Edible Insects You’ll Need to Know Before SHTF | Survival Life Read More »

Our First Year of Building Self-Reliance Skills at RISE Academy

by Todd Walker

Our First Year of Building Self-Reliance Skills at RISE Academy ~ TheSurvivalSherpa.com

School is out for summer. Here’s a look in the rear view mirror at our first year of Project Based Learning at RISE Academy.

Our students and staff wish to thank each of you for the encouraging words, moral support, and following our journey of Doing the Stuff of Self-Reliance! Below is a pictorial recap (picture-heavy) of the skills, projects, and links to more in-depth posts for those interested in learning these skills.

Cutting Tool Safety and Use

Our First Year of Building Self-Reliance Skills at RISE Academy ~ TheSurvivalSherpa.com

Carving tent stakes.

Our First Year of Building Self-Reliance Skills at RISE Academy ~ TheSurvivalSherpa.com

Aware of his “blood circle”

Our First Year of Building Self-Reliance Skills at RISE Academy ~ TheSurvivalSherpa.com

How to safely chop kindling.

Our First Year of Building Self-Reliance Skills at RISE Academy ~ TheSurvivalSherpa.com

The draw knife was a hit with the students.

Our First Year of Building Self-Reliance Skills at RISE Academy ~ TheSurvivalSherpa.com

Cutting rounds for “burn and scrape” spoons and bowls.

Related Links:

Outdoor Classroom Construction

Early in the school year, we decided to build an outdoor classroom. Nothing too fancy but functional for our needs. Students used math skills to square corners, learned to read a tape measure (fractions), and lashed the bamboo structure together. Their lashings held fast even through Hurricane Irma.

Our First Year of Building Self-Reliance Skills at RISE Academy ~ TheSurvivalSherpa.com

A lot of square lashings were tied.

Our First Year of Building Self-Reliance Skills at RISE Academy ~ TheSurvivalSherpa.com

A few of the crew.

Our First Year of Building Self-Reliance Skills at RISE Academy ~ TheSurvivalSherpa.com

Raising the roof

Our First Year of Building Self-Reliance Skills at RISE Academy ~ TheSurvivalSherpa.com

The roof secured

Related Links:

The Science of Fire

We have a joke around school when I’m asked, “What are we doing today?” My typical response is, “Cutting and burning stuff.” You may not get it, but fire takes center stage in the life of our outdoor classroom. Learning to use fire as a tool is paramount for outdoor living and education.

Fire by Friction

Our First Year of Building Self-Reliance Skills at RISE Academy ~ TheSurvivalSherpa.com

Double teaming the bow drill.

Our First Year of Building Self-Reliance Skills at RISE Academy ~ TheSurvivalSherpa.com

A hand drill coal blown into flame.

Related Links: 

Fire by Spark Ignition

Our First Year of Building Self-Reliance Skills at RISE Academy ~ TheSurvivalSherpa.com

Birthing fire from flint and steel

Our First Year of Building Self-Reliance Skills at RISE Academy ~ TheSurvivalSherpa.com

Practicing flint and steel ignition under an emergency tarp.

Our First Year of Building Self-Reliance Skills at RISE Academy ~ TheSurvivalSherpa.com

Ferro rod fire in the rain

Related Link: 

Fire by Solar Ignition

Our First Year of Building Self-Reliance Skills at RISE Academy ~ TheSurvivalSherpa.com

Mr. Andrews demonstrating solar ignition

Practical Tools and Crafts

Burn and Scrape Containers

This may be the most mesmerizing of all the skills students learned.

Our First Year of Building Self-Reliance Skills at RISE Academy ~ TheSurvivalSherpa.com

Showing off burned bowls.

Bark Containers

Students used Tulip Poplar (Liriodendron tulipifera) bark to craft traditional containers.

Our First Year of Building Self-Reliance Skills at RISE Academy ~ TheSurvivalSherpa.com

Stitching sides with artificial sinew.

Our First Year of Building Self-Reliance Skills at RISE Academy ~ TheSurvivalSherpa.com

A grape-vine was used as the rim on this basket.

Related Link:

Hoko Knife

A simple way to introduce primitive technology to students is to make a Hoko knife. This stone cutting tool was discovered on the Hoko River archeological site in Washington State. A landslide destroyed the native fishing village about 2,700 years ago preserving artifacts of their material culture.

Our First Year of Building Self-Reliance Skills at RISE Academy ~ TheSurvivalSherpa.com

The flint flake compressed in a split stick with natural cordage.

Our First Year of Building Self-Reliance Skills at RISE Academy ~ TheSurvivalSherpa.com

Some were wrapped with modern cordage (tarred mariner’s line).

Related Link:

Pine Pitch Glue

Our First Year of Building Self-Reliance Skills at RISE Academy ~ TheSurvivalSherpa.com

Pine pitch, charcoal, and a variety of containers to hold the glue.

Our First Year of Building Self-Reliance Skills at RISE Academy ~ TheSurvivalSherpa.com

Crushed charcoal added to the mix.

Our First Year of Building Self-Reliance Skills at RISE Academy ~ TheSurvivalSherpa.com

Heating the pitch glue low and slow.

Related Link: 

Natural Cordage

Our First Year of Building Self-Reliance Skills at RISE Academy ~ TheSurvivalSherpa.com

Reverse twist cordage from cattail leaves.

Our First Year of Building Self-Reliance Skills at RISE Academy ~ TheSurvivalSherpa.com

Cordage made from a variety of natural materials.

Related Link:

Atlatl

What’s an atlatl?

A simple dart-throwing stick with a handle on one end and spur (male end) or socket (female end) on the other end. The dart, a flexible spear, mates with the spur/socket when thrown. Typically about two feet long, an atlatl employs leverage to extend the arm’s length to propel a dart further and with more velocity than when thrown using only the arm.

Our First Year of Building Self-Reliance Skills at RISE Academy ~ TheSurvivalSherpa.com

Notice the bend in the dart shaft when thrown.

Our First Year of Building Self-Reliance Skills at RISE Academy ~ TheSurvivalSherpa.com

She was proud of her accurate throws.

Related Links:

Campfire Cooking

Our First Year of Building Self-Reliance Skills at RISE Academy ~ TheSurvivalSherpa.com

Cooking over an open fire.

Our First Year of Building Self-Reliance Skills at RISE Academy ~ TheSurvivalSherpa.com

Ms. Byrd enjoying s’mores before Christmas break.

Related Link:

I’ve also created a RISE Academy Playlist on our YouTube channel. if you’d like to see our students Doing the Stuff, click on the video link below:

Many Thanks!

The things we have to learn before we do them, we learn by doing them.

~ Aristotle

We cannot thank you enough for all the support and encouragement you’ve given our students whom you’ve never met! The full impact of this journey in experiential education may never be known. It’s difficult to quantify. But you can see it in their eyes and hear it in their voice.

Some of you have asked how you might help in more tangible ways. Stay tuned for updates on becoming a partner/sponsor with RISE Academy. Until then…

Keep Doing the Stuff of Self-Reliance,

~ Todd

P.S. – You can also keep up with the Stuff we’re Doing on TwitterPinterestYouTubeInstagram, and Facebook… and over at our Doing the Stuff Network.

P.P.S – If you find value in our blog, Dirt Road Girl and I would appreciate your vote on Top Prepper Sites! You can vote daily by clicking here or on the image below. Check out all the other value-adding sites while you’re there…

Thanks for Sharing the Stuff!

Copyright © by Survival Sherpa: Content on this site (unless the work of a third-party) may be shared freely in digital form, in part or whole, for non-commercial use with a link back to this site crediting the author. All links in articles must remain intact as originally posted in order to be republished. If you are interested a third-party article, please contact the author directly for republishing information.

Photo and Video Credits: Many of the photos were taken by Mr. Chris Andrews (teacher) and various RISE students. Video footage was shot mainly by students and guided by Mr. Michael Chapman (teacher).

Our First Year of Building Self-Reliance Skills at RISE Academy ~ TheSurvivalSherpa.com

Our First Year of Building Self-Reliance Skills at RISE Academy Read More »

Don’t throw it out until you’ve smelled it.

(Happy Thanksgiving, and Happy Throwback Thursday! In honor of all the food that will be prepared — and perhaps wasted — over the next few days, I’m republishing this piece from May 12, 2012. It’s my hope that a little judicious leftover prep and/or freezing will cut down on waste.)

I didn’t get to the supermarket for a few days after my arrival in Anchorage. Until then, I used the milk and oatmeal my hostess already had. When I mentioned that I’d be replacing what I used, she looked surprised.

“Uh, that’s really old milk. I meant to warn you off it,” she said.

It had tasted fine to me. That is to say, it tasted about as good as nonfat milk ever tastes – like the water they used to wash a cow. All that mattered to me is that it loosened up the oats in the bowl.

I nearly changed my tune when I checked the “sell by” date: April 5. It was then May 6. I was drinking milk a month past its prime.

Right about now your stomach may be curdling. The milk hadn’t, though. Linda B. bought it to fix a specific dish for Easter and then left the rest on the top shelf for the next month. It never left the fridge so it apparently didn’t have a chance to spoil.

I think we throw food away way too easily in this country.


Not good enough


In the past few months I’ve been making a serious effort to clear out the freezer and cupboards. Since I date the food I freeze, I know that the ground beef had been cooked 11 months previously and that the whole fryer was about a year old. I made bread pudding using shredded coconut that I know is at least four years old. I stewed some rhubarb that was going on five years old.

They all turned out just fine. If the ground beef had been dry I sure couldn’t tell after it was made into chili. The chicken produced copious pan juices. The rhubarb may (or may not) have been freezer-burned, but stewed and mixed with my homemade yogurt the flavor was as sweet-tangy as I’d remembered from previous summers.

This is not to say that we should let our food get old. My goal is to create a better (i.e., written) system so that the rhubarb doesn’t crouch down behind bags of frozen wild blackberries. But as a nation we turn up our noses a little too easily at anything we think of as substandard.

One MSN Money reader talked of a roommate who threw milk away on its sell-by date. He didn’t pour a little in a cup to sniff it for sourness, but automatically tossed it out.

I’ve also heard of people who throw away leftovers after two days in the fridge. Seriously? Cooked food won’t go bad in two days unless the fridge is unplugged.

Why not freeze things if you aren’t going to eat them? Why waste them?


Meanwhile, back in Anchorage…


I put the apples and oranges I’d bought into the bottom drawer of the fridge. (At no point did I compare them.) A couple of days later I sliced into a Sunkist and found it was partially frozen. The apples were, too. Since I knew they’d probably be mushy when thawed, I cut them up and cooked them into applesauce.

After Linda hosted her writers’ group we grazed for days on the leftovers. Almost a week later there was still a little roasted chicken left, so I turned it into what I can only describe as mock curry. It’d never pass muster in Madras, but I’m rather fond of the dish. But it was a little too thick, so I took Linda up on her offer to use anything in the cupboard. Before I opened the can of chicken broth I decided to check the “best by” date.

You guessed it: Old. Really old. As in “March 2002.”

The can wasn’t bulging and there was no suspicious odor. I stirred it into the curry and ate the one-pot-glop results off and on for a week. And I didn’t die. Not even a little bit.

Incidentally, what’s known as an “expiration date” doesn’t mean much of anything. They’re not even required by federal law except on infant formula and certain types of baby foods. When you’re talking dry or canned goods, the date means the end of peak flavor. “It’s just a quality issue,” a USDA spokeswoman told me. (For more information, see this USDA fact sheet.)

I do have some standards. When mold grew on the last few slices of bread I gave it a Christian burial. The previous day it had been merely stale, whereupon I turned it into French toast. I should have frozen the rest before it got moldy. Next time I will.

A former co-worker who grew up in various Alaska villages would have cut off the moldy part and eaten the rest. That’s too much even for cast-iron-stomach me. Then again, he talks about eating eggs that “came over with Baranof.” He and his family also ate WWII powdered eggs up until the early 1960s. It’s a toss-up as to which oeufs were more dismal.

The point is they were food and the family ate it. When you’re a village kid, you don’t ever waste food.


The way you look at food


That makes me a village kid, I guess, although the rural area where I grew up was referred to as a “township.” I was raised by a mother whose family lived much of the year on garden produce, dry beans, biscuits and white gravy and by a father whose family ate whatever his mom could grow and his dad could shoot. (As a kid my dad swore when he grew up he would never willingly eat another rabbit. He never has.)

My three siblings and I ate whatever was put in front of us – and quickly, too, because if you cleaned your plate you had a shot at getting some of the last little bit of potatoes left in the bowl.

Would we have dreamed of saying, “Eeewww, that meat loaf is three days old – I won’t eat it”? Oh, hell, no. (Not that meat loaf would last for three days with four kids around.)

Would anyone I knew have thought that milk too close to its sell-by date should be thrown out? Nope. In fact, we might have hoped it was close to its sell-by date, because it might be discounted. The freshness of bread was a moot point because ours came a dozen loaves at a time from the bakery outlet.

A couple of weeks before I left Seattle I found milk for 99 cents a gallon at the Asian market near my house. Its sell-by date was the next day. I turned it into two delicious batches of yogurt. And I still didn’t die.

I’m not saying that everyone has to eat the way I do. But I’m suggesting that you reconsider the way you look at “old” food, or at least at the buy-and-use practices that let food get old in the first place.

For example: If your fridge is full of mouldering take-out containers perhaps you could concentrate on finishing leftovers before bringing more food home? You could even learn basic cooking so you don’t spend so much money on food that you don’t even finish.

Or if you make a big pot of chili and get tired of it in two days, for heaven’s sake freeze it in small portions. Instant lunches! Or here’s an idea: Cook a smaller pot next time.

How many hours did you have to work to earn the ingredients? How much energy, fertilizer, pesticide and water did it take to produce and preserve the tomatoes, meat, beans and spices? When “old” food goes down the disposal those resources disappear, too.

Like your grandma said, people are starving in Africa. They’re also starving in the United States. It’s unlikely that either group would check a sell-by date before eating. But it’s pretty likely that the close-dated milk is still good.

The post Don’t throw it out until you’ve smelled it. appeared first on Surviving and Thriving.

Don’t throw it out until you’ve smelled it. Read More »

Security Information Overload: From Panic to Apathy & the Remedy

Security Information Overload: From Panic to Apathy & the Remedy

Security overload leads to apathy. How often do you hear a car alarm go off and roll your eyes hoping the owner would disable the blasted thing before the incoming headache comes a knocking? The primary objection I have to such systems is they work too well. Every week I hear an alarm being triggered […]

This is just the start of the post Security Information Overload: From Panic to Apathy & the Remedy. Continue reading and be sure to let us know what you think in the comments!


Security Information Overload: From Panic to Apathy & the Remedy, written by Thomas Xavier, was created exclusively for readers of the survival blog More Than Just Surviving.

Security Information Overload: From Panic to Apathy & the Remedy Read More »

AHS Statement: Senate Energy and Natural Resources Committee Markup of LWCF Permanent Funding (S.1081) and Restore Our Parks (S.500) Acts

PDF Version of Letter   The Honorable Lisa Murkowski Chairman Committee on Energy & Natural Resources 304 Dirksen Senate Building Washington, DC 20510   The Honorable Joe Manchin Ranking Member Committee on Energy & Natural Resources 304 Dirksen Senate Building Washington, DC 20510   November 15, 2019   Re: Statement in Support of S. 1081,…

The post AHS Statement: Senate Energy and Natural Resources Committee Markup of LWCF Permanent Funding (S.1081) and Restore Our Parks (S.500) Acts appeared first on American Hiking Society.

AHS Statement: Senate Energy and Natural Resources Committee Markup of LWCF Permanent Funding (S.1081) and Restore Our Parks (S.500) Acts Read More »

What to Do in Winter in Lake Louise

Winter in Lake Louise may be cold but it sure is pretty. There’s loads to do for skiers and non-skiers alike. A frozen lake with the most beautiful skating rink in the world set against a backdrop of truly stunning mountain scenery may be the first thing people think of when they think winter in Lake Louise.

But within 25 – 30 minutes of Lake Louise Village there are an incredible number of outstanding outdoor activities to keep you entertained. In the evening you can count on many a fine dining experience. – and some of the accommodation is world-class too.

Beautiful Lake Louise in winter

Beautiful Lake Louise in winter

Here are 9 things I’d recommend doing in winter in Lake Louise

1. Skate or play shinny on the world’s prettiest outdoor skating rink

Every winter Lake Louise is transformed into a skating rink. Enjoy public skating with an entry through the ice castle or bring your hockey stick for a game of shinny in a separate area.

Lake Louise is lit until midnight but in theory you could skate around the clock. It’s free to skate.

Skate rentals are available at Fairmont Chateau Lake Louise at a cost for adults of $20 for 2 hours or $30 all day. It’s half that for kids. Hockey sticks can be rented for $5. (All prices are 2019 – 2020).

Playing shinny on Lake Louise

Playing shinny on Lake Louise

Skate around the ice castle at Lake Louise

Skate around the ice castle at Lake Louise

2. Catch world-class ice carvers in action at Lake Louise in January

Every January for 12 days world-class ice carvers congregate at Lake Louise. They’ll transform a block of ice into a work of art under your watchful eye.

Wonder through a winter wonderland in front of the Fairmont Chateau Lake Louise, checking out the ice bars, ice carvings and of course the ice castle down on Lake Louise itself. Catch an ice carving demo; look on at what one carver can do in one hour with one block of ice.

At peak periods – which are Saturdays and Sundays from 10 AM to 5:30 PM you must now have tickets. If you stay at one of a handful of hotels in the nearby area you get free access. For more information visit Ice Magic Lake Louise.

One of the ice sculptures at Lake Louise from a few years ago

Stunning ice sculpture at Lake Louise

Strong women seems to be a theme

Strong women seems to be a theme

3. Snowshoe to the Ink Pots – 25 minutes from Lake Louise

If you can walk, then you can snowshoe and what better place to do it than in Banff National Park. The trail to the Ink Pots is a great one. Its 12 kilometres return with just 220 metres of elevation gain.

The higher you go, the prettier it gets with the pièce de résistance the Ink Pots themselves. They are brilliant-coloured mineral hot springs located on the route to Mystic Pass. The trailhead is a few kilometres east of Castle Junction, close to the Johnston Canyon Trailhead. 

Snowshoe to the Ink Pots in Banff National Park

Snowshoe to the Ink Pots

4. Do the Johnston Canyon Ice Walk – 25 minutes from Lake Louise

The Johnston Canyon Ice Walk is a popular, family friendly winter outing, accessed via a 30 minute drive from Lake Louise or Banff.  Slip-slide your way, preferably with icers attached to your shoes or boots, 2.7 kilometres to the frozen waterfall.

Some days the trail is like a skating rink. Hold on to the railings like your life depends on it. On other days the trail is simply snow-packed and not the least bit icy. Make sure you go to the end of the trail (which is more work) so you can see the ice-climbers in action on the frozen waterfalls.

Catching the ice climbers in action in Johnston Canyon

Catching the ice climbers in action in Johnston Canyon

5. Go downhill skiing at Lake Louise Ski Resort

Love downhill skiing? Head to beautiful Lake Louise Ski Resort – voted Canada’s Best Ski Resort in 2018. It’s one of the biggest ski resorts in North America boasting 4,200 acres of skiable terrain. It’s also one of the prettiest resorts I’ve ever skied at. Families love it as there are beginner, intermediate and expert runs from everyone of the chairlifts.

In total there are ten lifts including a gondola, 145 marked runs plus back bowls, some remote. The resort is also the home of one of the top three terrain parks in the world (2018), a tube park and a top-notch beginner’s area.

With one of the longest ski seasons in North America (mid-November to May) you have plenty of time to discover not only the fabulous skiing and snowboarding but some of the special activities. Do a night tour under a full moon and finish with hot chocolate. 

Beautiful wilderness scenery at Lake Louise Ski Resort

Beautiful wilderness scenery at Lake Louise Ski Resort

6. Cross-country ski on one of the beautiful trails near Lake Louise

You can look forward to some exceptional cross-country skiing at Lake Louise – and in the immediate area. One of my favourite trails – the Fairview Trail takes off right from the main parking lot at Lake Louise. It hooks up with the Tramline Trail. You can ski it all the way into Lake Louise Village.

Read: Lake Louise Skiing: The Fairview & Tramline Trails 

Cross-country skiing on the Fairview Trail - a perfect way to spend winter in Lake Louise

Cross-country skiing on the Fairview Trail

The Pipestone Trail just a minute’s drive past the turnoff to the Lake Louise Ski Resort is very beautiful and the snow is usually amazing. You can choose from loops of varying lengths and make a day of it.

Pipestone cross-country skiing near Lake Louise

Pipestone cross-country skiing near Lake Louise

7. Cross-country ski to Boom Lake near the Alberta – British Columbia border – 20 minute drive

For something that’s only a short drive away from Lake Louise I’d recommend the easy five kilometre ski into Boom Lake. With an elevation gain of only 180 metres (590 feet), you’ll barely break a sweat. Be sure to continue down the north side of the lake to reach the pretty icefalls.

And of course you should use common sense and avoid the lake itself until you know the ice is thick.

Read: Cross Country Skiing to Boom Lake, Banff National Park

Cross-country skiing to Boom Lake

Cross-country skiing to Boom Lake

Massive frozen waterfalls can be seen along Boom Lake

Massive frozen waterfalls can be seen along the lake

8. Go doglsedding

There is one company that runs dogsledding tours in Lake Louise – Kingmik Dogsled Tours. The most popular tour takes you on the Great Divide Trail towards the Kicking Horse Pass at the Continental Divide.

Enjoy snuggling up with your special somebody over the 16 kilometre, 90 minute length. And trust me with all the blankets you’ll be plenty warm.

Dogsledding on the Great Divide Trail

Dogsledding on the Great Divide Trail

9. Walk or snowshoe 

There are a couple of trails that take off right beside Lake Louise.

The Lake Louise Shoreline Trail is flat and easy. It follows the north shore to where the melt-water from the Victoria Glacier enters the lake. Some days in the winter you can see ice climbers on the frozen falls.

You can see ice climbers in action at Lake Louise

You can see ice climbers in action at Lake Louise

View from the far end of Lake Louise

View from the far end of Lake Louise

Mirror Lake and Lake Agnes

Another hike or snowshoe is the one to Mirror Lake and potentially to Lake Agnes. It’s 2.6 kilometres to Mirror Lake via a well-maintained trail though the forest. From Mirror Lake you continue on good trails to reach the Lake Agnes Teahouse via a climb up a steep, slippery set of stairs in the winter. It’s 3.6 kilometres one way with an elevation gain of 400 m.

IMPORTANT – After Mirror Lake there is a section of trail that crosses avalanche terrain. Banff National Park calls it Challenging Class 2 terrain for avalanche exposure and requires appropriate training and equipment. Continue from Mirror Lake only if you’re prepared with a shovel, transceiver and the know-how.

Frozen Mirror Lake with the Beehive in the back

Frozen Mirror Lake with the Beehive in the back

Where to stay in and near Lake Louise

This post includes some affiliate links. If you make a qualifying purchase through one of these links, I may receive a small percentage of the sale at no extra cost to you. Thank you for your support.

For a splurge stay at the lake at the Fairmont Chateau Lake Louise or in the village at the Post Hotel & Spa.

For good value stay at the Lake Louise Hostel.

Deer Lodge is very close to the actual lake and the renovated rooms are excellent. They also have a popular outdoor hot tub.

The Mountaineer Lodge is a stone’s throw from the village – and offers comfortable rooms.

Fairmont Chateau Lake Louise

Fairmont Chateau Lake Louise from the lookout a short distance up Fairview Mountain

Click on the photo to bookmark to your Pinterest boards.

What to do in winter in Lake Louise


The post What to Do in Winter in Lake Louise appeared first on Hike Bike Travel.

What to Do in Winter in Lake Louise Read More »

Grandview Trail To Horseshoe Mesa Hike

Grandview Trail To Horseshoe Mesa Hike

Easily the toughest and most rugged of the Grand Canyon Park Service’s recommended day hikes, the Grandview Trail to Horseshoe Mesa is not for the faint of heart. The trail was built in 1893 by miners, and after a few minutes on the Grandview, you’ll realize that people were a lot tougher back then. The route is an engineering marvel, with steep cobbled sections and wood cribs hugging the cliffside that lead down to an abandoned mine site at Horseshoe Mesa. This day hike offers expansive views, natural beauty, and a break from the Grand Canyon crowds.

The post Grandview Trail To Horseshoe Mesa Hike appeared first on HikingGuy.com.

Grandview Trail To Horseshoe Mesa Hike Read More »