7 Essential Items for Your Survival Kit

7 Essential Items for Your Survival Kit Read More »

The use of optics on rifles and shotguns has become standard in the tactical realm, and for a good reason. An optic can:
In 2005, the Marines entering Iraq were equipped with ACOG rifle combat optic and were massively successful. So much that there was a congressional investigation regarding the number of headshots that the Marines were making.
Optics increase the ability of any shooter and are a substantial force multiplier.
It’s easy to dismiss optics, especially modern tactical optics, as being unneeded on combat rifles. They can often be seen as an aid or a crutch when it comes to combat rifle shooting.
However, keeping this attitude means living in the past. In the modern realm, if you are involved in a self-defense shooting, you want every advantage possible.
Any prepper or survivalist carrying a rifle should consider investing in a quality optic. But this doesn’t mean that iron sights are inefficient or outdated. If you are going to let me choose between a scope or iron sights, I’d advise iron sights.
Every rifle should be equipped with iron sights even when it’s rocking a scope. They are:
With all that being said, a high-quality rifle optic makes shooting simpler and faster. The downside of iron sights is the fact that the front sight often obscures your vision when it comes to long range shooting.
For close range shooting, the process of aligning iron sights and getting on target is significantly slower than utilizing a proper optic.

A quality rifle scope allows shooters to engage targets at extended ranges easily.
With a quality optic and a good rifle, you can hit a man-sized target out to 500 yards with an AR 15. That’s an unlikely shot, and it’s somewhat hard to justify a self-defense shooting at that range, but it’s possible.
Fighting at 200 to 300 yards, it will be substantially easier to engage an attacker especially when they are hiding behind cover and presenting a smaller target.
Outside of combat situations, an optic makes hunting much easier. In that same realm, it makes scouting easier as well.
In Afghanistan, optics are often used to scout the surrounding area. 4 power ACOGs make searching the road for IEDs much easier. In a survival situation, a variable optic or even spotting scope makes road damage and debris easy to spot from a distance.
You’ll also be able to identify friend from foe at a distance. The presence of an optic on a rifle is an invaluable tool.
If you live in an urban environment, a variable or magnified optic may not be the best solution. However, a red dot scope increases your ability to hit a target accurately and quickly.
In close quarters combat, speed is king so you have to get to the target faster than your opponent. Red dot optics are ideal for close quarters combat.
Optics with illuminated reticles are much easier to use in low light situations and even in the dark of night. Iron sights are nearly impossible to use effectively at night. Red dot optics can be teamed up with magnifiers to increase their range when necessary.
In a running gunfight, your opponent is going to be moving, they’ll like be running, maneuvering, hiding behind cover and shooting back. In these situations, it’s much easier to track your opponent as they run and move.
With iron sights, the sight picture is often too obstructed to track an enemy effectively.
Variable
Variable optics offer higher magnification levels and a range of different magnification levels. They are quite versatile and can serve well in various types of rifles.
They are commonly used on hunting rifles. They allow shooters to see and shoot targets near and far. They are becoming very popular for modern defensive rifles like the AR 15 or AK 47 as well, and tend to make use of both close and long range ability.
For Bolt Action Precision Rifles
Primary Arms 4-14×44
 This straightforward and affordable optic is a first focal scope with significant power and a good reputation. The FFP design means the reticle grows and shrinks as you increase or decrease the magnification so the holdover points are accurate at any magnification range.
Primary Arms is one of the most affordable FFP optics and is built to last. This particular model is higher on the magnification range and is best suited for long range bolt action and precision rifles.
For Modern Combat Optics
Burris MTAC 1-4×24
 The Burris MTAC utilizes the very popular 1 to 4 power range. A 1 to 4 power scope allows shooters to easily use the close and longer range aspects of modern semi-automatic rifles.
At 1X with its illuminated reticle, it’s a half decent red dot scope; and dialed up to 4 power, a good shot don’t have any issues seeing and hitting targets that are 200-300 yards away.
 The Trijicon ACOG is the king of fixed power combat optics. Designed with combat in mind, this optic can and does go to war and come back.
The ACOG is available in a wide variety of magnification levels, with 4x being the choice of United States Marines and soldiers. The biggest downside is its high price tag. It’s often over a grand in price.
A more affordable alternative is the Primary Arms Compact Prism Riflescope. It is a lightweight, 3 power optic that is built for the 5.56, the 7.62 x 39mm, and the 300 Blackout. Each has a reticle that is tuned to its respective round and feature ballistic drop compensation.
Red dot optics are insanely simple optics with little to no complication. They utilize a red dot as the reticle, although some people use a green dot.
Red dots are perfect for close quarters combat and offer shooters a precise and accurate means of engaging a target rapidly. They are suited for rifles and shotguns.
 SIG’s newest line of red dot optics is becoming quite popular. Designed to be functional, utilitarian SIG has even met the FBI standard for red dot optics.
It is a full sized red dot optic that is well suited for any rifle or shotgun. It’s large, easy to use, and incredibly durable. The SIG Sauer ROMEO7 is also priced affordably.
Optics are designed to make a shooter’s life a lot easier. With a high-quality optic, the user can accurately and rapidly engage targets.
A high-quality optic should be water-, shock- and fogproof. Any prepper and survivalist should consider an optic for hunting, combat, and scouting.
This post was contributed by Almo Gregor. Almo is a firearm enthusiast, an avid hunter, and a strong lifelong 2nd amendment supporter. Outdoors, hunting and shooting were a big part of his childhood and he continues with these traditions in his personal and professional life, passing the knowledge to others through freelance writing.
What Are Survival Optics and Why You Need Them? Read More »
 Tomorrow we’re attending a Thanksgiving celebration hosted by DF’s son and daughter-in-law, and we’re not going empty-handed. He’ll be doing a turkey in the oven plus prime rib on the Weber, and I’m bringing three pies.
Not just any pies, mind you. These are Alaska pies, made with fillings grown less than three miles from where they’ll be consumed.
Specifically, they were grown in our own dirt. The apple pie filling was made mostly by DF over many days in August and September. He sliced the Nordland apples and mixed them with sugar, cinnamon, and a dash of ginger and nutmeg, then froze the result in pie-sized portions.
Lots of pie-sized portions: We have enough filling for more than two dozen desserts. Although the trees are less than five years old, the weirdly warm summer had them producing like gangbusters.
The second pie will be raspberry and rhubarb, with a hint of cinnamon. The berries went nuts this year, too, producing nearly three dozen quarts for the freezer, a bunch eaten fresh, and still more picked by family members. (Especially DF’s granddaughters, who love eating a path through the patch.)
And the last pie will be the best pie: pumpkin. It’s one of my favorite flavors anyway, and this one is special because it was the first year we tried to grow pumpkins. Although it was a jack o’ lantern cultivar rather than a pie pumpkin, that didn’t seem to matter much. Frankly, I had my doubts when I made a test pie a couple of weeks ago, since the pulp was a bright yellow. (See the illustration above.) But apparently it’s the cinnamon, ginger and cloves that are mostly responsible for the orange/brown hue of pumpkin pie filling.
Another reason for the color: Since the homemade puree was a bit on the bland side (not that pumpkin is known for its strong flavor), I added a splash of molasses to liven things up. And oh, my, didn’t the molasses and ginger dance well together, especially since I used brown sugar instead of the white sugar the recipe calls for – and brown sugar is, of course, flavored with molasses.

Every bite of those pies will remind me of summer hours well-spent. We cheered on nascent pumpkins (and sighed over the ones that didn’t take), harvested fungo-bat-sized rhubarb stalks, dodged yellow jackets in the berry patch and gazed rapturously at apple trees so heavily laden that we had to rig up a cloth sling to keep one tree from breaking under the weight of all that fruit. The Nordlands were visible from the living room, ruby dots among the green, green leaves.
Right now only the bottom crusts are completed. Well, ready to be completed. They were par-baked earlier this evening, then cooled and wrapped until tomorrow.
At that point I’ll stir together the flour and salt, and put this and the shortening outdoors to chill. Normally I put the mixture in the fridge, but there’s no room right now because DF got a really big turkey.
A couple of hours before I want to do the baking, I’ll take out a package of apples to begin thawing. The raspberries and rhubarb will be mixed with sugar, cinnamon and a little flour while they’re still frozen; I don’t want them to give off too much juice before it’s time to bake. The pumpkin puree is already thawed and in the fridge; it needs to drain it a bit more to get the right consistency. (Next year we’ll be more careful about that.)
I’ll have to bake in stages. If the apples thaw too much they, too, give off an excessive amount of juice, so the first top crust I roll out will go on that pie. The next crust will top the raspberry-rhubarb, and while those two bake I’ll make the pumpkin custard for the last pie, which doesn’t need a top crust.
The house will smell absolutely delicious, and I will need to exert considerable self-restraint to keep from eating a piece of each of the three. The fact that we’re taking them to a gathering will help me keep my hands to myself.
Besides, it’ll be worse the next day, when DF is stirring up gravy and carving the prime rib and turkey (taking the meat over pre-cut makes it easier on the buffet setup). At the very least I’ll be standing by with a glass of iced tea and a shaker of salt, ready to pounce on the crispy parts of the turkey skin. That, to me, is the best part of the Thanksgiving dinner.
So yes, I’m thankful not just for having enough to eat, but having a variety of delicious foods. I’m thankful for my daughter, who is blooming after a difficult divorce. I’m thankful for midlife love that grows deeper every day. I’m thankful for extended family, and great friends, and the chance to do work that helps people help themselves.
In short, I’m thankful for a life that’s richer than I ever imagined it could be. And I hope that you, dear readers, have joy in your own lives, on Thanksgiving and every day.
The post A festival of pie. appeared first on Surviving and Thriving.
A festival of pie. Read More »
This is a Guest Post by Jeremy Rogers

If you’re like me, you probably have a lighter
as part of your EDC. It’s hard to imagine life without one. I’d like to briefly
discuss the ones I’ve used in the past, as well as my current EDC lighter.
Moisture resistance, fuel retention, and durability are the main attributes I
look for in an EDC survival lighter. Other features are nice, but these are the
most fundamental and important aspects, in my opinion. I’ve used the standard
BIC, BIC Mini, Zippo, QIMEI Peanut Lighter, and the Anodized XL Maratac Peanut
Lighter.
BIC is the first lighter I carried for a long
time. I still use them around the house, at camp, and for survival kits. Water
and leak proofing a BIC has been challenging. I always worried about fuel
leakage if the ignition button became held down in my pocket. I put a zip tie
under the ignition button to prevent this from happening. Unfortunately, this
makes the lighter inconvenient to use if it’s needed quickly. Also, because the
zip tie has to be cut off to use the lighter, replacement zip ties have to be
carried.
I started using a Zippo about three years ago.
Zippo has an optional belt pouch with a metal clip and a fuel canister that I
purchased. My Zippo hasn’t failed me yet. I fretted over the case getting bent
because I’ve heard of this happening. However, the main issue I’ve had is fuel
evaporation. I used a piece of bicycle inner tube to prevent this. It helped,
but it didn’t eliminate the problem. Plus, the inner tube made the lighter
inconvenient to deploy and it tore easily.
While searching for something better, I ran across peanut lighters. The QIMEI was my first one. It came with a spare O-ring, flints, and a wick. It’s durable, leakproof, and waterproof. The only problem I’ve had is that its tiny size makes it difficult to hold and it gets hot fast. Other than that, I liked the design better than anything I’d found until that point. I later obtained a Maratac Peanut Lighter as a replacement for my QIMEI. The Anodized XL Maratac Peanut Lighter is my current EDC survival lighter. I’ve carried it on my keychain for almost a year now. I’ve never had a single problem with the Maratac. Its larger size makes it a lot easier to grip and light. Spare flints, wicks, and O-rings are sold separately
The Maratac Peanut Lighter comes with a rubber
O-ring to seal out dirt and moisture. Neither one of these has affected my
Maratac. I put a small amount of lip balm or Vaseline on the O-ring and threads
as an extra precautionary measure against moisture. The aluminum case also
makes this lighter impervious to the elements.

I have not been able to note any fuel evaporation for the long length of time that I have carried this lighter. I’ve also never had a skin burn from fuel leakage while carrying the Maratac in my pocket. Skin burn from fuel evaporation is a reason that I carried my Zippo in a belt pouch.
It’s built like a tank due to the robust aluminum case. The case is considerably thicker than a Zippo’s. It can be used as a waterproof container for small items by removing the brass insert. My Maratac has some cosmetic wear, which I expect.

The Maratac peanut lighter will hold five extra flints at the bottom of the brass insert. I still carry my Zippo fuel canister along with my Maratac lighter. I’ve carried the fuel canister for a long time and it’s never leaked. I can use the extra fuel as a firestarter in poor conditions. I keep a spare wick coiled inside the cap of my fuel can. I’ve been very pleased with my Maratac lighter. I can no doubt make it last a very long time if I had to.

I hope you’ll find something useful in this article. I’d love to hear your thoughts and thanks for reading.
Jeremy Rogers is an up and coming freelance writer. His blog address is http://www.heritageoutdoors.net.
Finding Your Perfect Everyday Carry (EDC) Lighter Read More »
Our weekend on the Superior Hiking Trail.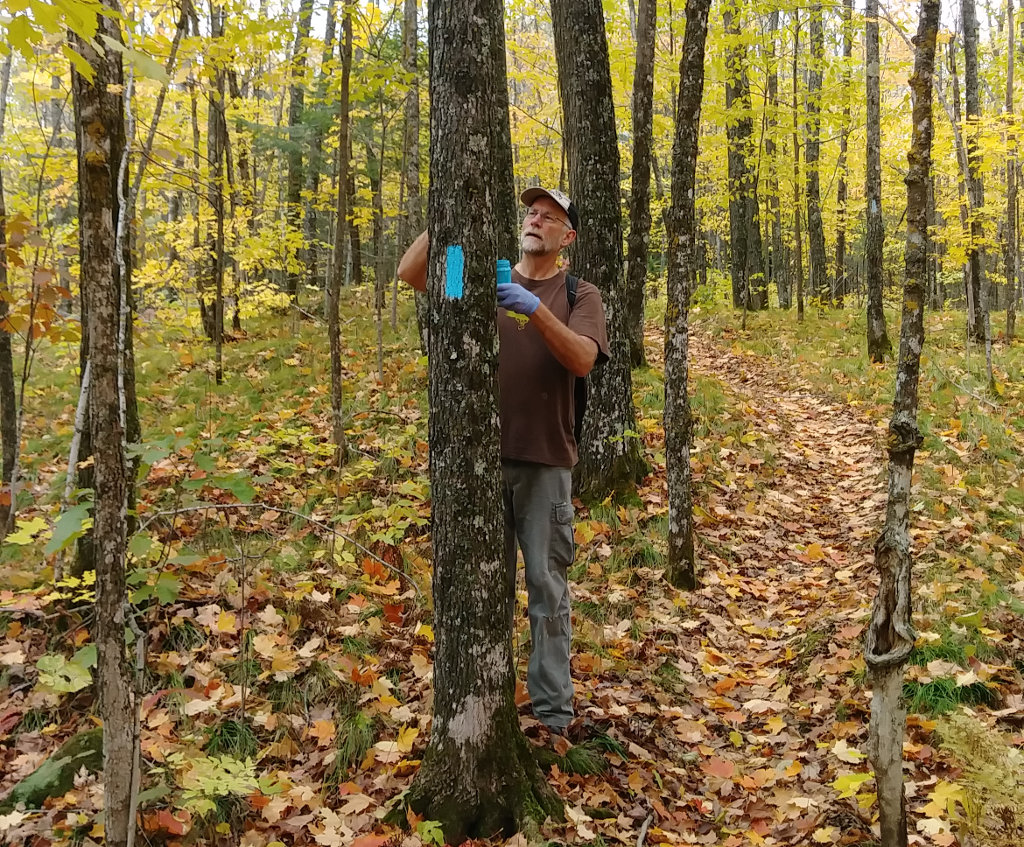
 We had a wonderful weekend doing trail volunteer work on the Superior Hiking Trail this weekend. We painted blazes on about 17 miles of trail as our part of the #BlueBlazeBlitz that saw pairs of volunteers blazing the majority of the 300+ trail miles along the north shore of Lake Superior.
The trail was completely blazed in 2006-2007 by two people contracted by the SHT Association. At that time, the standard of a vertical blue blaze measuring 2-inch by 6-inch and positioned about 6 feet from the ground every 1/10th mile was set. Over the past dozen years, those blazes have faded, or the trees they were on have fallen. On my thru-hike, I joked that the SHTA should use a paint that wouldn’t kill the trees since I saw so many on the ground. 🙂
Our blazes in 2019 are still blue, and about the size of a dollar bill, but we were instructed to place them about every 100 yards, so they are about half the distance apart as the originals.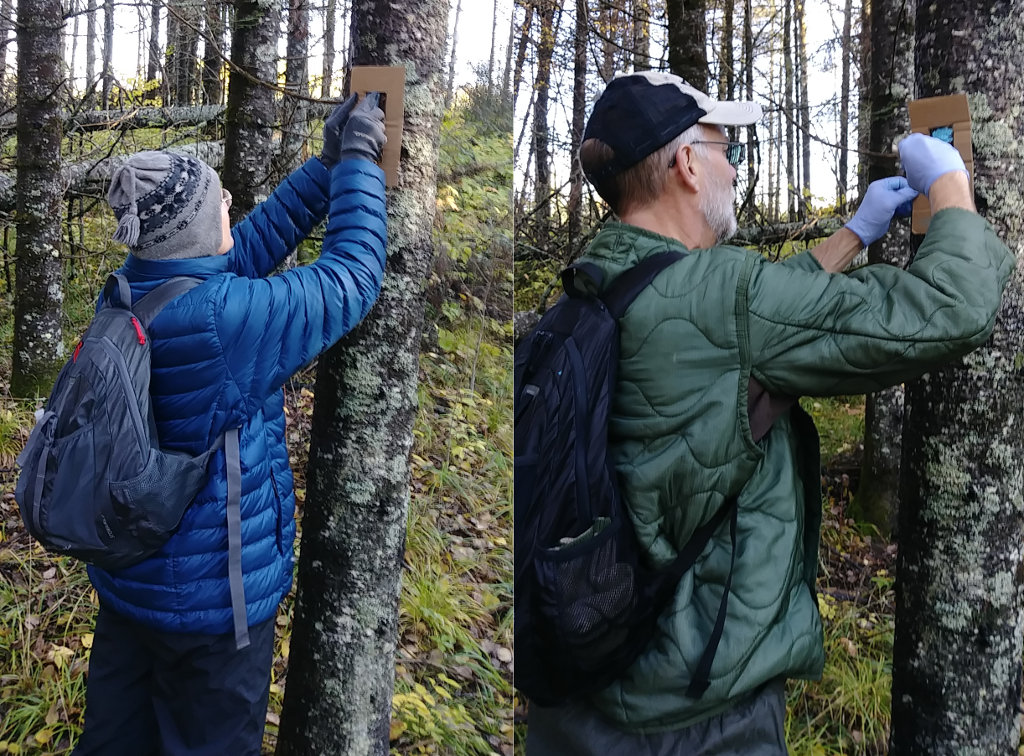 The process is pretty simple.
Count 100 steps and find a tree for a blaze. Clean an area 6 feet up. Paint the blaze. Repeat 20 times every mile. But, there are some things to learn to make ‘good’ blazes.
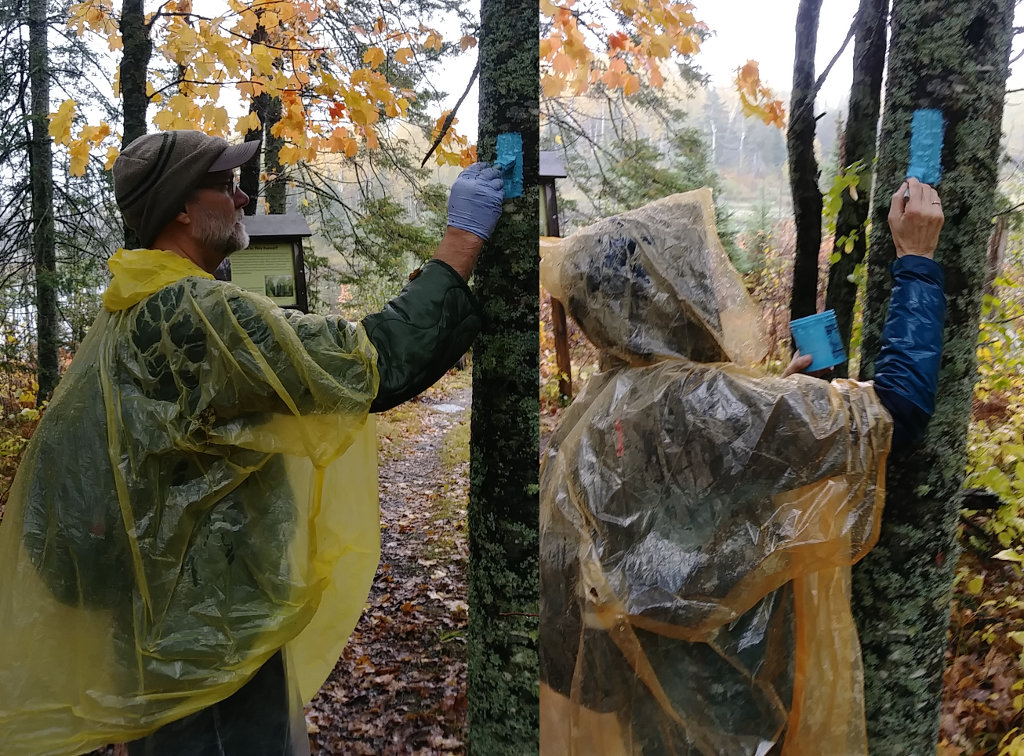 For our volunteering, we blazed on both Saturday and Sunday. Our longest assigned section was on Saturday and it rained the entire day, non-stop. But, we were told the blazing would go on ‘rain or shine’, so we successfully covered the 5 miles out and 5 miles back in about 7 hours. After we finished, we learned that some groups chose to not blaze due to the rain, so now we hope our blazes hold up. We did meet another blazer leaving the trail and she had done her section – Good Job!
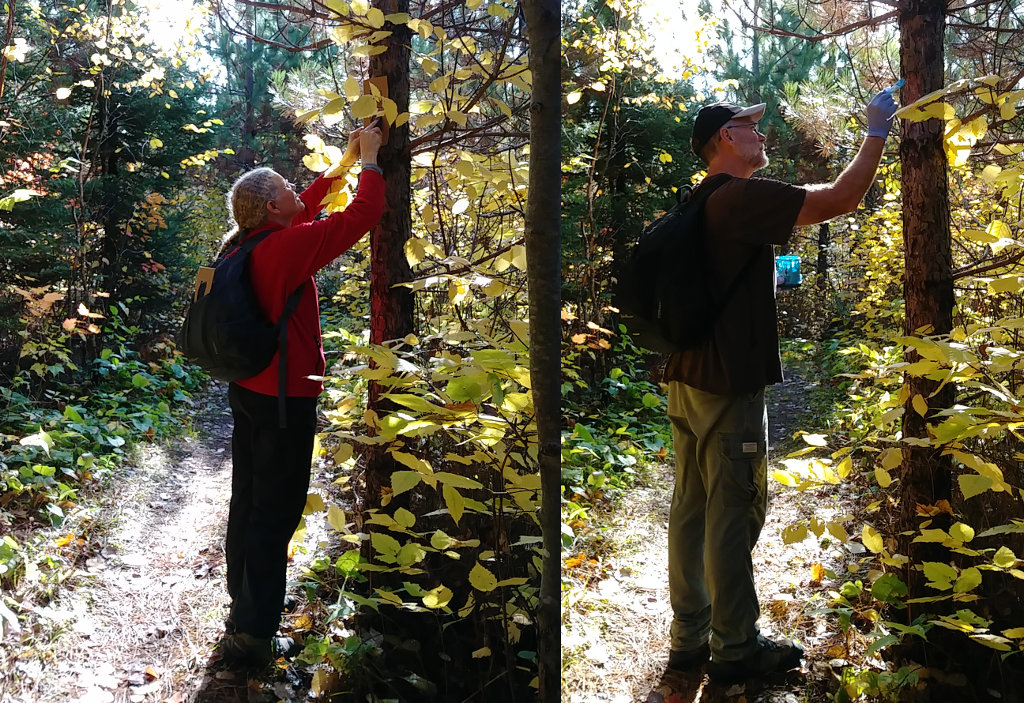 Sunday’s hike was so much more fun! The sun was out and it was a perfect fall day. Our second section was 7 miles round-trip and the blazes were much easier to paint without rainwater to deal with.
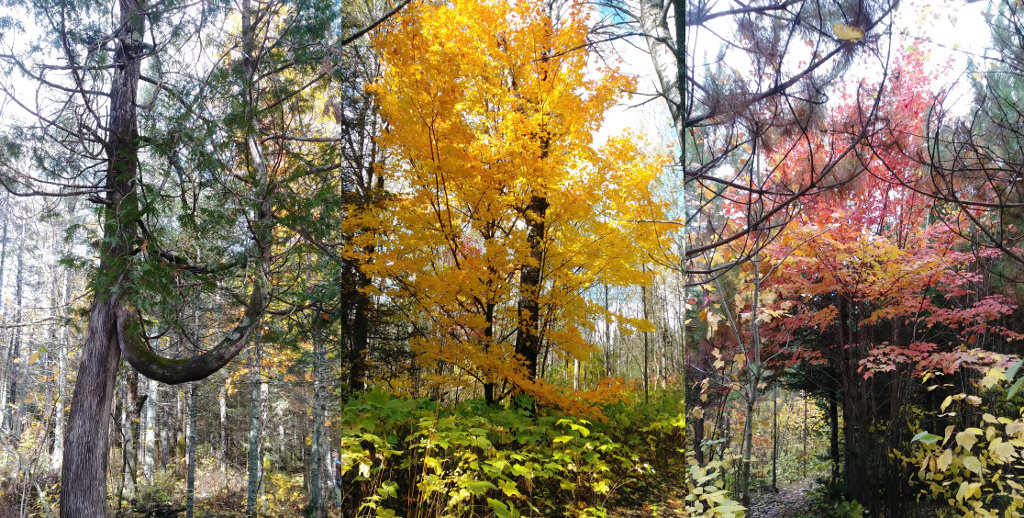 It was nice to be out in the woods at this time of year. Lots of colors changing, cool temps, and no bugs. These were just a few of the beautiful trees we passed. My favorite part was walking through a maple forest with a canopy of orange and red lit by sunshine.
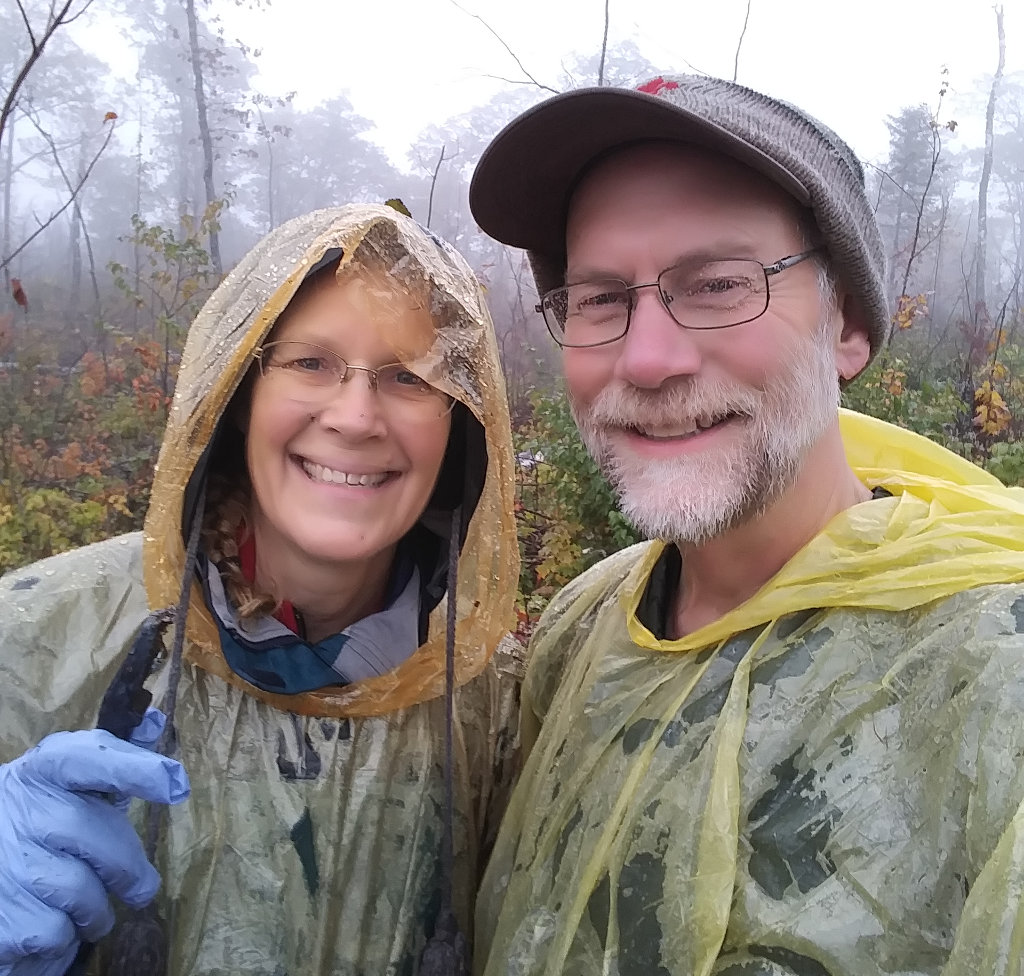 Hike On
SHT Blue Blaze Blitz Read More »
If there’s one thing that is guaranteed to send shivers down the spine of even the most experienced trekker, it’s the sight of a venomous snake.
Every year in North America, there are a reported 8,000 bites by venomous snakes – and the figures unreported bites are thought to be much higher. This might sound like a startlingly large number, however, the truth is that very few of these bites result in death. In fact, it is estimated that there just five fatalities per year. To put things into perspective, you are nine times more likely to be killed by lightning than a snake.
That said, it doesn’t mean you should become complacent around snakes, as they are still very capable of delivering a damaging bite. Although death is unlikely, being bitten by a venomous snake can result in breathing difficulty, blurred vision, and potentially even temporary paralysis.
In this guide, we’re going to cover everything you need to know while wandering through snake country. We’ll go through effective preventative measures, snake identification, and what you should do in the unlikely event of a bite.
First things first, let’s tackle the many myths that are abound when it comes to snakes. Whether it’s because someone is quoting an antiquated piece of advice they found in a magazine from the 1970s or are unscrupulously trying to sell you a useless snakebite kit, there are plenty of untruths floating around online.
Slit-Shaped Eyes = Venom?
One of the most commonly known identifiers of a venomous snake is the shape of its eyes. Many people believe that a venomous snake has slit-shaped eyes. That’s not necessarily true.
A 2010 study found that there is absolutely no correlation between the presence of venom and pupil shape. In fact, it was found that pupil shape might be determined by its predatory/foraging behavior.
Do Snake Bite Kits Work? (TLDR: NO!)
This is a particular bugbear for serious trekkers and snake enthusiasts alike. When it comes to venom treatment, snakebite kits are probably one of the biggest scams out there. These kits simply don’t work. Not only that, they’re potentially extremely dangerous.
Let’s have a look at one of the more popular kits out there: the Sawyer Extractor Pump. Full of 5-star reviews and first-rate sales copy, a medical study from 2004 concluded that the pump removes virtually no venom.
These kits will, for example, work for less serious bites. Think bees or wasps, but not snakes. In fact, using these kits can actually increase local tissue damage by concentrating the venom. Not only that, you’re also going to significantly increase the chance of an infection developing.
One of the most important things you can do when it comes to avoiding a bite is learning how to identify a venomous snake and taking a moment to learn some of its most common behaviors.
There are four main species of venomous snake in North America, each with their own unique markings. Additionally, each species comes with its specific behaviors and having an awareness of this can help you when you’re preparing an outing.
Coral Snake
The coral snake is one of the most identifiable of the deadly snakes, so long as you can correctly remember the following saying: ‘red and yellow, kill a fellow; red and black, friend of Jack’. The saying refers to the colored banding on the snake. If the red and yellow bands are together, then you know you’ve got a venomous snake on your hands.
The coral snake tends to be found in forested areas, hiding under leaves or underground. Knowing this will make you aware when walking on or near piles of leaves. It generally displays reclusive behavior i.e. it will retreat unless provoked. In other words, if you stay out of its way, a bite is highly unlikely.
Rattlesnake
This is the most widely known species of venomous snake and is primarily identified by the rattle on the end of its tail, which can be both seen and heard. Furthermore, rattlesnakes tend to have thick, heavy bodies and a diamond-shaped head.
Although their warning sign is a rattle, it is important to remember that baby rattlesnakes may not have developed the rattle yet (but are just as venomous!). Additionally, it is possible that an adult snake loses its rattle, meaning you should learn more identifying features than just the tail.
In case where the rattle seems to be missing, it’s probably easier to do the identification process the other way around: in other words, if it looks like a rattlesnake but the tail is pointed, then you know it’s probably a harmless snake that has similar features.
Cottonmouth
This is North America’s only semi-aquatic venomous snake, which can usually be found in damp environments, like swamps or in and around water. During the day, the cottonmouth can be found basking on rocks to heat up its body temperature.
The key identifying feature of a cottonmouth is the dark cross bands with light brown shading. That said, it can be hard to spot this in older ones because the coloring becomes incredibly dark.
Copperhead
This snake is known for its predatory ambush attack, typically hiding under rocks or leaves until its prey walks by. They’re thought to be the most likely to bite humans out of all the venomous snakes, although their venom isn’t very potent.
Rather than always displaying reclusive behavior, copperheads are known to sit still when they encounter a human, unless it can easily retreat. They are generally the most defensive of venomous snakes, striking the moment they feel threatened.
As the name suggests, this snake has chestnut-brown cross bands shaped like an hourglass or dumbbell, on top of slightly lighter colored skin. The banding is usually wider on the sides and narrower on top.
Being able to identify a venomous snake and knowing its usual habitat are just the first steps in being able to prevent a bite. We also want to mention that this article is in no way designed to instill an irrational fear of encountering a venomous snake. Rather, with a simple understanding and better awareness, you’ll be able to keep some tactics in the back of your mind while out on the trail and this will put you in a much better position.
You don’t need to write down and memorize but digest the following few pointers and be sure to practice them while out and about:
First of all, don’t believe everything you read. There is so much misinformation out there on the best practices and there are even conflicting medical journals.
Being bitten by a venomous snake is serious business, even if it’s unlikely you’ll die from it. The venom from a snake can begin to destroy skin and muscle tissue and it isn’t unknown for a bite to result in limb amputation.
Stay Calm
If you find yourself bitten by a venomous snake, your first responses will likely be that of shock and pain. It is important, however, that you remain calm and think logically through the next few steps. Panic can elevate your heart rate, speeding the process of venom spread.
Call 9-1-1
You should call the emergency services as soon as you can and never attempt to treat the bite without professional medical help. If you can, you should inform the emergency services as to what type of snake it was as this can help them in deciding which type of antivenin treatment to use. If you can’t figure out the species of snake, you can take a photo of it so long as it is absolutely safe to do so.
Don’t Try to Catch the Snake!
Snakes often strike twice; the first bite acting as a warning (and thus often don’t have much of any venom present). This is one of the reasons you should avoid a second bite as best you can. You should leave the snake alone and don’t attempt to catch it or kill it.
Keep the Wound at Heart Level
You should keep the wound still and at heart level, making sure not to take any painkillers or attempt to suck the venom. Although ingesting venom isn’t necessarily harmful, it can pose problems if you have cuts in your mouth and will be of no help in actually removing any venom.
Avoid Snake Bite Kits
Additionally, and as we’ve already mentioned, you shouldn’t use suction kits. These have been proven to be ineffective in removing any substantial amount of venom, if any, and can cause more harm than good.
Remove Tight Clothing and Jewelry
Finally, you should remove any particularly tight clothing and restrictive jewelry as this can contribute to greater swelling. Do this as soon as you’ve been bitten – don’t wait for symptoms to appear, as it may then be too late to easily remove your jewelry.
From the Editor: Here’s a fantastic infographic that summarizes the article:

How You Can Prevent (and Treat!) Venomous Snake Bites Read More »
You can also check out ALL our Podcasts on ALL your Favorite Channels. google play Libsyn IHeartRadio Soundcloud Sig Glockncoltg aka TJ Kirgin and co-host FDE aka Fat Dark Earth and Sylis to discuss the alleged Red Flag Law “Standoff” in New York and what really happened. Join the Tactical shit group on the Sheepdog […]
The post Shot’s Fired Episode 35: Boog or No Boog That is the Question appeared first on Tactical Sh*t.
Shot’s Fired Episode 35: Boog or No Boog That is the Question Read More »
Hello Pack. Winter has arrived on our survival homestead folks, or at least it feels like it. Only in Ohio could you go from wearing sleeveless clothing to cracking ice in a poultry waterer in such a rapid amount of time. One day this past week we had 60 degree weather, the next day we had temperatures below freezing. In this state, you better be prepared for multiple season wardrobe changes in…
What I Did To Prep This Week – Week 70: November 10th 2019 – November 16th 2019 Read More »
by Todd Walker
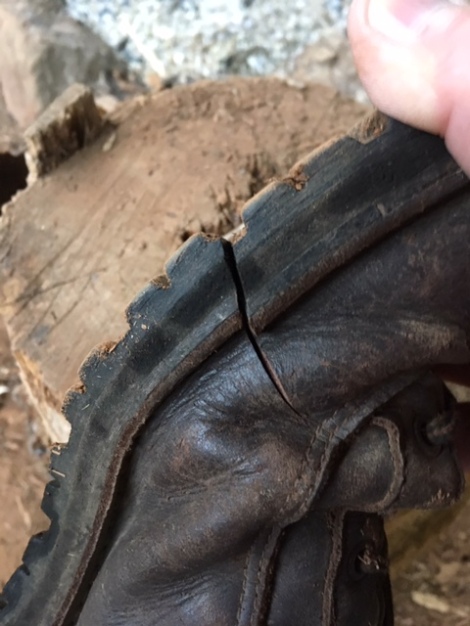
A boot full of blood. Tenons and bones severed. A tourniquet to stop arterial bleeding.
After watching the video footage of the ax striking my foot, all of the above should have happened but didn’t. I kept working on the log cabin. In fact, a whole month passed before a coworker noticed and asked how I sliced my boot.
“Huh?”
“Your boot. How’d you cut it?”
Inspection at school.
I really had no idea. I would have remembered almost lopping my foot off. No recollection of me bent down like a toddler filling his diaper, mouth gaping in terror, in search of blood. I racked my memory.
An axman should remember and learn from close calls. I dug into old video footage and found the ax-boot encounter.
In all my years of swinging axes, I’ve never been bit seriously. Blood has dripped from minor nicks while handling an ax or in the sharpening process. But never in full swing.
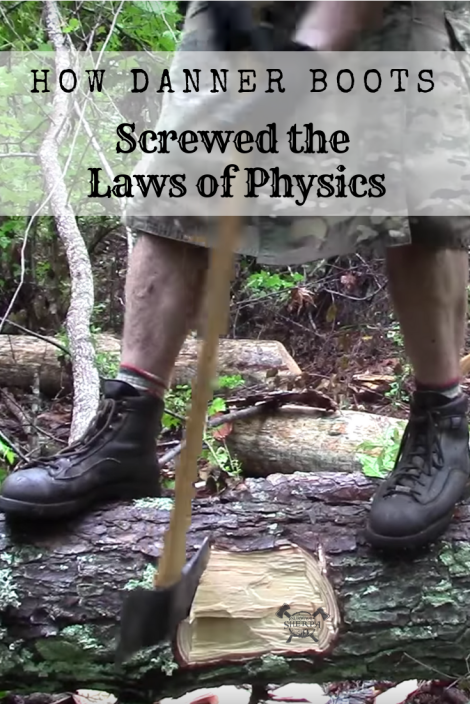
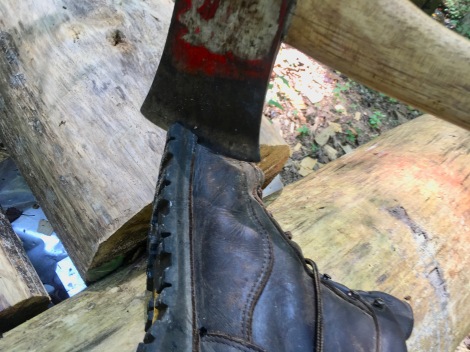
At the 1:22 mark in the video below, you’ll see how I violated the Frontal Zone Rule by dangling my foot over the log like bait over the rail of a deep-sea fishing boat.
Newton’s Third Law of Motion states that for every action, there is an equal and opposite reaction. Forces occur in pairs. Each force is of equal strength but in opposite direction. Even though the two forces are equal, this does not mean that they will cancel each other and stop movement.
Nothing defies the physical laws of nature except comic book superheroes. My Explorer boots reached Superman status after stopping a speeding ax.
Dan, a buddy of mine, said I should bronze the boots and place them on my mantle as a family heirloom. He has a good point. Even with the ax gash, I still wear them to school everyday to teach traditional outdoor skills. On weekends building my log cabin, they remain watertight and too comfortable not to wear.
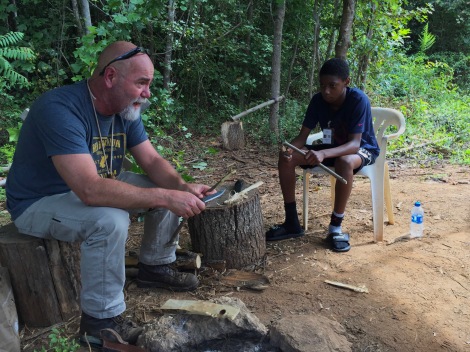
Boots still on the ground in our outdoor classroom.
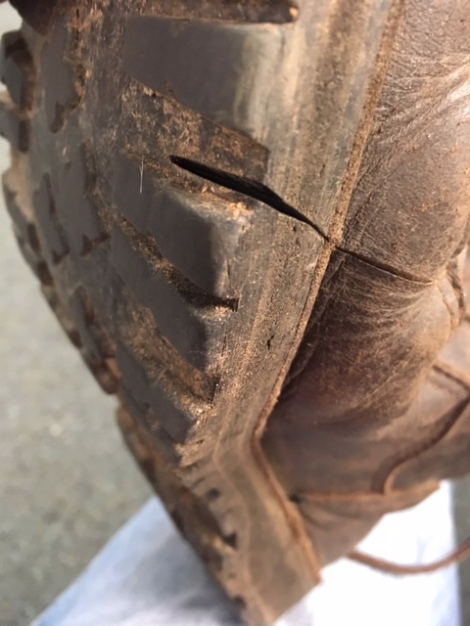
I keep my working axes honed and shaving-sharp. The ax strike separated the inside edge of my boot sole, surgically splitting one stitch, and slicing the leather upper. I really expected the adjacent stitching to begin to fail. Two and a half months of daily wear since the ax-ident and not a stitch has unravelled. These Superman boots are built to last. Thanks to Danner’s superior, Made in America craftsmanship, my foot is not a nub!
Thank you, Danner!
“Price is what you pay and value is what you get.”
~ Warren Buffet
Buying high quality boots is like old-fashioned window shopping. The item catches your eye. You really want it. Then you see the price tag. There’s no way you can pay that price. But you still go out of your way to walk past that window daily to get another look and dream of owning the thing.
Your desire hasn’t changed, you’re just not willing to pay the price.
Price is painful once but value lasts long-term. You see, I wanted a pair of high-quality, American-made boots, that could be resoled after many years of tramping in the woods. Even after the ax sliced my boot, not one tear rolled down my face. My foot is worth more than the price of these fine boots! I’m a lifetime customer now. If Danner can’t re-craft the sliced leather upper, I’ll continue to wear them as a sober reminder while swinging axes.
Opening the box and holding these brand new boots made me smile. The seams were double-stitched with precision. One feature I like about these Explorers is the minimum amount of seams in the boot. This can only reduce the chances of leakage or snags when tramping through rough terrain and bogs. Even the laces are made of quality material.
The Vibram sole grips wet and dry soil like a mama hugging her son returning from war. The wide rubber sole adds stability and amazing traction. I typically trim pine bark off the top of logs where I’ll place my feet when under bucking with my double bit ax. This step is not needed since I bought the Explorers. The aggressive treads hold my feet in place securely on the bark. The only surface I’ve found they don’t grip is freshly peeled inner pine bark (see above blooper video). A man would need hobnail boots to stand on this slick stuff!

Nature’s slippy slide
I kept an old pair of boots in my truck the first week I wore my Explorers. Never needed to use the spares. No hot spots on my heels or other suspected pressure points I would normally feel from snug fitting leather boots. I played around with the lacing to fine tune the fit over that first week. The full-grain leather upper began mating to my feet like the soft breath of wool socks on a winter day. These rugged boots love my feet and punish rocks and roots – even axes.
If you want a boot that can handle the rigors of building an off-grid log cabin, rugged backwoods adventures, and still look good at the office, pay the price and get yourself a pair of Explorers. If you want lightweight, synthetic, Vegan friendly, foreign-made footwear, look elsewhere. Danner Explorer full-grain leather boots are handcrafted from top to bottom in Portland, Oregon (Made in USA).
One of my grandsons will receive my Superman boots when I’m gone with the story of how they saved my foot that hot July day in Georgia.
Keep Doing the Stuff of Self-Reliance,
~ Todd
P.S. – You can also keep up with the Stuff we’re Doing on Twitter, Pinterest, YouTube, Instagram, and Facebook… and over at our Doing the Stuff Network.
P.P.S – If you find value in our blog, Dirt Road Girl and I would appreciate your vote on Top Prepper Sites! You can vote daily by clicking here or on the image below. Check out all the other value-adding sites while you’re there…

Copyright © by Survival Sherpa: Content on this site (unless the work of a third-party) may be shared freely in digital form, in part or whole, for non-commercial use with a link back to this site crediting the author. All links in articles must remain intact as originally posted in order to be republished. If you are interested a third-party article, please contact the author directly for republishing information.
How Danner Boots Screwed the Laws of Physics Read More »
