.223 vs 5.56 Explained in Plain English
What is the difference between 5.56 NATO and .223 Remington?
.223 vs 5.56 Explained in Plain English Read More »
What is the difference between 5.56 NATO and .223 Remington?
.223 vs 5.56 Explained in Plain English Read More »
Excerpt from: FM 6-0 Mission Command: Command and Control of Army Forces – August 2003
RELEVANT INFORMATION SUBJECT CATEGORIES—METT-TC
B-10. Relevant information is all information of importance to the commander and staff in the exercise of command and control (FM 3-0 [Operations – February 2008]). In the context of information management, the six factors of METT-TC — Mission, Enemy, Terrain and weather, Troops and support available, Time available, and Civil considerations—make up the major subject categories into which relevant information is grouped for military operations. The commander and staff consider R[elevant] I[nformation] for each category in all military operations. The relative impact of each category may vary, but the commander and C2 [Command and Control] system consider them all.
MISSION
B-11. The mission is the task, together with the purpose, that clearly indicates the action to be taken and the reason therefore (JP 1-02 [Department of Defense Dictionary of Military and Associated Terms]). It is always the first factor commanders consider during decisionmaking. (See FM 5-0 [The Operations Process – March 2010].) A thorough understanding of the mission focuses decisionmaking throughout the operations process. … Commanders and staffs view all the other factors of METT-TC in terms of their impact on mission accomplishment.
B-12. The mission statement defines the who, what, when, where, and why of the operation. A thorough understanding of why the unit is conducting an operation provides the focus for planning.

In every encounter there is an element of chance.
–John Hall, former head of the FBI Firearms Training Unit
Family mourns loss of single father of two girls
The perils of Intervention are very high. The question I like to pose about mission definition is:
To whom does your primary duty and allegiance lie, a total stranger or your family?
That’s a moral decision I do not choose to answer for anyone else, only myself.
METT-TC and how it applies to us Read More »
Guest Blog Post by Tim Webb CCEMT/P, WEMT/ P, US Army SFC (ret)

Ah, the seemingly innocuous blister. We’ve all seen them, likely we’ve all had them, and even more likely we have all been crippled by them at one time or another. When you look at the hierarchy of medical problems that can kill you in the back country, blisters aren’t very high up on that list. However, they are one of the most common problems encountered. My bet is that the first human beings, thousands and thousands of years ago, that strapped some kind of footwear on started suffering from blisters soon there after.
While not threatening in and of themselves, blisters can absolutely become an issue that can put your life at risk. Blisters can cause pain and slow you down, if not stop you completely. They are prone to infection and long-term issues if not promptly fixed and the pain and discomfort alone is enough to cause you to change the way you walk. Potentially putting you at risk for orthopedic injuries including falls, sprains, and strains.
Most of us, whether we are in the back country or in an urban environment, have experienced blisters in one form or another. Some are just a minor annoyance, while others that involve very large areas. Technically speaking, blisters are formed when frictional forces mechanically separate layers of skin, allowing fluid into the void. Blisters can have clear fluids which likely means only superficial damage. Red blisters indicate either deeper tissue or vasculature involvement.
There are three things that have to happen for a blister to form:You have to have heat, moisture, and friction. If you can stop any of those, you can likely prevent blisters. I call these three elements THE BLISTER TRIANGLE Let’s take a look at these three individually:

Heat can be caused both by external forces (warm environmental temperatures) and by physical exertion (body heat). As our bodies heat up and send warm blood to the periphery, skin temperatures increase. Unfortunately, there is really no way to control this. Even with really cold temperatures outside, inside your footwear the skin can still heat up. So we can’t really control heat.
Moisture on the skin can happen due to both environmental and physical causes. Moisture from outside sources in forms such as snow, ice, and rain and physically from heat/sweat. The moisture causes clothing to stick to skin. Again, this is almost impossible to control. Gore-Tex boots and other high tech fabrics like moisture-wicking materials help, but none can completely eliminate the possibility of moisture building. When we have heat, we most likely have moisture. Moisture makes the sock stick to your foot. Once that happens, the sock doesn’t freely move over your skin. Instead, it sticks to your skin. The skin layers then slide, which is where the blister starts to form. So that leaves us truly with only one way to break the blister triangle–eliminate friction.
Friction is the only one of these three blister-causing elements that can be completely controlled. If we recognize that we cannot control heat and moisture, then we need to concentrate on controlling friction. Controlling friction is the key to both prevention and the treatment of blisters.
There are many different ways to treat blisters. Most people that have dealt with blisters typically have their own way of preventing and treating them. Some are really effective and others aren’t very good at all. Most of the techniques I’ve seen or heard of are geared towards eliminating friction. Rightfully so.
In my almost 30 years of pre-hospital and wilderness medicine, I’ve seen and heard of an amazing amount of things people do to prevent and treat blisters. Anything from using Superglue injected into the blister to smearing Vaseline over their entire foot in an attempt to prevent friction. In the early years of my military career, it wasn’t uncommon for me to use about half a bottle of foot powder in each boot, thinking that would keep my foot dry. Literally, I would squeeze it into this sock and shake the sock until a cloud of powder came out. Obviously, that didn’t work. I still got some horrible blisters. Why? Because I tried controlling one of the sides of the blister triangle that simply cant be controlled (moisture). We’ll talk some more about foot powder later. Remember, foot powder doesn’t help at all with heat or friction. It’s meant to keep the foot drier, but due to its composition, it tends to form small little balls as it pulls in moisture. These little foot powder balls then grade against the skin and apply more friction, not less. The more foot powder, the more likely blisters will form. I learned some very painful lessons through my early years of military service.
So now we know, of the 3 major components that cause blisters, friction is our best bet to break. Obviously proper fitting footwear is a key, however with that said even the best fitting footwear can shift in rugged terrain causing “hot spots” and eventually blisters. On straight, flat terrain, even poor fitting footwear can be fine. On uneven, rocky, or root-filled terrain, where your foot slides back and forth in your shoe/boot no matter how well your shoes fit, you could be in trouble.

Socks can be part of the problem as well. Drooping socks, socks that don’t wick moisture or socks not fit properly to your foot all can cause issues. On a recent 30 mile backpacking trip to the West Rim Trail in Pennsylvania, I developed a blister on my heal in boots that I’ve worn for years, boots that I never had issues with before. The most likely candidate–a drooping sock with a lot of small debris in my boot, due to not wearing gaiters. Friction, friction, friction.
When it comes to socks, there are some really fantastic products out there. Some brands now have socks that are double-walled with moisture-wicking or hydrophobic fabrics. Some hikers still prefer to wear a very thin liner sock and a thicker sock for cushion, which is a time-tested approach that works well. These techniques, whether it’s a double walled anti-blister sock or a liner sock of some sort, are beneficial because they can help break the friction cycle. The inner liner sticks to the foot and the friction happens between the sock and the liner, not your skin.
You can use a very light coating of foot powder or even antiperspirant applied for weeks prior to a trip in an attempt to cut down on the moisture or sweat that’s produced. While these steps are prudent and make sense, it still won’t control external moisture or even completely control sweat production, and it still does nothing to control friction. Another technique I’ve witnessed from others doing medical coverage for long term adventure races is Vaseline coating the entire foot. Some swear by it. Personally, I’m not sure I’d like that feeling on my foot. There are some new anti-chafing products out on the market that actually preform better when heated up. These show a great deal of promise and make sense. Especially when used in combination with a double-layered anti- blister sock.

Another factor often underestimated is swelling or edema. On any hiking trip or extensive workout, your feet are going to swell, particularly in a warm or hot environment . It’s physiologically impossible to stop it–because of gravity. Your core warms up, your body pushes blood to your periphery to cool it, the vessels become engorged, allowing blood to pool there and before too long you have swelling. Have you ever walked a long distance or worked out hard and noticed your rings or watch seem to fit tighter? It’s the same principle. Even with well-fitting footwear, swelling can cause problems.
We all learn through experience. If you know you’re likely to be prone to blisters or you’ve gotten them before, then a really good idea is to pre-treat those areas prior to going out. We’ll discuss some treatment ideas shortly but pre-treating as a means of prevention is ideal. The adage of “an ounce of prevention is better than a pound of cure” is certainly true with blisters. I have a good friend that, no matter what she does, she gets blisters in certain spots. Many of you can empathize with that and would tell a similar story. So now, the night before a trip or hard workout she applies a treatment to those known spots and is fine. Problem fixed.
Earlier I referred to “hot spots.” Most have probably heard the term before, but for those that haven’t a hot spot is the beginning of a blister. Let’s just call it a warning sign of significant trouble ahead if it isn’t cared for quickly. If you were to stop and observe your skin where you feel the pain, you’d actually see a reddish discoloring or inflammation of the affected area. Typically, it’s a little painful to the touch and may have some skin tissue starting to deteriorate. It indicates friction is being applied to the layers of skin and a blister is about to fully form. Fortunately, it can sometimes be fixed by simply adjusting a sock or pulling out debris that’s gotten into your footwear. However, it’s more likely it’s going to take actual treatment. The good news is that hot spots do not have to turn into blisters. If you take the time to fix them, you can prevent a full-on blister from forming
I think something that needs to be pointed out here is that the tendency for some of us to be a bit lazy, myself included. We want to push on, we don’t stop and check if a blister is starting to form. We feel the burn and think, “Ah we’ll be stopping soon, I just put these boots on, I don’t want to hold up the group.” Of course there’s legitimate reasons why you can’t stop, but the point here is that you really want to stop as soon as you can, investigate and treat the hot spots before it becomes a real issue. If you’re involved in guiding a group or a leader in any way, I think it’s a great idea to stop a couple of miles or hours into an event and have everyone check their feet, especially when it comes to kids. I’ve been guilty of not stopping myself and have paid the price for it. Trying to clean the area, drain a blister, prep and dry the skin, apply a dressing and other treatments will take far longer and delay you a lot more than if you just treat the hot spot.

Treatment and prevention go hand in hand, and both start with eliminating friction from the equation. There are multiple ways to accomplish this, and many, many products on the market to assist you–some good, some not so good. Most of you have your own way of treating blisters, and if it works that’s perfect. Stick with what works for you. I’d love to hear about your techniques. But for those that are looking for help, here are some ideas that may be helpful:
First, obviously start with footwear that fits well, but remember, terrain determines whether or not you get blisters. I would suggest trying socks that are designed (double-layered) to help prevent blisters or add a very thin liner sock. Choose socks that are hydrophobic and not a 100% cotton blend. Cotton, while possibly slightly cooler, will hold the moisture and not wick it away from the foot. At night or on prolonged stops, get your feet out of the boots and let them dry out, elevating your feet can help decrease swelling in the short-term.
Mole skin and mole foam are the tried and true methods from years ago. Cutting the mole skin/foam so that it surrounds the blister and provides protection for the blister is simple. However, neither mole skin or mole foam are meant to cover the blister. They can form a protective barrier around the blister, but they won’t help if the blister expands. It works, but personally, I’ve moved away from it. I think there are better ways of managing. On occasion, while treating a major blister on the bottom of the foot, I’ll use it in conjunction with other treatments.
Anti-chafing products can work well as a prevention measure, but as a treatment technique have limited uses. These products are common, inexpensive, and work really well as a pre-treatment and sometimes help in conjunction with treatment. For instance, I’ve used these anti-chaffing products over top of a piece of duct tape that I’ve placed. In combination , this can be a game changer.
I think duct tape works really well, provided you use good, quality duct tape. Not all duct tapes are created equally and the glues used are vastly different. There are medical grade tapes that can be used as well, but they tend to be expensive and hard to find. I haven’t found many cloth tapes or other medical grade tapes to be very effective. Most medical products are not geared to take the heavy pounding we would apply to them, so your money is better spent on products that have multiple uses. The reason why duct tape is so effective is because, once it’s applied to the skin, it allows the friction to take place between the sock and the duct tape and not sock to skin. Typically, I’ll cover the blister itself with a dressing, a band aid or a small piece of gauze first and then apply the duct tape over the blister. Ensure that the duct tape is applied smoothly onto very dry skin. It’s also a good idea to curve the edges of the duct tape so that the edges won’t peel off. The key is to take the time, dry the skin, and apply the duct tape as smoothly as possible.
If using any type of tape around toes or fingers, be careful to NOT circumferentially wrap the digit. Tape applied too tightly can cause circulation issues and in freezing temperatures can lead to frostbite.
To drain or not to drain is the question. My advice here is to drain the blister. I understand the argument that by opening up the skin you risk infection, but I think that’s a minimal risk. The pressure and therefore the pain would be a great deal more if that blister remains intact. Eventually, the outer layer of skin will break and tear regardless, so a controlled drain the serous fluid, relieves pressure and offers the intact skin underneath the blister protection. Drain the blister with a clean needle, either a hypodermic needle (see blister kit picture) or clean safety pin. When you insert the needle, think gravity. This will assist in draining the serous fluid from the blister and then allow it to naturally drain while on the move. Cleaning the blister prior to and post drainage with soap and potable water or an alcohol prep pad should minimize the risk for infection.

After years and years of trial and error, both treating others’ blisters and my own, the single best treatment I’ve found is a product called Compeed. I was introduced to this by a seasoned Himalayan climber years ago and have never looked back. It really is amazing stuff. It sticks well, provides excellent protection, comes in many sizes, is inexpensive. I allows the serous fluid to drain directly into the dressing and it is safe to leave on for days. I have used Compeed in many different climates and conditions from cold Michigan winters to hot, humid desert climates and everything in between. There are other brands that make a similar product but Compeed’s glue is simply superior to anything else I’ve tried. Compeed is listed on Amazon for various prices and package deals.
Compeed’s dressings act like a second skin. They’re designed to help aid in healing the blister, act to provide a friction free area, have a cushion that actually expands a bit as the blisters release fluids and help tremendously with pain.The glue is remarkable and as long as it is applied to dry skin, it can stay on for days. Literally I’ve had these dressings stay in place on patients in very damp environments for over five days. Compeed deserves a place in everyone’s first aid kit and even in their EDC kits.

In extremely wet environments adding Tincture of Benzoin (see blister kit) will help the glue stick better. The key to using Compeed is to apply it to warm, very dry skin. Once smoothly applied to the skin, rub the dressing to warm the glue and it’ll be on for days. The dressing is designed to start to peel at the edges so that you know it’s time to remove the dressing.
I have nothing to disclose with Compeed. I don’t make any money from them at all. Despite that, I have absolutely found their products to be the best on the market. Use it both to treat and to prevent blisters. Pre-applying to blister prone areas can prevent blisters. Once a hot spot is felt, stop, and remove the shoes and socks, clean the area, dry it and apply a Compeed dressing. It can prevent a blister from forming.
Here’s how I typically treat blisters:
Again there are many, many ways to treat and prevent blisters, the key truly is prevention. Stop, check your feet and the feet of your companions and treat as soon as there’s an issue. DON’T WAIT–I cannot stress that enough. Stopping early and taking the time to fix things before it really becomes an issue is immensely important. The adage “pay now or really pay later” applies here. Treat early before it becomes a potential evacuation issue.
Hers an example of what I may carry in a blister kit:

You’ll note in the picture a small pair of tissue scissors. Quite frequently, wound debridement may need to occur, especially in large blisters. Having a good pair of tissue scissors will be invaluable.
We’ve talked a great deal about blisters to the feet. Granted that’s the most likely scenario, but friction blisters can occur in other places on the body as well. Most commonly on the hands and more likely from a repetitive motion without wearing protection, such as gloves (i.e. cutting firewood). Treat and protect these blisters the same way you would on the feet.
While usually just a painful annoyance, blisters can become a serious safety concern. So much so that evacuations and serious safety issues can occur, putting not only the individual but potentially the whole group’s safety or ability to complete their task at risk. For the most part, blisters are preventable and easily treated if caught in time. Avoid the painful nightmare of blisters by being proactive rather than reactive and your time in the woods or walking on a city street will be much more enjoyable.
Tim Webb CCEMT/P, WEMT/ P, US Army SFC (ret) is a 30 year wilderness and urban prehospital provider. A senior Instructor with Remote Medical Training, holds a Fellowship from the Academy of Wilderness Medicine from the Wilderness Medical Society. A formal tactical medic working with local and federal SRT teams. He served with the US Army for 22 years as a medic including tours during Desert Storm and Operation Iraqi Freedom. He has also traveled to Afghanistan with Wilderness Medical Associates to teach the US Army’s famed 101st Airborne Divisions medics wilderness and remote medicine. He currently works as a Critical Care Paramedic with American Medical Response in West Michigan.
The post The Blister Triangle: Preventing and Treating Blisters at Home and in the Field appeared first on WillowHavenOutdoor Survival Skills.
The Blister Triangle: Preventing and Treating Blisters at Home and in the Field Read More »
Though its from last year it still serves as a reminder as to just how dangerous these laws are. Two Anne Arundel County police officers serving one of the new “red flag” protective orders to remove guns from a household killed a Ferndale man after he A red flag order has resulted in the death of a […]
The post Another Red Flagged American MURDERED In His Home! appeared first on Tactical Sh*t.
Another Red Flagged American MURDERED In His Home! Read More »

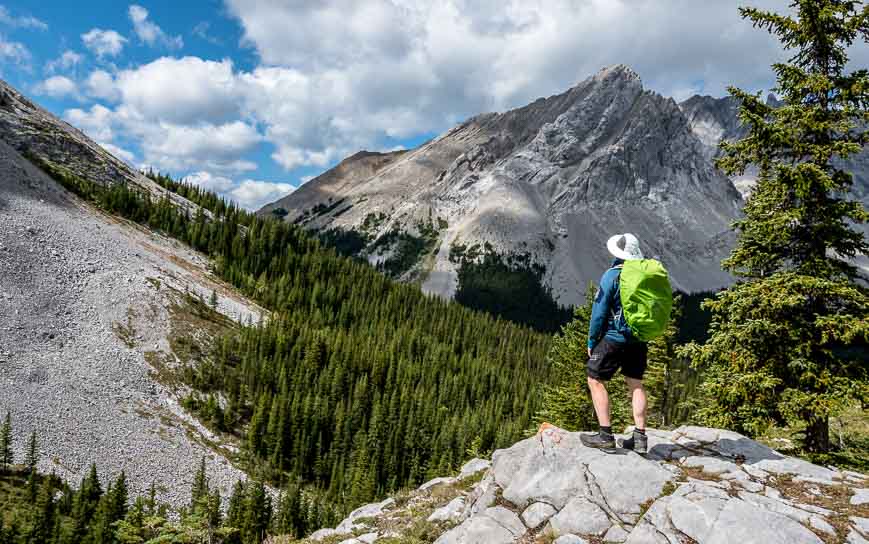
Beautiful Elbow Lake in Kananaskis Country
It’s a popular hike to Elbow Lake – in part because it’s short. However it is a steep hike from the get-go, climbing 137 metres to the lake. The trail is on an old fire road through the forest. It’s very obvious and not that interesting until you reach the lake.
Be sure to do a full circuit of Elbow Lake on foot as it’s very pretty from different angles. If you hike it in a counter-clockwise direction you’ll reach the junction with the Rae Glacier trail. Continue instead on a well-worn path to a river crossing of the Elbow on wooden planks. Make your way along the western shore of the lake on a fire road, stopping to admire the blues of the lake and the pretty mountain backdrop.
Keep an eye out for mountain bikers as the trail connects to a network of excellent biking trails in eastern Kananaskis Country so it’s a favourite. Horseback riding is also allowed.

Be sure to do the full hike around Elbow Lake
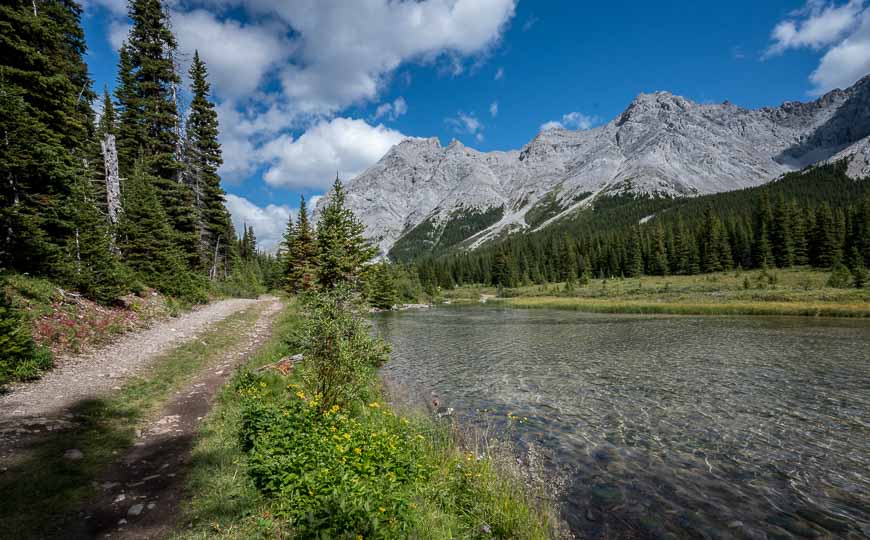
Elbow Lake scenery from the fire road on the western shore
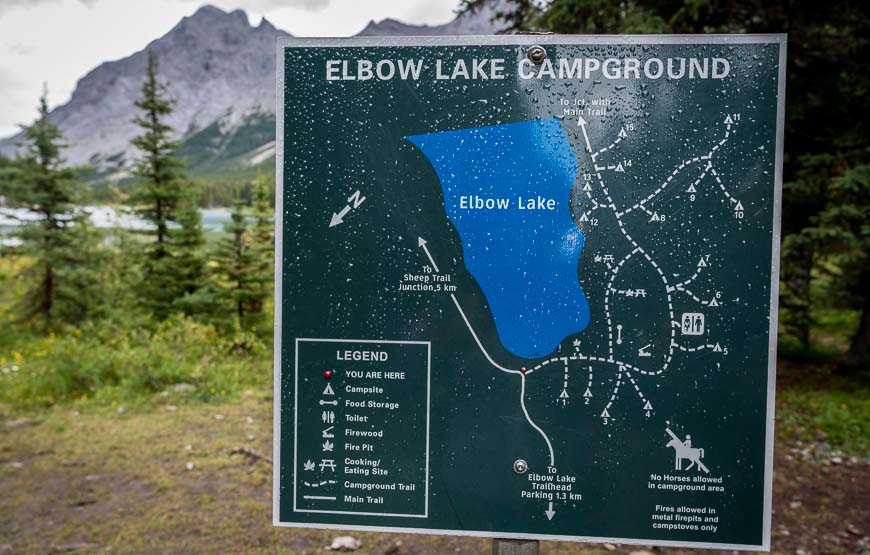
Elbow Lake is a very popular campground, especially for young families. As you can see in the photo below, most of the campsites are in the trees. But if your timing is right you might be lucky and score campsite 12 or 13 which will give you a view of the lake from your sleeping bag.
There are bear-proof lockers and outhouses as well as several picnic tables some distance from the tents for cooking. Firewood is provided.
For information on booking campsites and important dates visit the Alberta Parks website. Be prepared to book as soon as the dates open up especially if you’re trying to score a summer weekend.
Great family camping at Elbow Lake
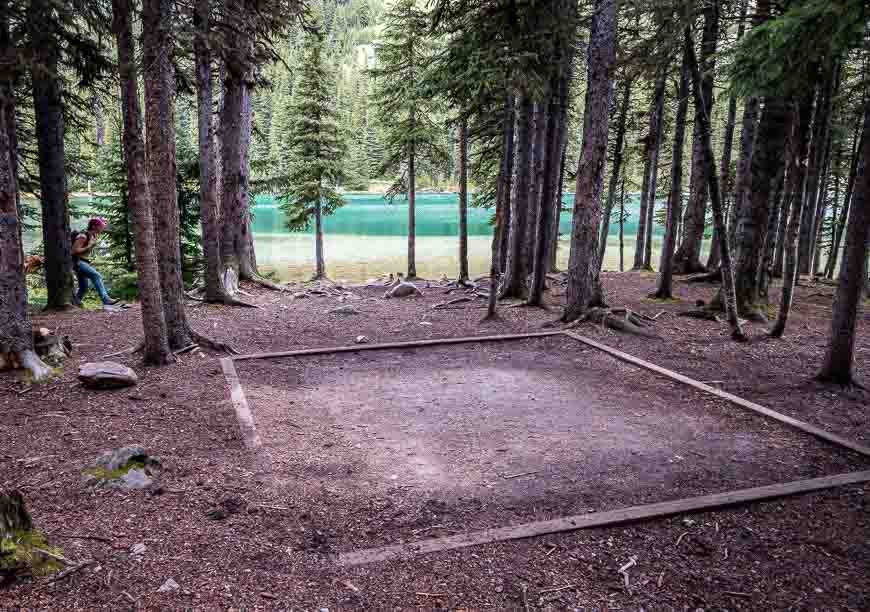
Try and score this campsite close to the lake
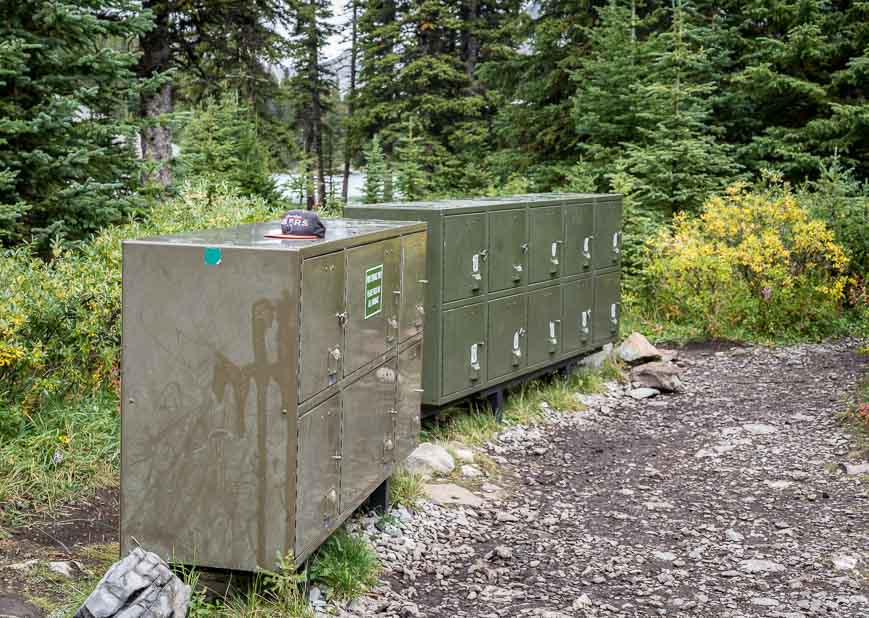
Bear boxes at Elbow Lake Campground
Continue anti-clockwise around the east shore of Elbow Lake to reach the turnoff to Rae Glacier. There isn’t any signage but there is a piece of flagging tape. The intersection is about halfway along the length of the lake.
Turn right onto a rocky trail heading northeast. Follow the path up a rib. At the top there are some pretty views of three mountains – Rae, Tombstone and Alpaca.
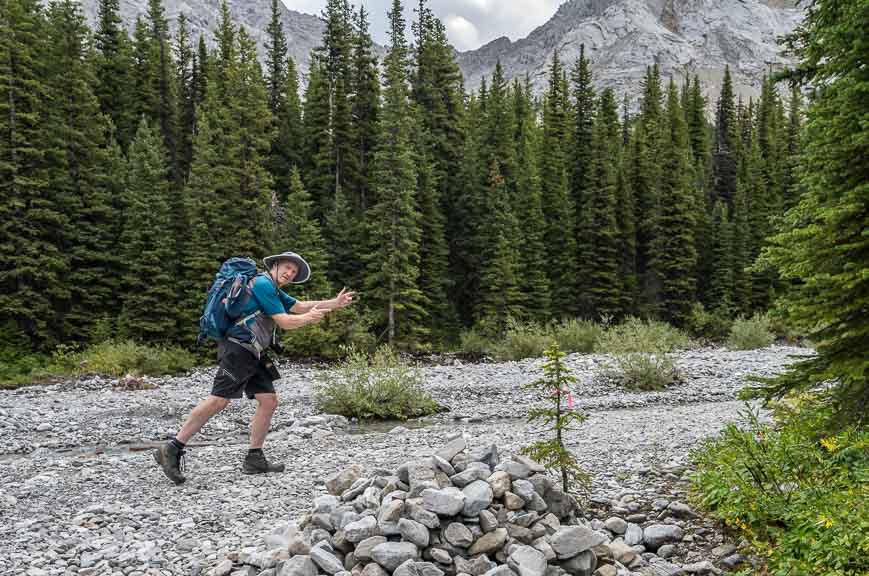
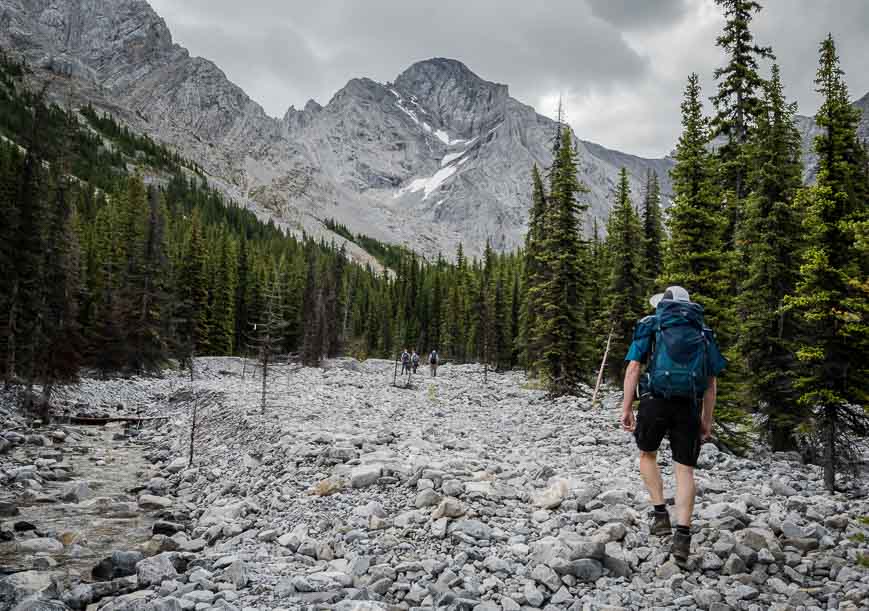
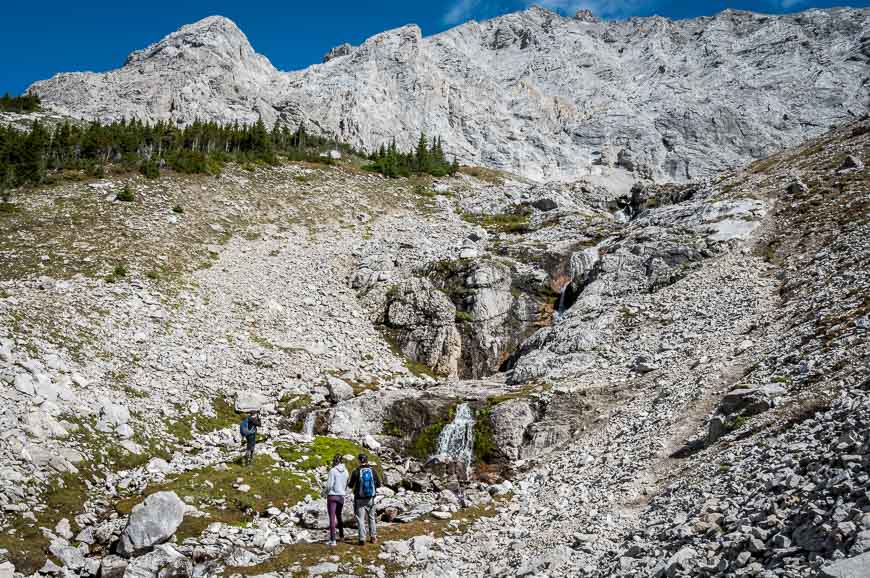
Continue along the rib eventually descending towards the creek. Stay to the right side of it on the scree. In short order the creek heads left. The névé above the small waterfall – five photos down, is the source of the Elbow River. While you can explore the area around the waterfall the trails here won’t get you to Rae Glacier.
Instead stay right and climb on moraines to the Rae Glacier. Go as far as you feel comfortable. From Elbow Lake to Rae Glacier gain 229 metres over a distance of just 2.2 kilometres.
Descend the way you came but consider continuing anticlockwise around Elbow Lake to get back to the trail coming up from the parking lot.
Look for the flagging tape and turn right
An obvious trail through the rocks on the way to Rae Glacier
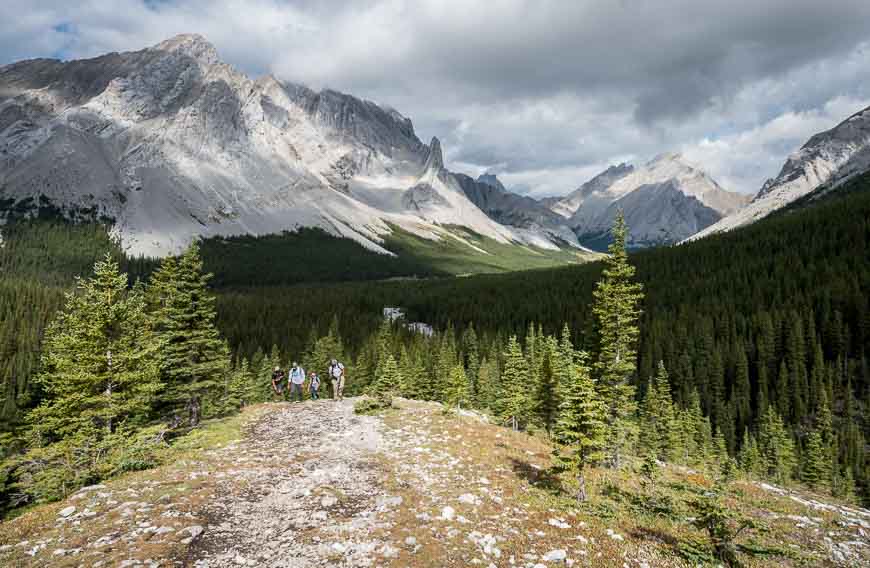
Hiking up the rib on the way to Rae Glacier
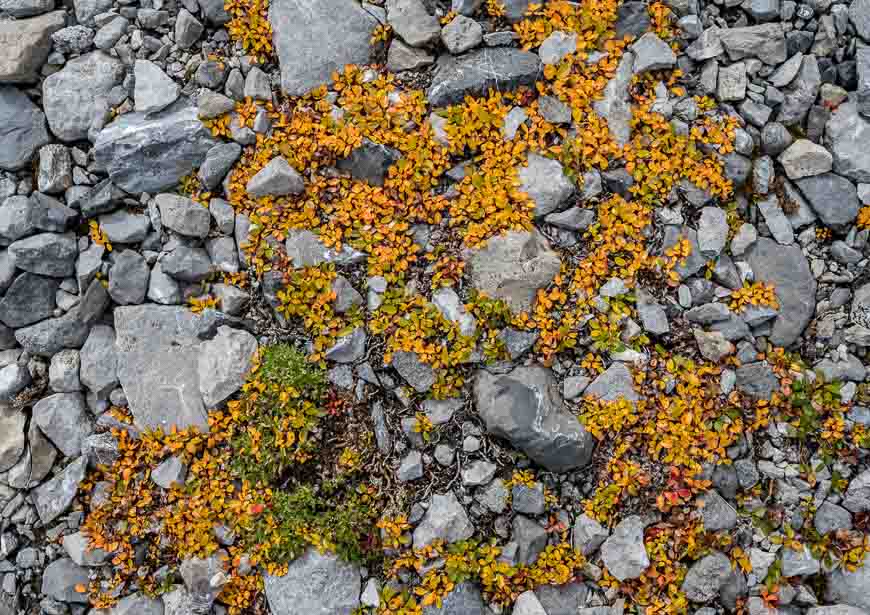
Nice blast of yellow underfoot
This is NOT the way to the Rae Glacier but it is an area you could explore
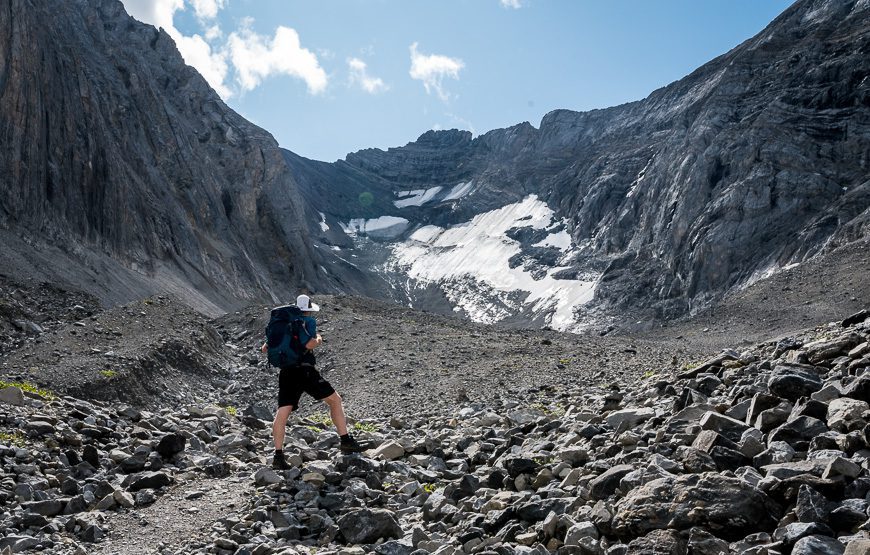
Hiking through the moraines on the way to Rae Glacier
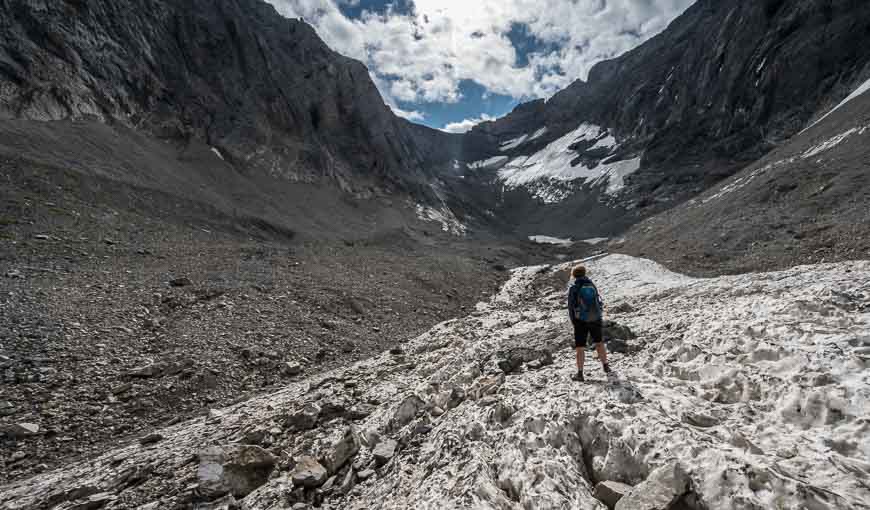
Standing on chunks of what’s left of the Rae Glacier
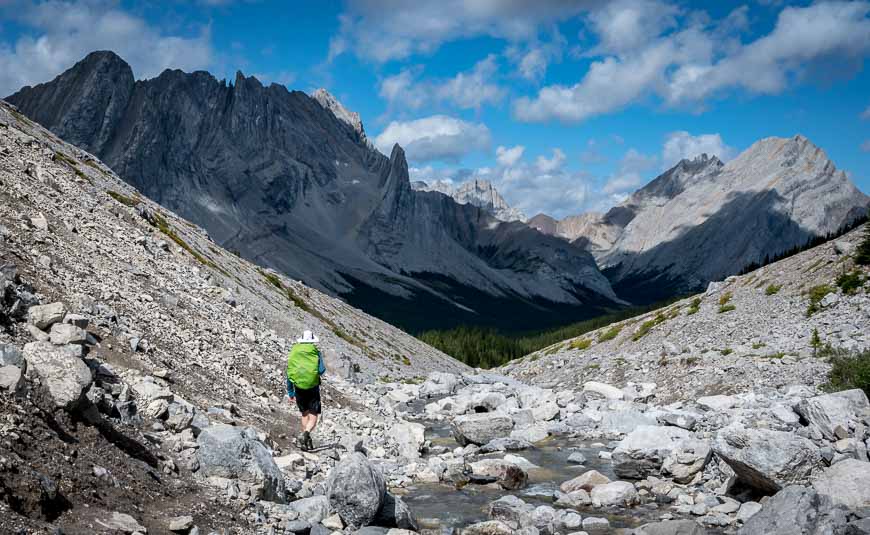
It’s a pretty descent back to Elbow Lake
Taking in the view on the hike back to Elbow Lake
From Calgary take the Trans-Canada Highway west to the Highway 40 turnoff. Turn south on Highway 40 and follow it for about 62 kilometres. The well-signed trailhead is on the east side of the highway. Note that Highway 40 is closed from December 1 – June 15th every year beginning just past the junction with the Smith-Dorrien Road. There is a winter gate.
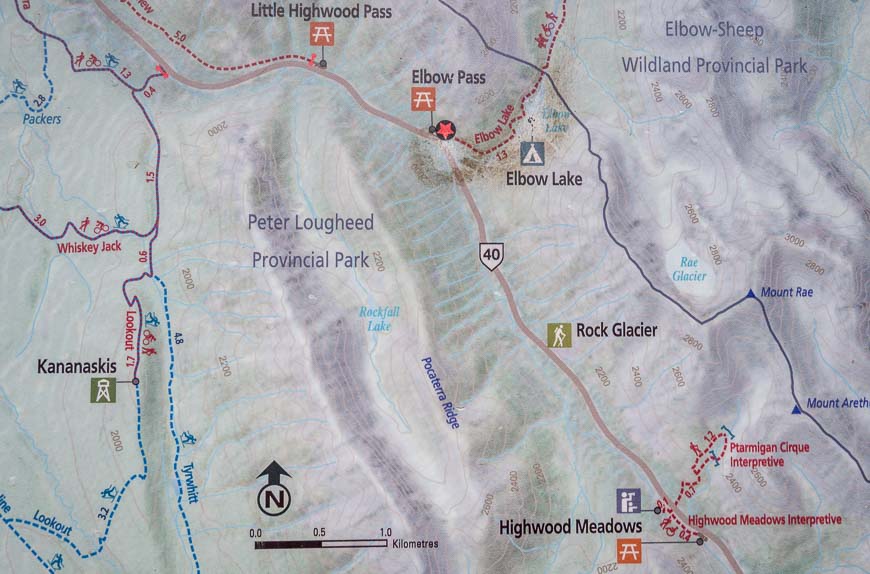
Map showing Elbow Lake & Rae Glacier in Kananaskis Country
Click on the photo to bookmark to your Pinterest boards.

The post The Rae Glacier – Elbow Lake Hike, Kananaskis Country appeared first on Hike Bike Travel.
The Rae Glacier – Elbow Lake Hike, Kananaskis Country Read More »
This week, I was Canoe Dude instead of Hiking Dude!
Last February, I climbed Mt. Kilimanjaro in Africa with a group of church friends and friends of friends. One of those folks was a bloke from Australia. Well, he came to America to visit friends around the country, in CA, MT, and MN. To make sure he experienced the best of Minnesota, four of us went on a 4-day canoe trek in the Boundary Waters Canoe Area Wilderness (the BWCA).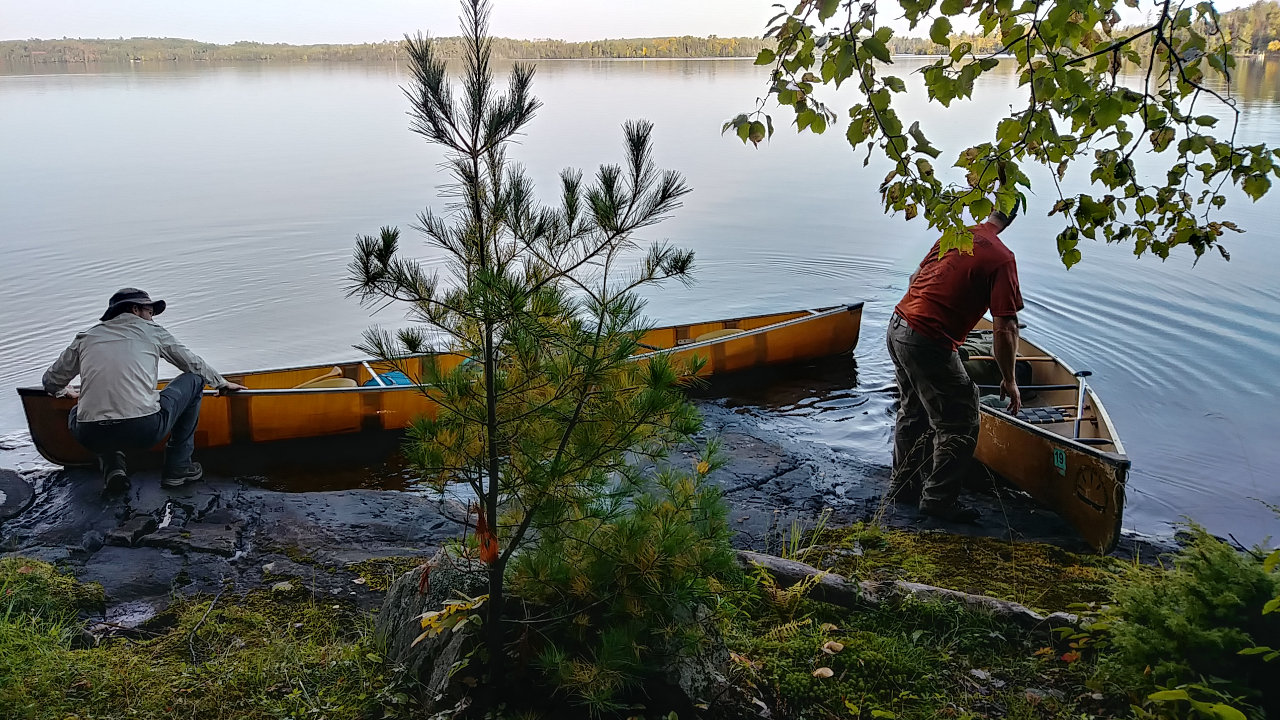

Map of our Route
The blue line is our route with green tents where we camped. You can zoom in on any part you want, or click the box icon in the upper-right to make it fullpage.
The Boundary Waters is a special place to Minnesotans. It is a million-acre wilderness set aside from development for recreational enjoyment, and is one of the most visited wilderness areas in the USA with about 250,000 users per year. There are over 2,000 established campsites spread around more than 1,100 lakes connected by hundreds of miles of riverways in the BWCA. Permits are required to access the BWCA.
Our adventure began with a 4+ hour drive ‘up north’ to Ely, MN where we picked up our permit and checked out the local Piragis Outfitters store in which you can find pretty much everything you need and anything you don’t need. For example, if you don’t want your fresh banana to get bruised, you can buy a plastic banana shell to keep it safe (no, seriously!) It really is a fun store to check out.
A couple miles east of Ely, we piled all our gear in a small motor boat at the boat launch and putted across Farm Lake to a friend’s cabin we used as our starting point. We took a short hike through the woods to South Farm Lake and back to get a feel for the place. Then, a dinner of brats, beans, and beer followed by a game of cribbage and a nice night of rest in comfortable beds.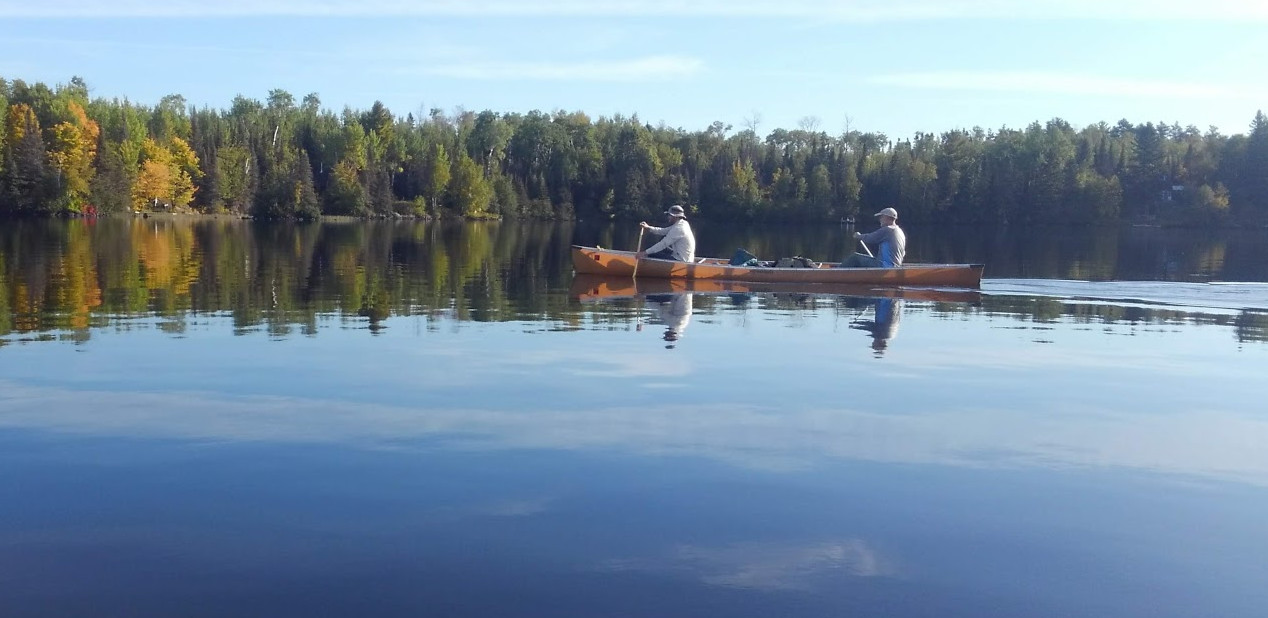
Pancakes for breakfast and we were on the water before 9am. The water was smooth as glass and no one else was around, so we had a wonderful morning paddle into the wilderness.
Minnesota has a wonderful fall color explosion, but we were just on the beginning edge of it. A couple maple trees were red, but most trees were only starting to lose their green, giving way to yellows and oranges.
Our route took us east, up the Kawishiwi River with a couple very short portages, followed by our longest portage of the trip at 210 rods. A portage is a great opportunity to get out of the canoe and hike for awhile. This was my first time balancing a canoe over my head and carrying a pack over a rocky trail through dense woods – it was fun, but hard work.
A ‘rod’ is an ancient measurement unit that translates to 16.5 feet, or 1/320 of a mile. Measuring canoe portages is one of the few times you’ll see it in use these days, mostly from tradition but also because canoes are around 1 rod in length. So, our 210 rod portage meant I carried the canoe for 2/3 of a mile – that was far enough for me.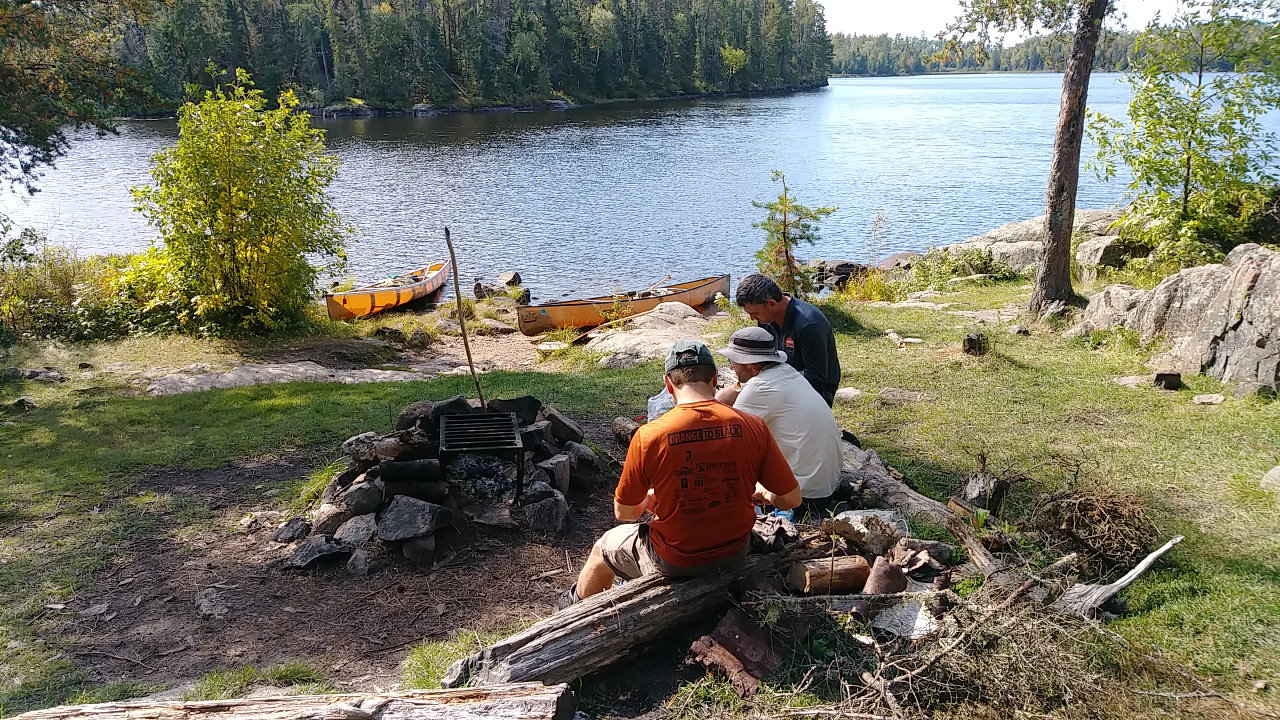
After canoeing a few hours, we stopped for lunch at a typical BWCA campsite. All camping is required to be done only at established sites, so they are often highly impacted. The thought is that concentrating impact to a vew spots will prevent ad-hoc sites from being created and keep the majority of the area pristine. In general, it works great but can mean frustration in high-use summer times when canoeists must keep on paddling until they find an open campsite. This week, we had no problem with campsites since school is in session and most folks are at work – but not us!
You can see the standard campsite layout here – a US Forest Service fire grate, logs around the social area, flat spots for tents, and somewhere off in the woods is an open-pit toilet.
After lunch, we continued up the river, completing another three portages. At one point, the maps showed the water route going two different ways. One way (the correct one) was a longer loop with a couple portages while the other (our choice) showed a more direct path with no portages. We followed the flat water to a creek flowing toward us that was too strong and rocky to paddle up. Rather than turning around and going back a mile or so, we decided to try hauling the canoes upstream since there was no portage trail.
We tied a 100-foot rope to a canoe and tied the 2nd canoe behind. I took the rope upstream and hauled the canoes up, with one person in each canoe steering. Once the canoes were up, Brad held the lead one while I scrambled another 100 feet upstream with the rope. We repeated this 5 times until the size of the rocks, depth of the water, and overhanging brush and trees finally made us give up.
We changed our plans and saw on the map that the alternate route’s portage trail was probably less than 1/8 mile over a low hill to our west. Bob and I bushwhacked into the woods to see if we could find it. At this point, I mentioned to Bob, ‘Hmmm, here I am in the wilderness with no compass, food, or water, hiking off into the dense forest.’ After only a couple hundred feet, we surrendered to the extremely dense brush and admitted defeat.
Upon reaching the canoes, we untied them, piled in, turned around, and shot the rapids downstream. It was exciting and lots of fun for about 2 minutes. I’d say it was worth the effort of hauling them upstream, but I’d probably get some debate about that from Brad who cracked his shin on a rock, raising a big bump and drawing blood. At least, it was an adventure!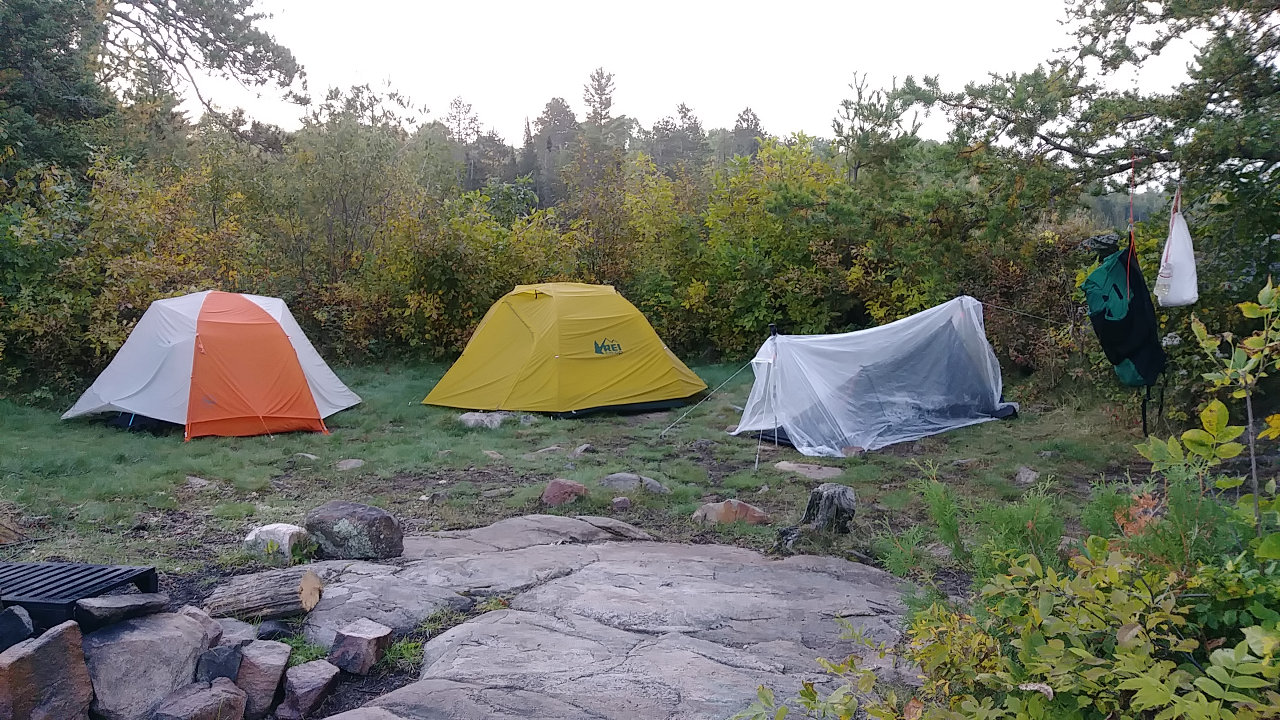
We covered around 13 miles our first day. Having not done a multi-day canoe trip before, I didn’t know how far to expect to go. Two of us in each canoe, with our gear, we averaged over 2 miles/hour and that included time portaging and stopping for lunch. I’m now confident that 20-mile days are reasonable when planning future trips, if I want to cover more territory.
The canoeing was much easier than I expected. As long as you keep your paddle pulling through the water, you keep moving along. Trying to boost our speed seemed to take much more energy than the resulting speed gain, so a consistent pressure against the water is all it takes. Oh sure, the muscles get tired after 7 hours of paddling, but not nearly what I was expecting. With new views continually flowing past, and always looking around hoping for a moose, bear, or eagle sighting, the hours passed quickly.
Our campsite for the night was on a small, exposed peninsula. There was plenty of room for 6 small tents and access to firewood far back in the forest. Here, you can see two real tents and my Hobo Hotel on the right. This is just a bug net with a plastic sheet thrown over the top. I’ll post more about it later.
One thing about using established campsites means there are often (almost always) scavengers around looking for scraps. We had plenty of chipmunks scurrying around at each site and I expect many mice came out at night. Protecting your food from rodents is a good idea, as well as not dropping any crumbs, scraps, or garbage on the ground.
I found some Chili flavor ramen and Thai Chili flavored tuna packets at Walmart, so my simple dinner was pretty spicey! Each of us brought our own food, so we weren’t very efficient but everything was just ‘add boiling water’ type food. After dinner, we had a nice fire and just chatted until it got dark. It was a great day, but the weather forecast says tomorrow won’t be so nice.
I’ve found that bad weather at the start of a trip is not nearly as bad as at the end. Everyone forgets that awful day in a couple days. But, on a short trip, one lousy day is significant, and tomorrow is supposed to be that day.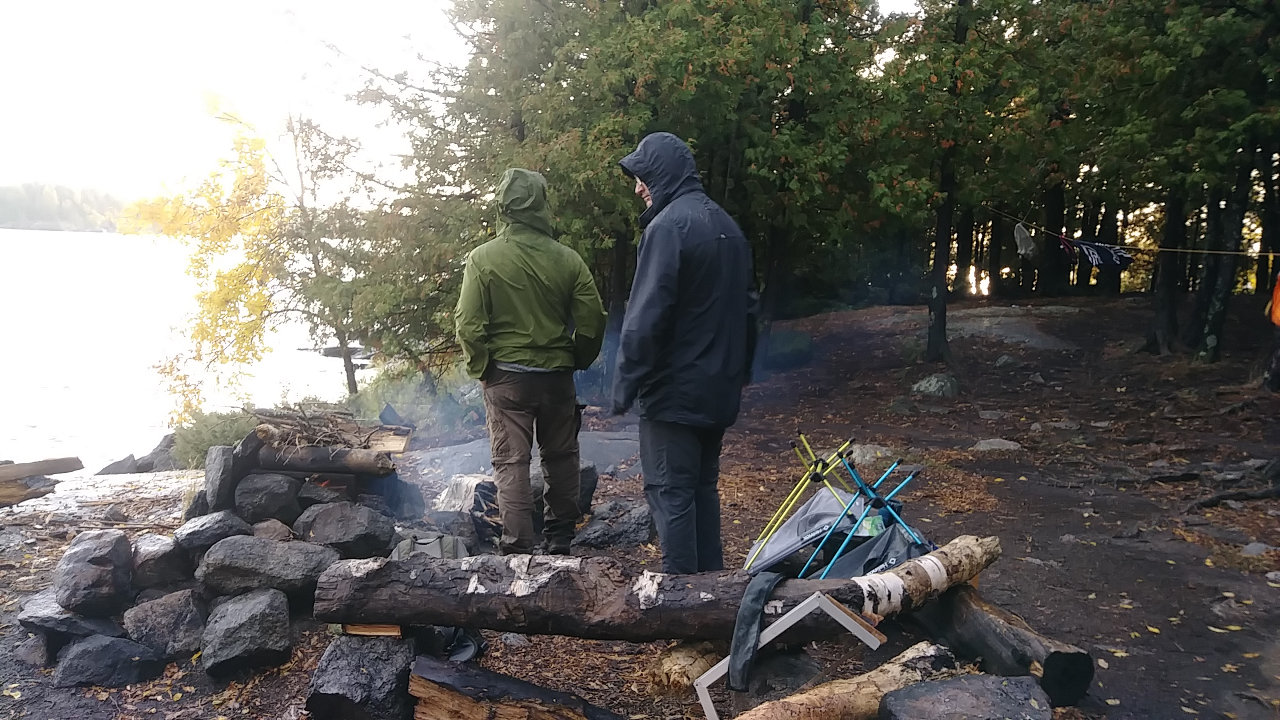
I didn’t sleep very well last night, partly due to beavers slapping their tails in the river much of the night. We found out later that Kawishiwi means ‘river full of beaver houses’ which is a fitting name since we passed by well over a dozen of them.
Today, we decided to use the good morning weather to reach a campsite before the expected rain and winds picked up. It was a short paddle up the South Kawishiwi into and across Gabbro Lake to an excellent site on the southern tip of a very long peninsula. We had a great cedar forest for protection from wind, and a wonderful view across the entire lake from east to west so we could watch the storms roll through. And, roll through, they did!
Just before noon, the rain started, picked up, got very heavy, then torrential, then tapered off to basic rain that finally stopped around 10am the next morning. It was a good idea to keep this a short day on the lake and we stayed mostly dry and warm in camp. Fortunately, one person brought a 10×10 tarp under which we had shelter from the worst of the storm without being forced into our tents. One tent did get overcome by water during the worst of it, but most of their contents stayed dry.
We had gathered wood early, so we got to have a fire again this evening, along with our usual dinners. Tonight, I had chicken ramen with Hot Buffalo tuna – I tell you, StarKist has come out with some good flavored tuna choices.
Not much to share when you sit around camp for almost 24 hours.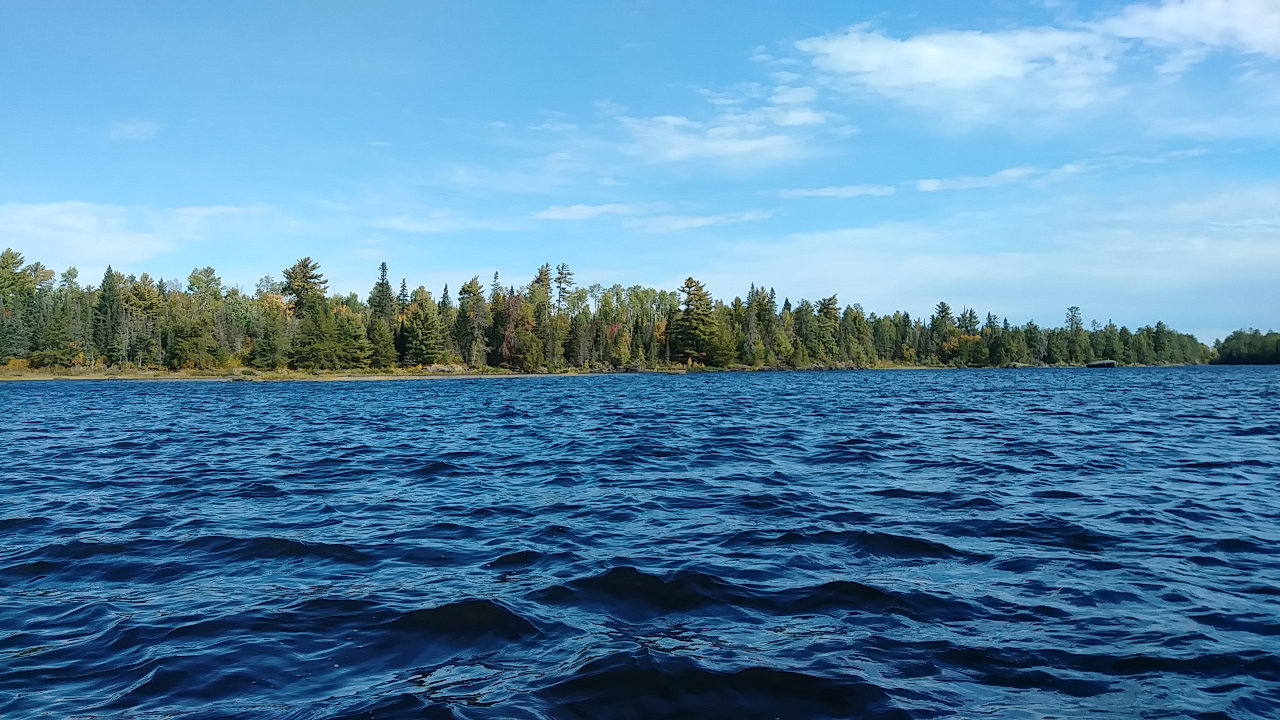
Since we only traveled a few miles yesterday, we either have two fairly short days left or we paddle in farther today and have a very long day out on Thursday. When the rain let up this morning, the wind did not. We will be paddling into the wind to get out, so we chose to go with the two shorter days. But, leave it to us to make a short day as long as possible. 🙂
Today’s water was not the glass-smooth water of the first day, but it was still beautiful. We left camp and pushed south into the wind to cross Gabbro Lake and use the protection of its southern shoreline for our journey west into Little Gabbro. After the rainstorm of yesterday, it seemed many more loons and eagles were out today. We saw a couple dozen of each on our entire trip.
Whether we’re slow learners, or maybe to prove we could do it, today’s map showed two waterways out of Little Gabbro…
OK, on a tangent now – Every lake or river I’ve ever been on has many small creeks, streams, rivers flowing INTO it, but only ONE flowing out. That’s the way things work – water flows downhill, concentrating into larger and larger flows. In the Boundary Waters, it does not work that way! These water bodies are all depressions created when the last glaciers ripped through here around 17,000 years ago and gouged out the softer rocks and then water filled them later. That means that when there’s enough water, there may be multiple waterways flowing out of a lake that rejoin somewhere far downstream. One might be more navigable than the other, or not, depending on the current available water. Pretty weird, I think.
…Anyway, one of our choices today has a 120 rod portage while the other has an 8 rod and a 12 rod portage. Well, I’d much rather do the two short ones, and maybe we’ll get lucky and be able to just navigate through those short ones. After all, they are downstream portages, so we don’t have to paddle against the current. We went downriver about a quarter mile to the first portage. There, we found an old wooden dam with big metal spikes mostly blocking the river. The portage around was short and easy.
Another 150 feet downstream, we encountered a short stretch of fast rapids with a zigzag through some big boulders – not marked as a portage on maps. If they were aluminum rental canoes, I would have gone through but these light, borrowed, kevlar canoes might get a few significant scratches from kissing the rocks. So, we scouted for a way through the dense woods. Intertwined brush and many fallen logs meant a very slow portage with a good chance of injury or gouging a canoe on broken branches. Another dead-end for us.
Back to the canoes, and this time we get to retrace our path Upstream – not nearly as fun as down. Some furtive paddling and a couple rock scrapes and we were back to the dam portage. After that, some more aggressive paddling got us to Little Gabbro, around a point, and to the 120 rod portage! Whew! No big deal, we had extra time today so this 90 minutes was just another adventure.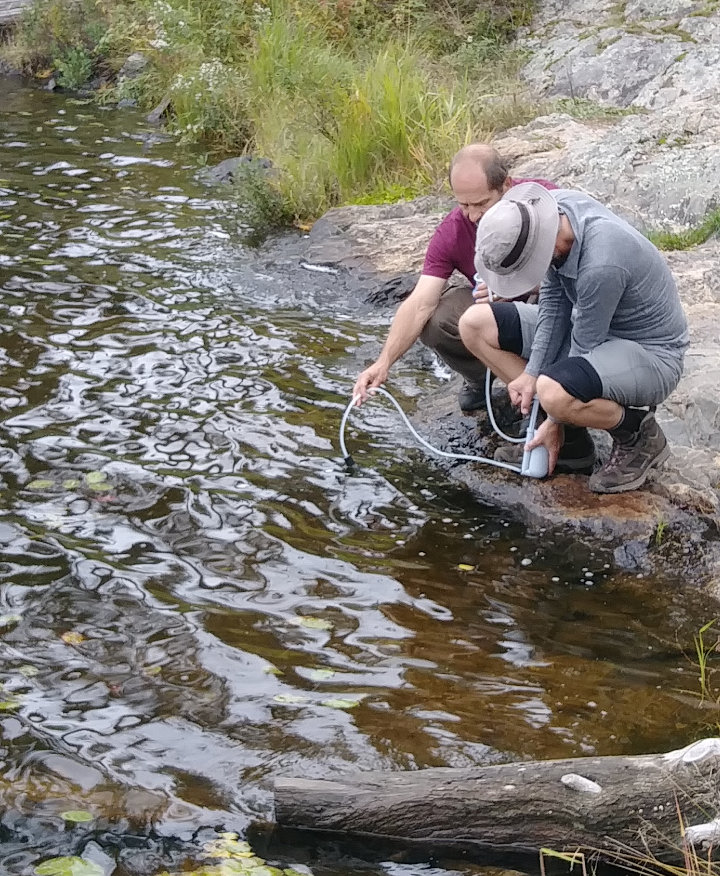
A easy couple miles on the South Kawishiwi River got us to our final 60-rod portage of the day over a beaver dam into Clear Lake. Most of our portages had rocky landings, but this one was nice, thick mud at the put-in point. We paddle from the south to the northwest side of the lake and found an open campsite near our last portage. We could have easily paddled all the way out today, but we’re in no hurry.
At camp, we gathered wood, filtered water, and set up tents. Another beautiful view to the south across the lake with a couple loons and eagles around. I did see a moose track in the portage trail, but that was the only sign of any larger animals around.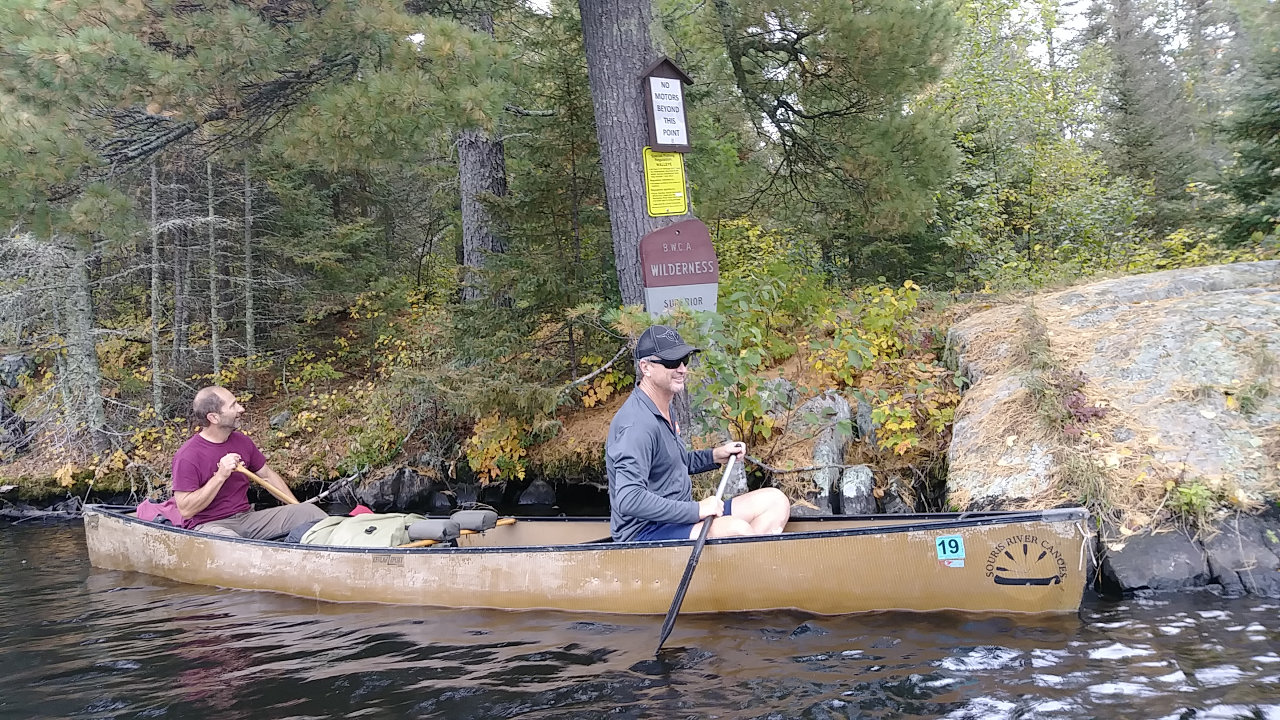
I finally slept pretty well and we had a mellow morning breaking camp. It took 5 minutes to reach the 175-rod portage and then we had 2 hours of smooth, easy paddling back to the cabin. It looked like the fall colors had improved quite a bit in just three days and the cool, dry weather was great for canoeing.
We piled gear in the boat, closed up the cabin, motored over to the boatlaunch and our canoeing trek was finished.
We did add on a 1-mile hike to see Kawishiwi Falls by Ely – cool waterfall with interpretive signs describing the logging operations and current electricity generating dam on the river. After that, we stopped at Gator’s Grilled Cheese Emporium in Ely for lunch – fun place with a model train that runs around the ceiling.
I do think September is the best time for outdoor recreation in Minnesota – low humidity, no bugs, fewer people, and colorful trees. This trip was a great introduction to the BWCA and I look forward to coming back next year.
2019 BWCA Canoe Trek Read More »
Is our banking system essentially a pyramid / ponzi scheme? How dangerously close are we to experiencing a toppling the upside-down pyramid?
Original source: The Bank Pyramid Scheme | Inching Closer To Toppling?
The Bank Pyramid Scheme | Inching Closer To Toppling? Read More »

When I entered Baden-Württemberg mid September supermarkets were already selling Christmas sweets whereas I was enjoying warm and sunny hiking day. The little village of Keltern is surrounded by vineyards but unfortunately the local museum was already closed that late in the season. As I was now skirting the Black Forest I was very keen on eating a real Black Forest cake – but none of the bakeries I passed offered it. What a bummer!
 |
| Cloister at Bebenhausen |
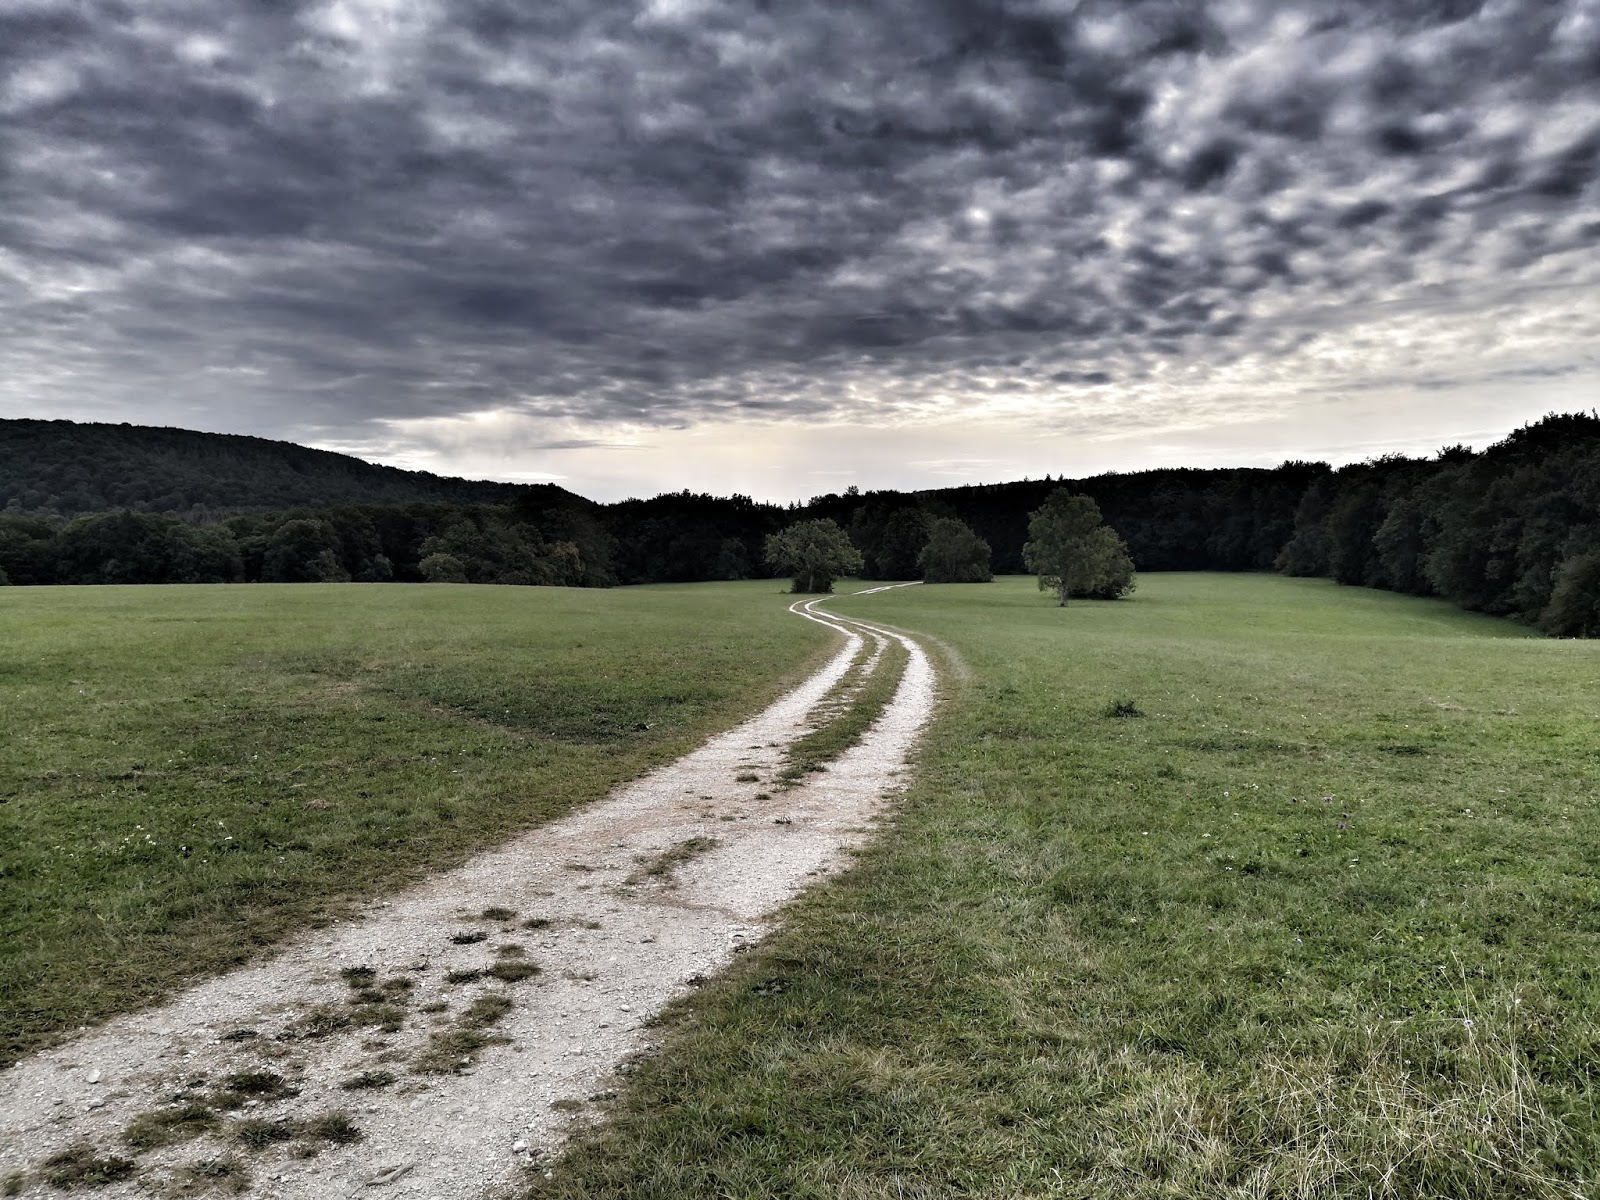
First highlight was Naturpark Schönbuch, a huge forest area with perfect wild camping spaces – until I realized that Stuttgart airport entry lane must be directly above it … Planes were starting and landing until 11 pm and the noise resumed at 6 am. The night was quiet though except for a wild boar that was rummaging around next to my tent. Next was a cultural highlight: former monastery Bebenhausen. I was so delighted that I spent too much time sightseeing and ended up night hiking. I was now approaching Schwäbische Alb and it was difficult to find a flat hidden spot. But I was not the only one around. I probably scared a mountain biker who was running down a steep slope and had not expected anyone on the trail that late at night. Up on the plateau I followed a well known trail for a while: I had hiked the Albsteig several years before and had truly enjoyed it.
 |
| Up on the Schwäbische Alp |
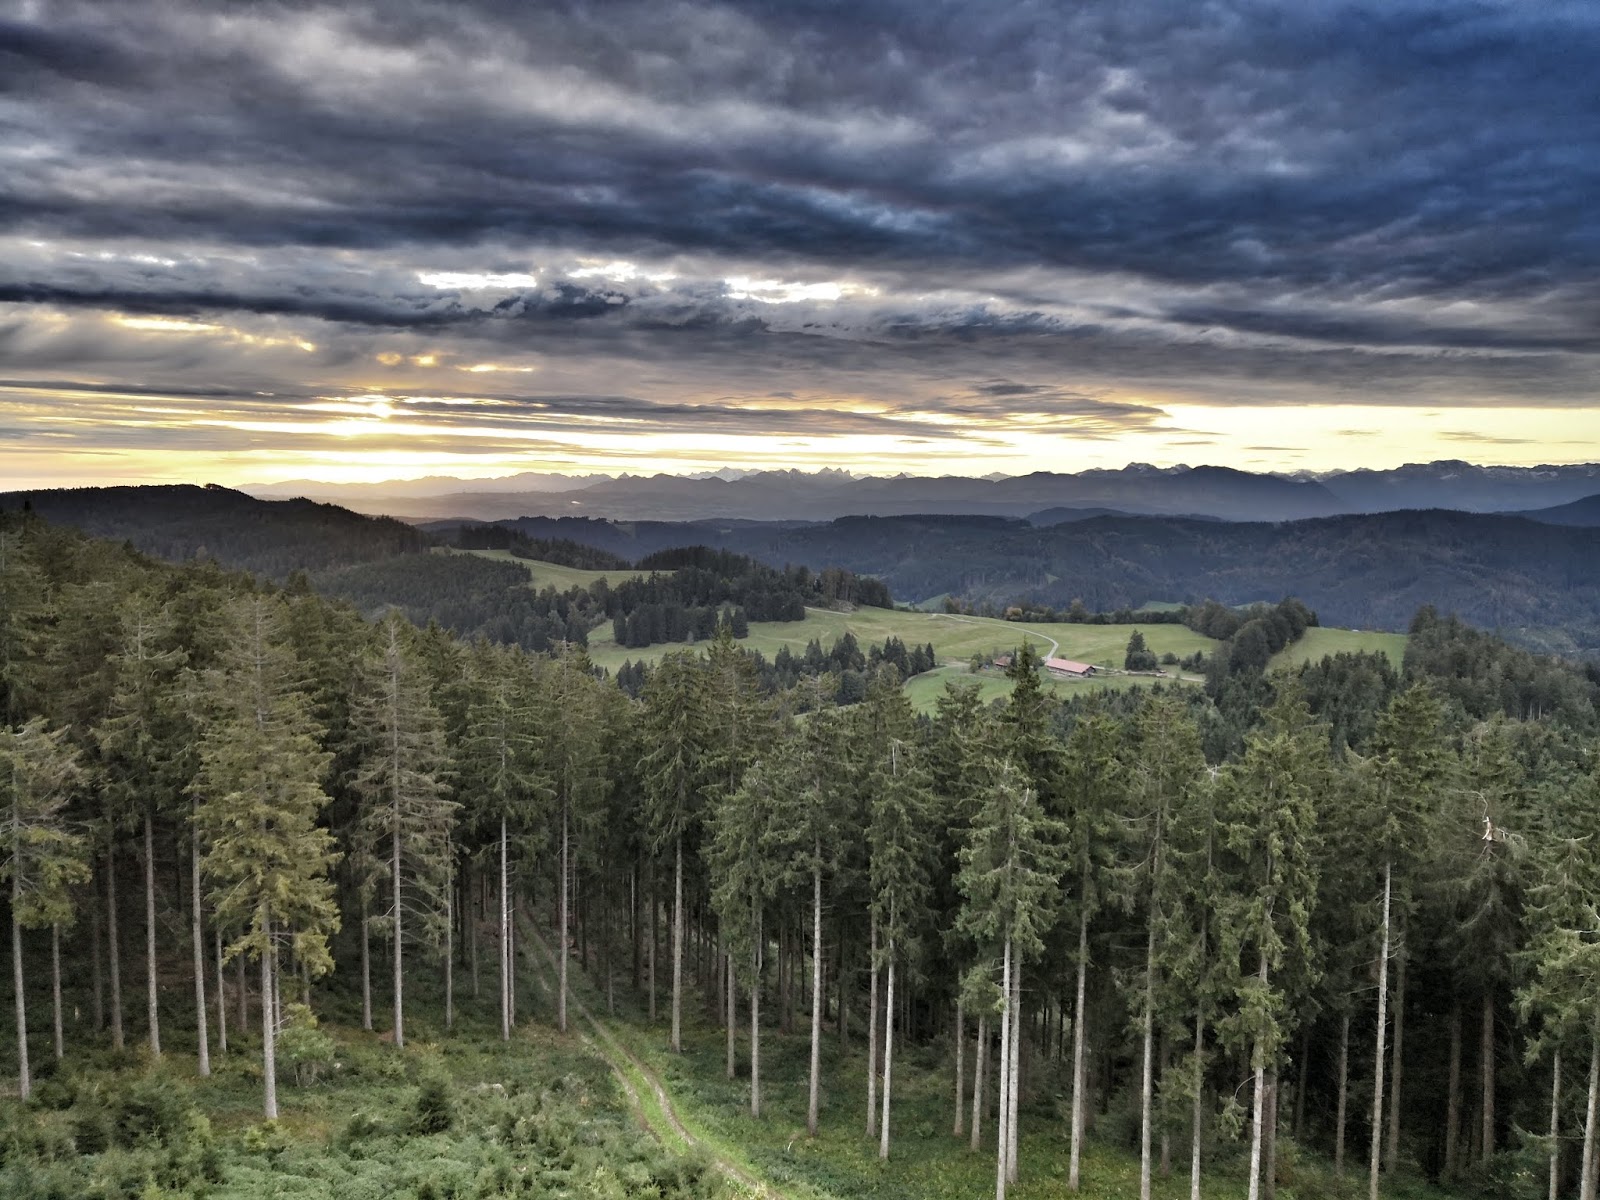
The climate up here is relatively harsh compared to the lower lying agricultural areas. There are no fields but plenty of open meadows where sheep and goats are grazing. I was now hiking the HW 5 but during the few kilometers that this coincides with the Albsteig I came across two highlights: Nebelhöhle, a huge flowstone cave where the temperature is only 10 degrees year round and the fairy tale castle Lichtenstein which was built after a novel written by Wilhelm Hauff. The views from the plateau were wonderful and I was sad to leave the Albsteig so soon.

 |
| Lauter valley |
But the HW 5 had other highlights for me: In the small town of Indelhausen snails were cultivated until the 1950s – a small snail garden and a monument reminded of that unexpected fact. The trail then followed the little river Lauter (the second river Lauter of this trip!) and the views down into the Lauter valley were incredible despite the slightly bad weather. I was now crossing the river Danube at Obermarchthal. Because of the bad weather there was no traffic on the Danube bike path which a hiked for a short distance before arriving at huge monastery where I had booked a bed for the night. There are no more nuns there and the big complex is now used as a conference centre. I had a big room inside the old convent and arrived just in time to have a glimpse inside the Baroque church – and to join the daily AYCE-buffet. I was the only hiker amidst a dozens of software developpers. This was one of the nicest (and cheapest) accommodations of the whole trip. Had known this beforehand I would have spent a rest day here.
 |
| Sunrise at Wurznacher Rieß |
But I had to press on despite the rain because I had to leave the trail at Biberach an der Riß and attend a festival in Switzerland. I resumed my hike one week later in the same town. Next I hiked through Wurnacher Rieß, a huge swamp, which was crossed by an old railway line because peat had been collected here in former times. This was unfortunately when the weather turned really bad. Luckily I had brought an umbrella for htis stretch which came in very handy!
 |
I have experienced a lot of detours during my hiking career but the next one had an unusual reason: Explosives Ordnance Disposal! The trail was closed off with warning signs but no detour was signposted. Because it was a Sunday I decided to ignore the signs and hike on. This decision was soon confirmed by a mountain biker who was cycling towards me. There was indeed a big excavation area in the forest but as was to be expected no one was working there. It was difficult to find a hidden campspot that night but luckily refrained from camping close to the forest road.
 |
| Alpsee at Immenstadt |
Because at 4.30 am a truck came thundering along and loaded trees. I suspect this might have been wood thieves … At least this way I woke up early and arrived at a huge observation tower (where I could have slept in …) right at sunrise and had a first glimpse of the Alps. The weather continued to be horrible. When I arrived at Immenstadt the view across the Alpsee was basically zero due to fog and rain. I rented a room and deliberated what to do. I was now joining the Maximiliansweg which would take me up high into the moutains but the forecast for the entire week was cold and rain … And therefore after sleeping one night over the idea I decided to call it quits for this year and took the train back home.
Europe Diagonal: Baden-Württemberg Read More »

There’s nothing worse than doing a long hike, getting back to your car, and finding out that your keys are missing. And it’s even worse when you are parked at a trailhead in the middle of nowhere. These tips will help you make sure that your keys are safe during the hike and that you get home safely.
The post How to Keep Your Keys Safe When Hiking appeared first on HikingGuy.com.
How to Keep Your Keys Safe When Hiking Read More »
In support for the sponsors of Modern Survival Blog, a few gift ideas for the upcoming Christmas Holiday Season. Supporting them, supports us. Thanks.
Original source: Preparedness-minded Christmas Gifts From Our Sponsors (<$25)
Preparedness-minded Christmas Gifts From Our Sponsors ( Read More »