October 1, 2025

We’re with you every step of the way!

Whether you’re a returning entrant, or brand new to the RoSPA Health & Safety Awards, going through the entry process can seem a little daunting… but don’t panic! We have a highly dedicated team at RoSPA to help.

We caught up with two members of the RoSPA team, Dr Karen McDonnell and Matt Cryer, to find out how they can help entrants on their awards journey.


Dr Karen McDonnell, CFIOSH, Chartered FCIPD

OHS Policy Adviser, Head of RoSPA Scotland, Past President IOSH
As a highly motivated advocate for safety and health, Karen is skilled in partnership working, with a track record of working with and through key stakeholders across the UK’s health and safety network. Karen has a broad range of strategic and operational experience gained over 25 years whilst working for RoSPA. Karen can help award entrants in a number of ways…

I can statement Karen all quotes


Matt Cryer, TechIOSH

Awards Standards Manager
Matt is the Award Standards Manager for RoSPA’s Health and Safety Awards scheme, responsible for developing and overseeing the assessment process, judging panels and question sets. During Matt’s time at RoSPA he has gained the NEBOSH General Certificate and TechIOSH status. With his wealth of awards experience, Matt can assist award entrants from the start, right through to the end of your awards journey…

I can statement Matt all quotes


As well as support from our team, we also offer a Free Mentoring Scheme, where we put you in touch with an experienced, high achieving award winner, to help you maximise your entry.

January is all about setting goals and planning for the year ahead. With the next RoSPA Awards deadline a mere four months away (April 30 to be precise), we’re asking organisations across the globe; could you become a #rospawinner?

Find out how to get involved by visiting www.rospa.com/awards before April 30 to be part of the 2020 Awards.

We’re with you every step of the way! Read More »

Greater Patagonian Trail GPT 11

When I was getting ready to leave Lonquimay after one night in a hotel I encountered two other GPT hikers in the supermarket. Big surprise for both parties and of course we both delayed our departure and chatted quite a while. Although this Swiss couple with hiking my direction I would not meet them again because they were behind me – and I was now taking a huge detour! On the upcoming trail section there had been a big landslide last year and every hiker had complained how dangerous it was to get around it. And I had realised that in order to enjoy this difficult trail I wanted to avoid any risks if possible. And as there existed a detour around this section I decided to take it!

Problem was that nobody had ever hiked the entire length of this long detour before! It involved a lot of road walking – and two bridges which I could not confirm 100% on google earth. This was going to be an adventure … The section started with a long road walk and first impressions of the volcano Lonquimay. When I turned onto the paved road accessing the National Reserve I was surprised by the amount of tourist traffic. My plan was to continue hiking on that road that would soon turn into dirt. But when I arrived at the entrance of the reserve a very friendly female ranger more or less talked me into taking an even longer hike into the reserve … In hindsight I can’t believe I took that risk because I had no gpx track of this route, there was no official map of it – there only was a small one page color photocopy of google earth. But the ranger praised this route so much and swore that her colleagues had only recently blazed it that changed my mind and embarked on this 45 km route through the reserve. According to the ranger it would take 4 days ….

To my delight the trail marking was indeed fantastic! I had never seen anything similar before. There were wooden posts and painted blazes on rocks the entire way. The views were outright spectacular and not too much snow was left. I even found a great water source that was not marked on my “map”. But instead of camping there I made the mistake of continuing. My “map” called the next kilometers the “labyrinth” and I was soon to find out why. I had to traverse a huge lava field and the trail zig-zagged through sharp lava outcrops. It was very strenous hiking but the waymarking was excellent! I was reluctant to camp in this lava field because it was so high up and completely exposed and pressed on until almost sunset. Despite my fears the night was completely calm with no wind and it was not as cold as expected. The view in the morning was incredibly: I was camped between two snow covered volcanoes under a completely blue sky!

Trail marking continued to be great and a water source appeared just in time. Soon I was descending below tree line again. On a steep slope a whole herd of cows was walking in front of me because the trail was so narrow that they could not let me pass …
It took me only two days to hike this traverse and I did not see a single soul during that time. In hindsight this was one of the most beautiful sections of the GPT – although it is not even the main route! Finally I had found the perfect mix of great landscape, good trail and trail marking. I sent an email to the ranger to de-register and embarked on the upcoming long road walk to rejoin the main GPT route.

The road walk turned out to be much nicer than expected. It was pure dirt and hardly any traffic – expect this French cyclist. He was not making a lot more kilometers cycling than I was hiking! Coming from where I was going to he assured me that the two bridges really existed – a great relief for me! He also told me that there was tunnel! Tunnel? I could not believe that but sure enough the next day I had to walk through a 400 meter long tunnel. There was no pavement and lots of horse droppings inside because there were more riders than drivers using it … Of course there was no lighting either ….

I camped close to the dirt road and was convinced that it was so bad that cars did not use it any more. In the morning I learnt that I was completely wrong: not only a car, but a small bus fought its way up the mountain …
I even passed an abandoned orchard full of cherry trees. I enjoyed the unexpected vitamins a lot …
The second bridge was a narrow metal construction over a deep river gorge with plenty of horse droppings on it. I cannot understand how the cowboys manage to drive cattle over such a bridge where even I felt uncomfortable looking down. There was a well stocked minimarket on the other side where I had a very long lunch break before finally joining the main GPT route again. I had made a detour of over 100 kilometers but I have enjoyed it a lot. In hindsight this has been one of my favourite stretches of the entire GPT! Even the road walk has been pleasant …

Greater Patagonian Trail GPT 11 Read More »

Security Information Overload: From Panic to Apathy & the Remedy

Security Information Overload: From Panic to Apathy & the Remedy

Security overload leads to apathy. How often do you hear a car alarm go off and roll your eyes hoping the owner would disable the blasted thing before the incoming headache comes a knocking? The primary objection I have to such systems is they work too well. Every week I hear an alarm being triggered […]

This is just the start of the post Security Information Overload: From Panic to Apathy & the Remedy. Continue reading and be sure to let us know what you think in the comments!


Security Information Overload: From Panic to Apathy & the Remedy, written by Thomas Xavier, was created exclusively for readers of the survival blog More Than Just Surviving.

Security Information Overload: From Panic to Apathy & the Remedy Read More »

How to make a Wooden Mallet for Bushcraft & Survival

When I was about 10 years old, my Grandfather made my brother and I each a gift – a wooden maul for splitting wood. It’s made from a large 8″ diameter x 4-foot hickory log. I remember when I could barely lift it. It was a practical gift and a true working man’s tool. While I didn’t appreciate the work that went into carving it at the time, it was the perfect tool for crushing the enemies of my favorite GI Joe and He-Man warriors. Almost 35 years later, I still have that maul. It’s as good now as the day I received it. It’s stained and a little beat up, but it’s a great tool that reminds me that all gifts don’t have to be bought. Some of the best ones are made.

So today, my gift to you is to show you how to make a wooden mallet or maul of your own or for a gift.

My 33-year-old hickory maul that my Grandpa made for me.

From driving in tent stakes to pounding a wedge for splitting wood, a solid wooden hand mallet has countless uses around base camp. Not only is it useful, it’s a really fun project. Besides, having a mallet on hand is always a good idea and packing in a hammer isn’t fun. You can make your own in just a few minutes, while the bread is rising in the dutch oven. While these can be made as large as you’d want, the tutorial below shows one that is a perfect size for light duty pounding.

Start with a solid, seasoned log that is approximately 3-4″ in diameter x 12-15″ long. The first step is to saw in what’s called a “stop cut” to form the head of the mallet. Saw all the way around the log and leave the center of the log untouched. This untouched area will ultimately form the handle of the mallet. The excess will be trimmed or batoned away in the following steps. Remember, you can always make the stop cut deeper but you can never put wood back in. Start by making the stop cut a little more shallow than you think you will need, especially if this is your first mallet.

4″ x 12″ log with stop cut all the way around.

Next, begin to trim away the excess wood from the handle portion of the mallet. The stop cut will prevent you from accidentally splitting off the head portion of the mallet.

Using a knife to split away excess wood from around handle.

Continue to split and carve away wood from around the handle until it’s the desired diameter.

Once the handle is close to the diameter you’re wanting, simply finish it off by carving away any rough edges or splinters. A final coat of linseed oil or beeswax will protect the wood and keep your mallet in working order for years to come.

What uses can you think of for a wooden maul or mallet in the woods?

Remember, it’s not IF but WHEN,

Creek

The post How to make a Wooden Mallet for Bushcraft & Survival appeared first on WillowHavenOutdoor Survival Skills.

How to make a Wooden Mallet for Bushcraft & Survival Read More »

Woom Bikes – Because Also Kids Deserve Great Bikes!

How do you ensure that your child likes to ride its bike, come rain, sunshine or snow? In our opinion it’s by giving it a bike which it likes and which works well throughout the seasons!

Speeding up on the woom 5

Disclosure: The woom Bike was provided for free to us for this review. As you know: I’m keepin’ it real and tell you how it is – I maintain full editorial control of the content published on Hiking in Finland. Read the Transparency Disclaimer for more information on affiliate links & blogger transparency.

That we are a family which ride their bikes year-round I wrote earlier this year, and now I want to shed a bit of light on the latest addition to our bike shed: The woom 5. woom makes bikes exclusively for kids, and that you can see in their products: They are made for the needs of kids, and not just some fancy, miniaturised version of an adult bike. The woom bikes are light, safe for the rider and safe in traffic, and there’s a host of functional and pretty accessories available for the bike. That they do it for kids you can see for yourself when you have a woom bike in front of you, as around 85% of their bike parts are individually designed and produced exclusively for woom, customized to fit the needs of small anatomies.

Now we have owned several non-woom bikes for our kids before we made the switch, and I have done plenty of research on the topic, too. One thing you’ll read in review after review is that the lighter a kids bike is, the better it is for the child. From our own experience with some very cheap kids bikes which were heavy as two bags of cement we can confirm: The lighter the bike, the more fun the rider has. woom bikes are around 40% lighter than comparable kids bikes, so as an ultralight backpacker this is obvious very positive, too. But enough about facts and stats, lets dive in to our subjective observations of riding the bike for almost three months.

Riding is fun!

At the Beach

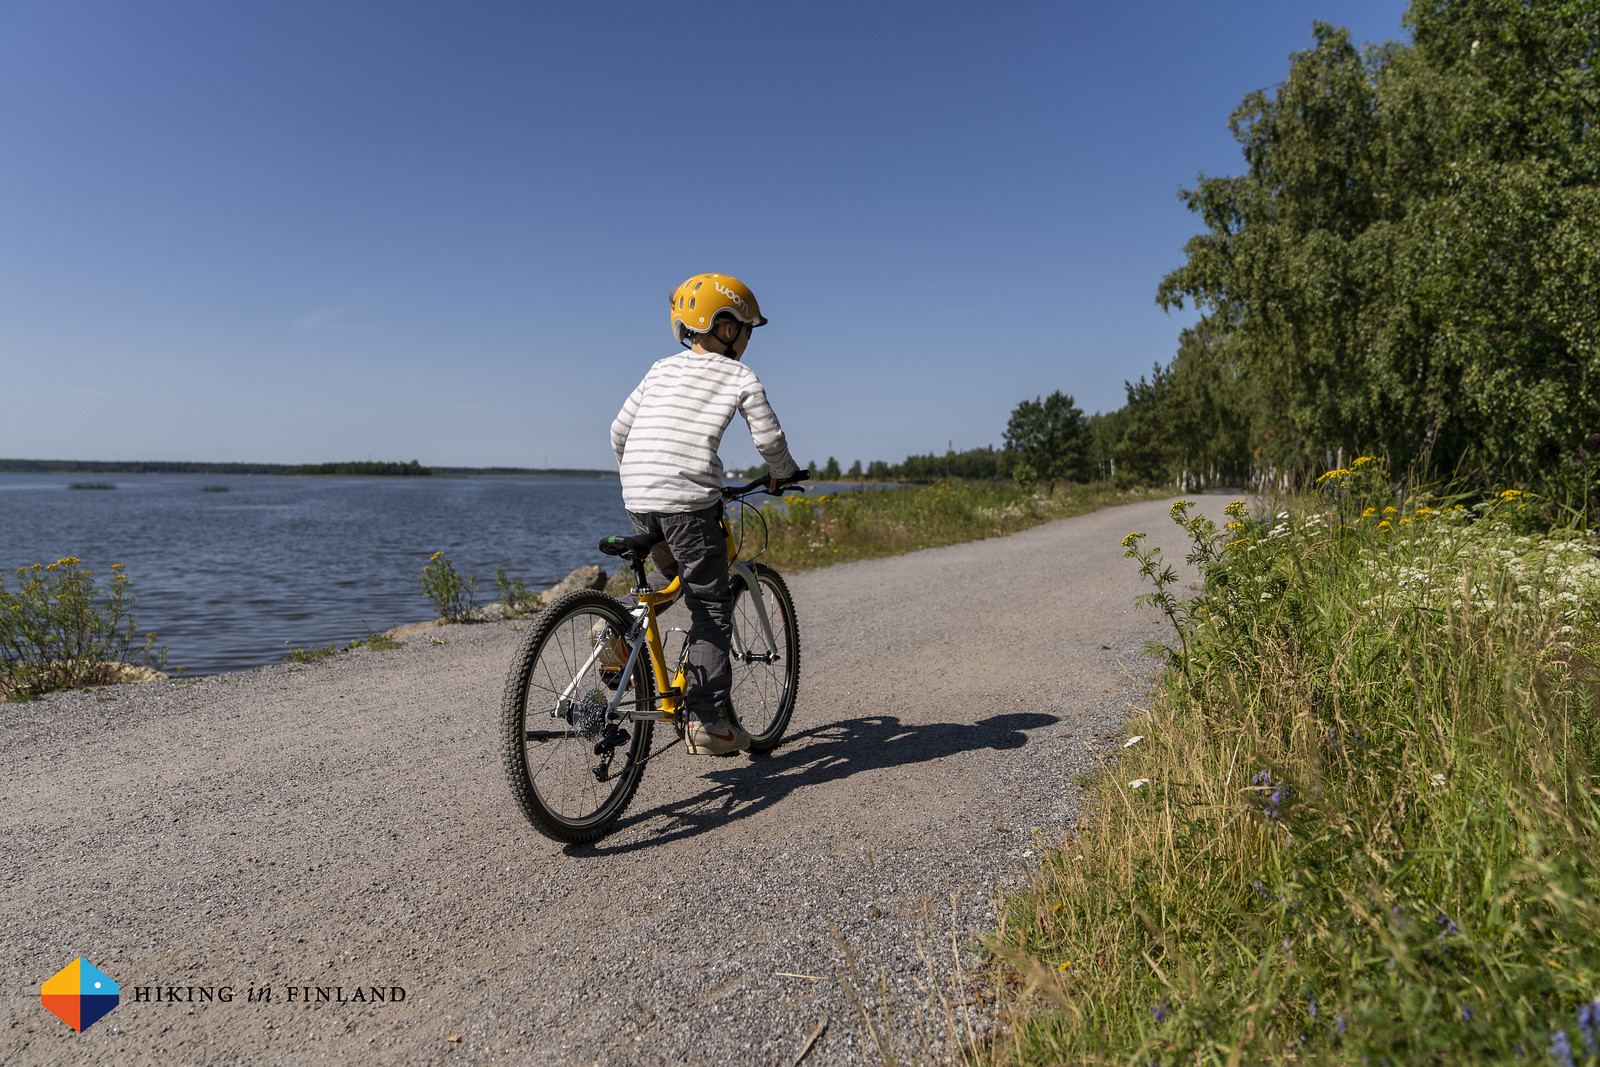
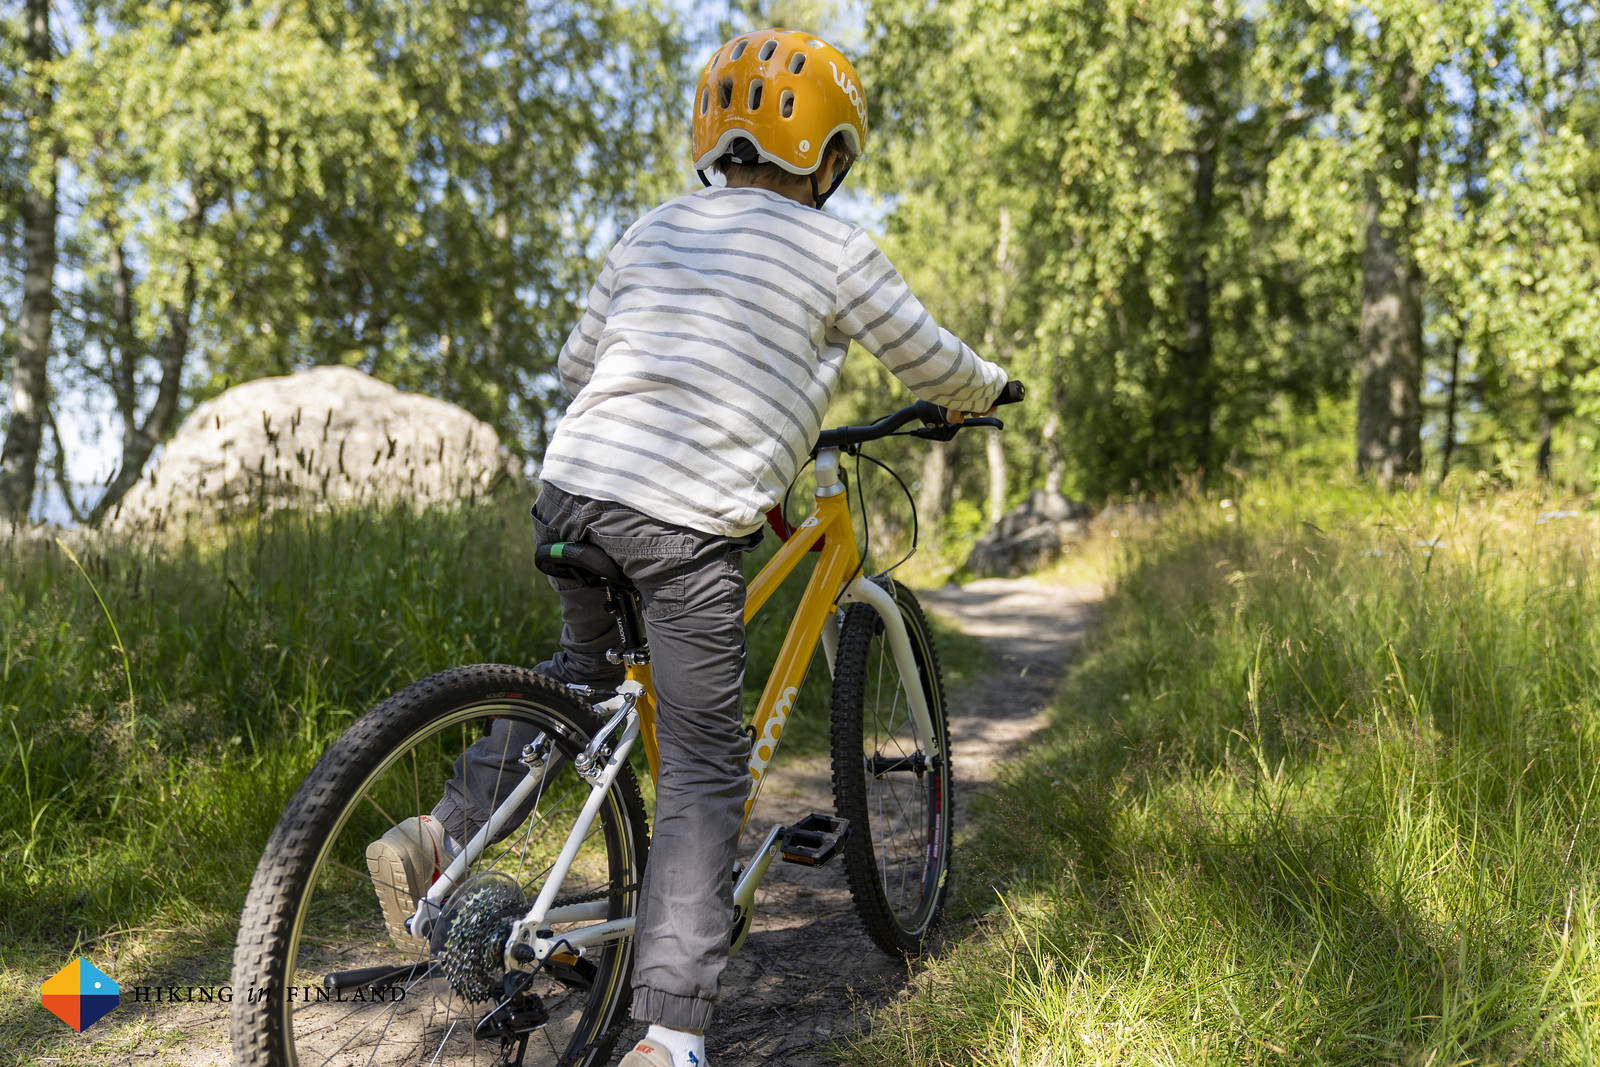
Now our son was already riding a woom 4 which he and we loved, but the one thing which became obvious as time went on was that the bike got too small for him. The woom 4 is made for kids between a height of 115 and 130 cm, though realistically I’d say that after 125 cm one should switch to the bigger bike. The woom 5 is made for kids between a height of 125 and 145 cm, and for our son it’s right now the perfect bike. Where in the past I had to say several times on a trip “Please cycle faster!” nowadays, since he’s on the woom 5, I have to ask him to slow down. He’s soooo fast on the new bike that he really likes to challenge us to races, and often enough wins! Thanks to the adjustable seat post and the vario stem the bike grows with him, and we hope that he’ll be able to ride this bike for a year or two (and that simply depends on how fast he grows!).

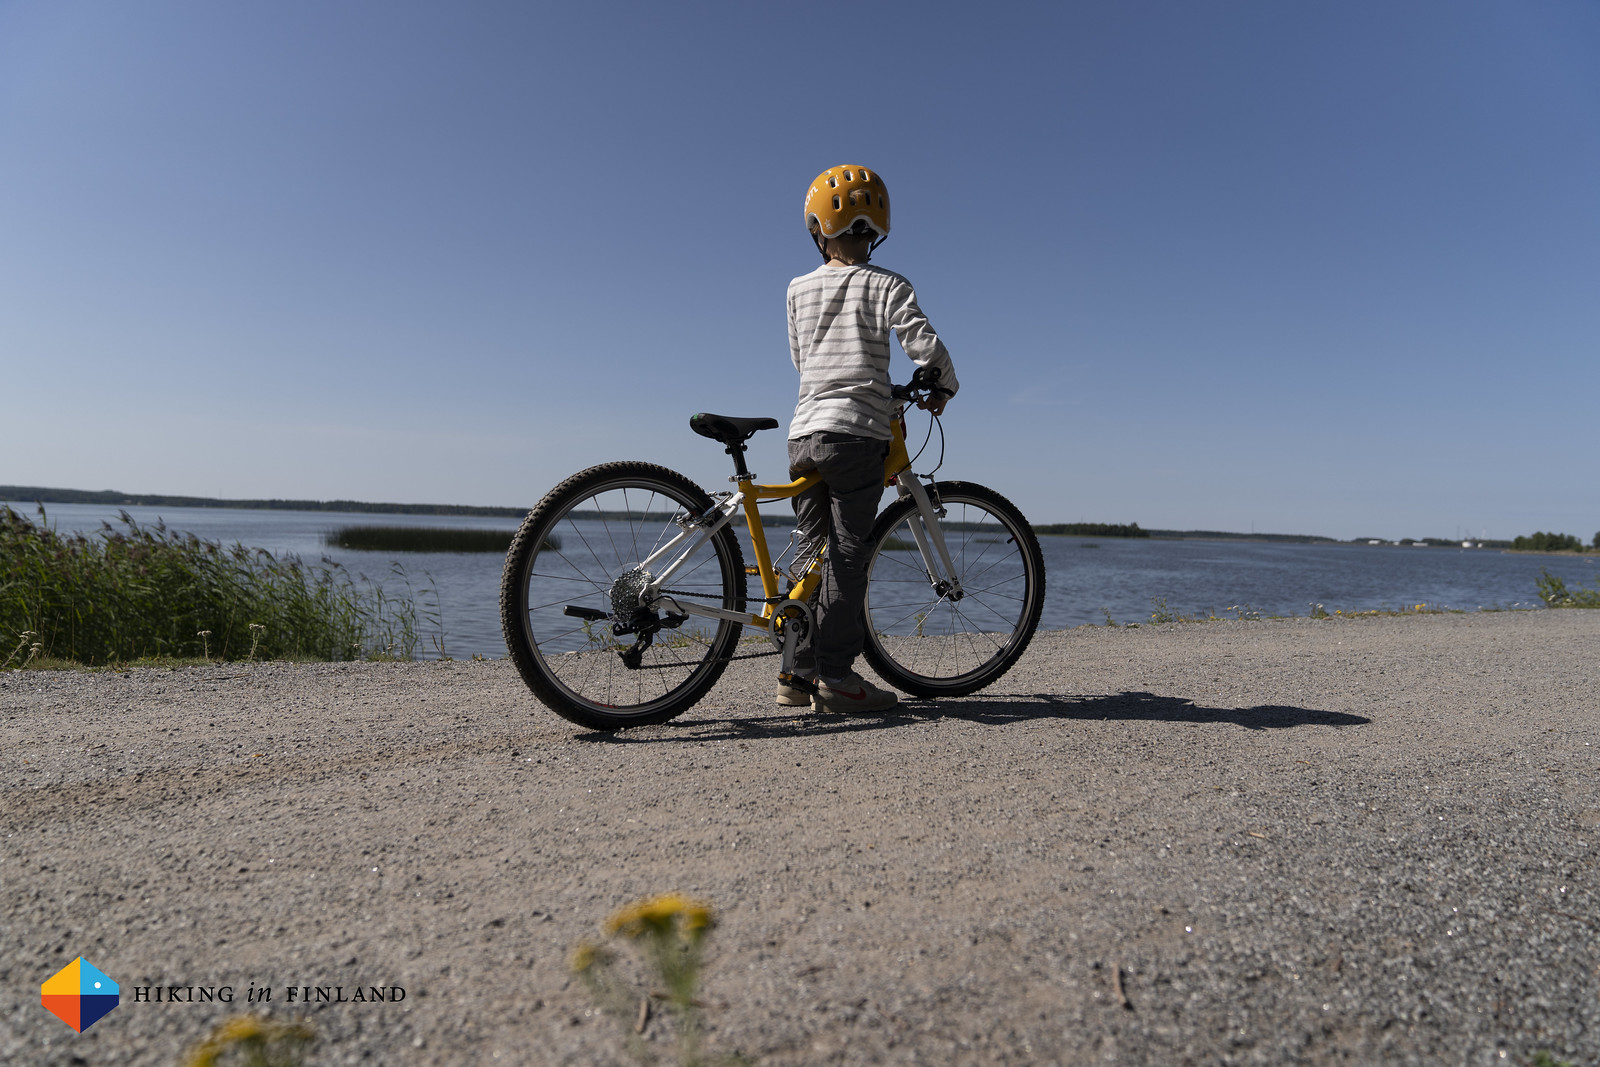
Going fast also means he needs to brake, and the the V-Brakes on the bike are so good that it takes little effort for him to stop safely. The SRAM X4 8-speed derailleur and the easy grip shift make switching gears easy as pie when we go up hills or ride into the wind, and the tires it comes with have a low rolling resistance and great grip from asphalt to single track trails and gravel roads. The Geometry also is great, because he can easily get on and off the bike and if he wants to stand on his feet, for example when taking in a view or waiting at a stop light, the top tube is at a friendly height.

Exploring

Should we stop for coffee and waffles?

Taking in the view

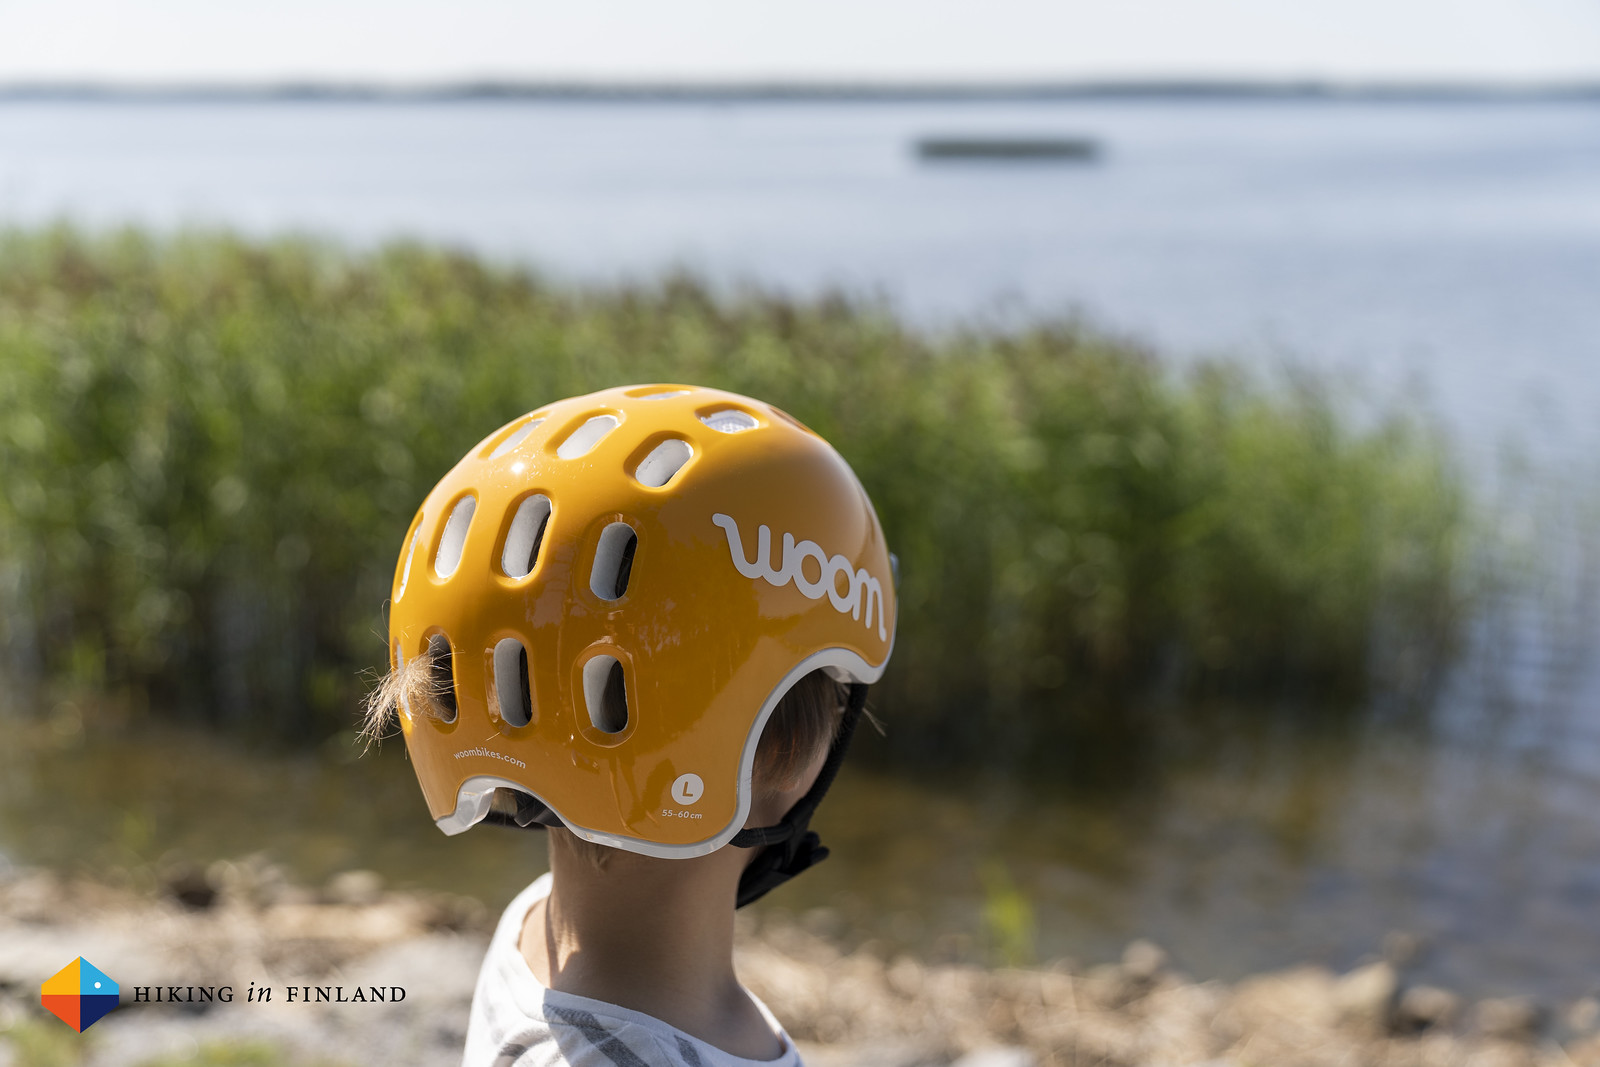
Just a few words on assembling the bike before we wrap up this review. The bike is delivered in a 120 x 62 x 22 cm box and weighs around 10 kg (the bike itself is 8,2 kg light), and it comes with all the tools you need to assemble the bike. You can add a host of useful accessories to the bike, from the mandatory Fenders (which I yet have to install!) over the Kickstand to the bell. We also got a Size L woom Helmet in the same colour as his bike, and while the previous helmet had some shortcomings we hope this one will survive the next Finnish winter. It is, other than the problem with the extreme cold, a great helmet which is well ventilated, easy to adjust and our son can open and close it easily thanks to the magnetic buckle closure.

woom Helmet = Safe Head

Single Trail

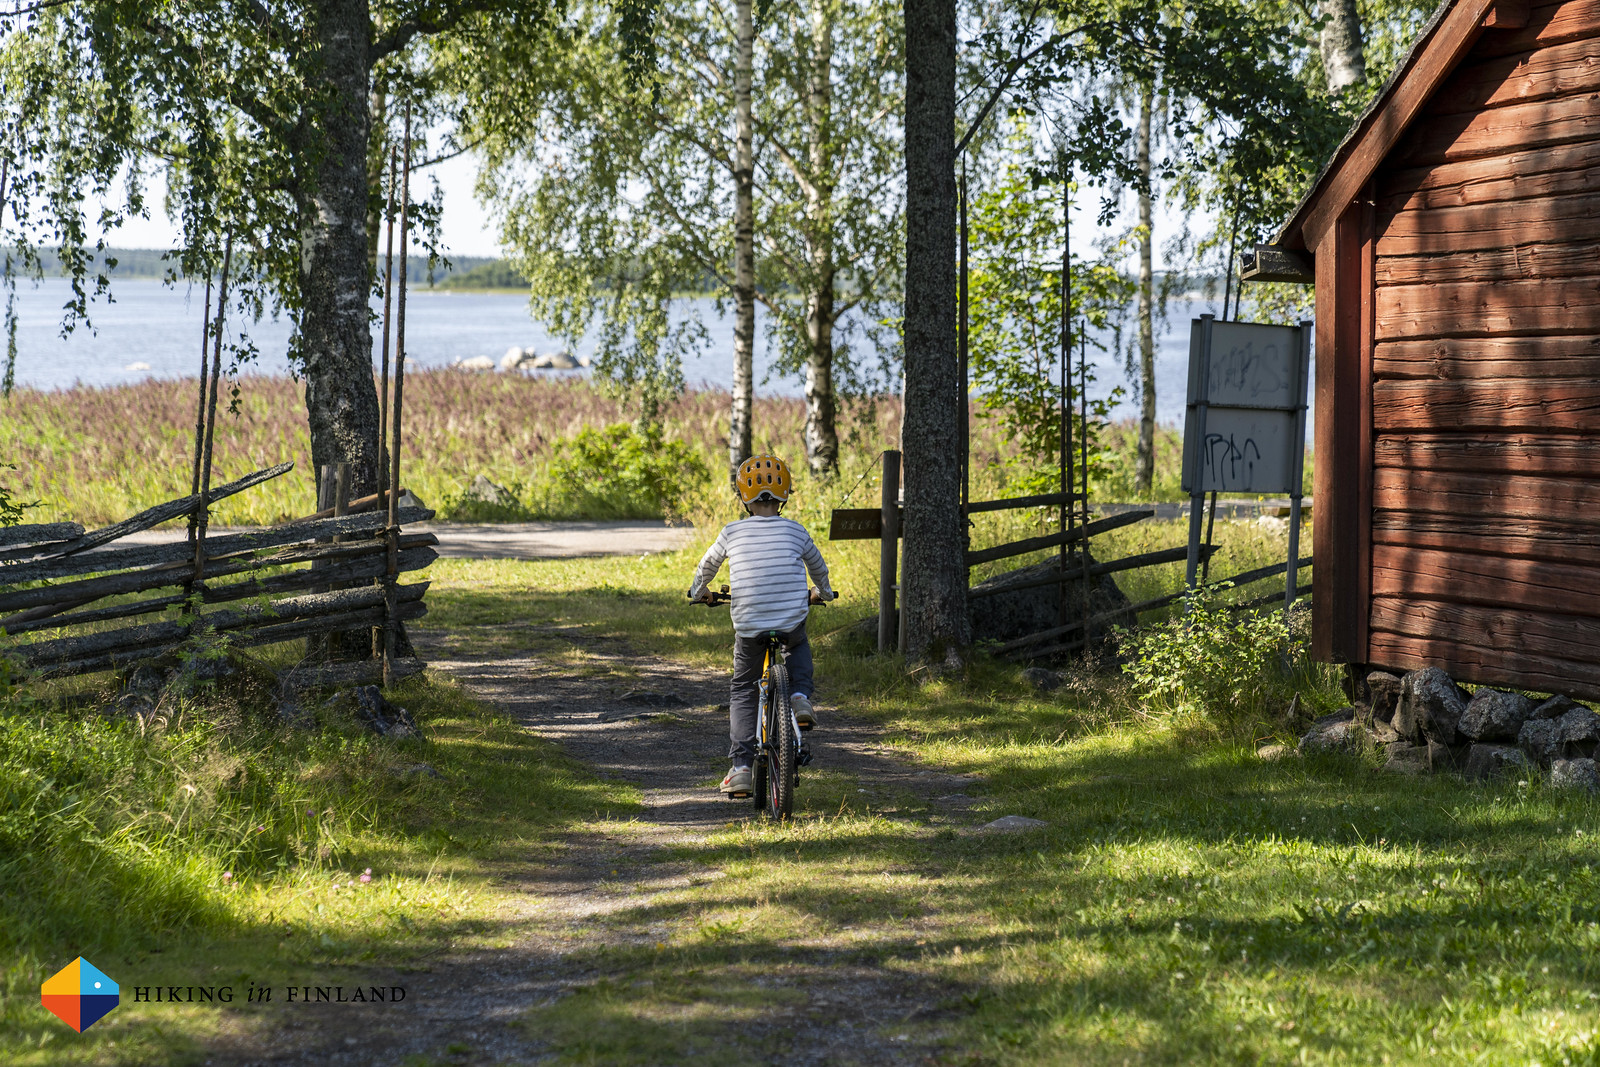
All in all our son and us are very happy with the latest addition to our bike shed. He enjoys cycling now even more (as he can go so fast) and a lot of his friends have come up to him and wanted to ride his cool bike. I keep on repeating myself, but he cycles fast thanks to the bigger tires and the correct size for his height, and I think we’ll try to squeeze in some bike trips before winter is coming as he seems to be able to easily ride 40 km a day with some ice cream and Pulla breaks in-between. I also intend to go ride some easy single trails with him here in Vaasa, as he has enjoyed the short bits where we were riding in the forests a lot.

So to sum things up, if you want that your child enjoys cycling then the best thing you can do is get them a bike which makes them want to ride. The woom 5 definitely is such a bike for our son, as he loves to ride (fast!) on it, be it to school, to the beach or the ice cream parlour. The bike is safe, handles really well, is specially made for kids with great attention to details and easy to maintain for me. We are looking forward to many more rides together, both in town and on trails!

A small break

Enjoyed this article? Support me on Patreon and get some useful rewards (like hanging out on Discord with me, where you can pick my brains!) or buy me a coffee – I work Full-Time on Hiking in Finland to bring you inspiring trip reports, in-depth gear reviews and the latest news from the outdoors. You also could subscribe to the rarer-than-ever Newsletter and follow along on Instagram, Twitter, Facebook and Youtube for more outdoorsy updates!

Woom Bikes – Because Also Kids Deserve Great Bikes! Read More »

Be Prepared, but Don’t Get Overwhelmed By The Coronavirus Hype

Be Prepared, but Don’t Get Overwhelmed By The Coronavirus Hype

The only thing that is for sure about the current Coronavirus outbreak is there is a whole lot of information and misinformation being spread throughout social media by so-called experts who may or may not […]

This Article Be Prepared, but Don’t Get Overwhelmed By The Coronavirus Hype is an original article from OFFGRID Survival If it is appearing on any other site but OFFGRID Survival, that site does not have our permission to use our copyrighted content!

Be Prepared, but Don’t Get Overwhelmed By The Coronavirus Hype Read More »