ESAB Rebel 205 Inductance tips
Video shows tips for settings on Esab Rebel 205 Inductance settings for MIG
ESAB Rebel 205 Inductance tips Read More »
Video shows tips for settings on Esab Rebel 205 Inductance settings for MIG
ESAB Rebel 205 Inductance tips Read More »
“SHTF” is a time-worn and borderline cliché prepper acronym we have all heard, seen and continue to hear and see daily in prepping circles. What will you do when the SHTF? Where will you go when the SHTF? Has the SHTF? It never ends.
Even so, it is an important concept. In case you have been sadly out of the loop for the past couple of decades, “SHTF” stands for Shit Hits The Fan, a vulgar euphemism for things going well and truly pear-shaped; FUBAR, sky is falling, hell on wheels, you name it.
A SHTF event is one where your daily survival necessities are no longer guaranteed, where the typical social order is suspended or heavily disrupted, where help in the form of emergency services is not available and where government intervention is either useless or part of the problem.
In this article, I’ll offer my thoughts on the matter.
Disaster is a matter of perspective, I suppose, and perception being what it is in this day and time with everything, every word, concept and interpretation rendered hideously malleable by the current cultural zeitgeist, it makes sense that event the concept of disasters would be subjected to the same.
A common car crash, however bad the effects on life, limb and property, is not a disaster and never will be unless the car crashed into a tanker full of nuclear waste and knocked it into a nearby river.
That has not stopped some people from treating car wrecks like “serious” SHTF events. And one could say they are if you treat SHTF as shorthand labeling for any event that requires you to employ emergency skills at any level.
How about the destructive crash of some larger conveyance? How about a train? I say that is not a SHTF event, either. How about a jetliner crash? I still say no, though the passengers aboard the doomed vessel hurtling toward terra firma would doubtlessly dispute my assertion. So what does qualify as a SHTF event in my eyes?
For me, it is a matter of scale, and not simply in property damage or lives lost, or the potential for either. A real, SHTF scenario will affect almost every facet of your day to day existence for some time going into the future.
How long that disruption lasts being of course dependent on the intensity of the event, its reach and any other of the thousands of potential variables that keep society knit together and recognizably functioning as such in 2019 America.
As a ‘for instance,’ one could say that a powerful natural disaster would qualify as a SHTF event. Landfall of a severe and powerful hurricane could qualify as a SHTF event without question.
One need only look at the aftermaths of Hurricanes Katrina, Harvey and Andrew in the not too distant past to get a glimpse into the dystopian misery awaiting us. Natural disasters of many kinds, if severe enough, if they strike the right place at the right time, could do much the same.
But if one were to drive far enough outside the majorly affected area, one would probably see life as normal chugging on without a care in the world, save perhaps a rise in lumber and gas prices. I would not say an event has to have a truly regional or even national area of effect to qualify as a SHTF incident.
Anything you can walk away from and go get a burger after or go to get groceries after is certainly not a SHTF event. SHTF events by any measure should disrupt society almost entirely, or rather disrupt our day-to-day “normal.”
If you cannot turn a switch and expect electricity, cannot open a tap to get clean water and cannot expect waste in any form to be vacated from the premises, you are dealing with a SHTF event.
If you cannot reliably call on the cavalry in the form of EMS, police and fire responders, you are likely living in a SHTF scenario (or a major American city). If everyone has to seriously start relying on bartering and get deals done before returning home to meet a curfew, you are likely dealing with a true SHTF event. If you are fleeing rampant pillaging and looting, or a city on fire with no end in sight before it turns to ash, you are dealing with a SHTF event.
A major prolonged breakdown of any and especially multiples of the above facets of our societies should be considered herald enough for a true, blue SHTF instance.
A power outage lasting a half hour to an hour is not. A protest that turns violent and gets put down harshly is not. A freak fire that burns down a handful of buildings is not.
When the bad things we take for granted as taken care of start going unopposed unless you oppose them yourself, that is a SHTF situation.
A SHTF event that affects a handful of people cannot be said to be a true SHTF event. You and three friends who get irretrievably lost in bear country while out joy hiking are in the shit now, for certain, but it is not a SHTF event, even when Yogi and Boo-Boo come sniffing around.
There will be people, authorities, friends, family, looking for you. Helicopters will be scrambled. Dog teams deployed. Rangers on four wheelers. The works.
An entire town a couple of hours away from a major metropolis that is left to rot and fend for themselves because what functioning government is left is triaging the situation and deploying all available resources to keep command and control facilities, government institutions and critical supplies and infrastructure solvent? Oh yeah, that would definitely qualify as a SHTF situation.
Essentially, the more people that have to say to themselves in chilling realization “No one is coming. I am on my own,” the more likely it is that you are facing a true SHTF scenario.
As awful as some things are, like city-wide riots and cataclysmic natural disasters, as much havoc as they spread, as much damage as they do and as many lives as they claim, they are not what I denote as paradigm shifting events, a sure symptom of a SHTF situation.
Flood waters will recede. Things will eventually dry out. Rubble will be swept away, bodies will be hauled off to be disposed of, power lines reconnected and life will eventually go back to normal.
So what do I mean by paradigm shift? When a paradigm shift occurs, things don’t go back to normal. It might mean a technological regression, a near-permanent loss of modern commodities, or living under the constant burden of some new threat or vulnerability.
A great example of a paradigm shifter is something like a typically imagined cataclysmic EMP that wipes out much of or the entire nation’s electronics and electrical grid.
Author R. William Forstchen imagined this precise scenario in stunning detail in his speculative fiction novel One Second After. Give it a read. You’ll get some inkling of just how irrevocably things will change in the aftermath of such an event.
So much of what we assume is “just the way things are” will vanish, permanently, with one stroke of fate. Something similar will happen in the wake of a nuclear exchange, major asteroid impact, or super volcano detonation.
As an example that most will understand, a paradigm shift would undoubtedly occur if zombies were to rise from their grave or aliens were to invade.
A paradigm shift is knowing, “Things will never be the same.” Whatever caused it is definitely a SHTF event.
Any time a widespread, regimented crackdown is inflicted on citizens by their government that qualifies as a SHTF event unto itself. History furnishes ample examples of how badly and how quickly violence and loss of life and freedom happens when things finally boil over.
Even at the state level, it is all too easy for the government to start infringing on basic rights and liberties, imprisonment and executions being the hallmarks of tyranny.
Even for those outside of conflict zones, disruptions to travel, commerce and utilities can quickly turn a scuffle into a proper siege at the larger scale.
Checkpoints, inspections and constant stress will lead to flaring tempers, overreactions and the spilling of more blood and subsequently tighter restrictions. Your staples and essentials are now officially no longer guaranteed thanks to localized sanctions.
These things have a way of snowballing, especially in the histories of Western nations. We don’t generally do sustained, low-level, brushfire conflict, preferring instead to let things become intolerable before our animosity erupts in an orgy of violence that changes the course of history and the lives of the surviving populace forever after.
If the tree of liberty must be refreshed with blood, you can be certain of SHTF.
To me, a SHTF event is one that not only sends you scrambling to respond, but will put you and everyone else in your area, and probably your region, in prolonged mortal peril.
Your basic survival requirements, and I mean the necessities- clean air, shelter from the elements, clean water for drinking, food- will no longer be guaranteed unless you are clever enough and prepared enough to provide them.
The institutionalized trappings of a functional society will be strained past the breaking point or just cease to exist. The uneasy quasi-truce between the rabid dogs of society, criminals, and the rest of us will disappear, and the natural law will once again take precedence.
What is yours will only stay that way of you can keep it. Your next meal will only be ready if you provide it. Your continued existence will no longer be guaranteed by default barring a fluke. Survival, real moment-to-moment, day-to-day survival is the new normal. The Way Things Were is the simultaneous plea and eulogy on everyone’s lips.
Diseases that are rendered powerless by modern medicine will reassert themselves with fury. Death will harvest his grim crop in ways that were once laughable inconveniences. Infection from a scratch. A fever gone unchecked. Parasites. A rotten tooth.
Medieval ailments will once again spell nearly certain doom. There will be no competing pleasures to occupy your time. Every moment will mean another minute of life, earned, or a squandered opportunity in the face of the encroaching night.
When things have changed so utterly for the worse that your most fervent wish is full bellies and a warm, safer place to sleep next to your loved ones, that’s when you’ll know you the Shit has well and truly Hit the Fan.
The term SHTF should be reserved for major events that severely threaten lives and the fabric of society, not localized disasters and crises no matter how bad they are.
While events that mortally imperil you, even for days at a time, are scary and might be the penultimate test of your life, they are still likely not true SHTF situations.
Try not to water down the import of a term that should be reserved for properly cataclysmic situations by tossing it out every time a riot occurs or a tornado touches down.

Just What Constitutes SHTF? Read More »
Improving you day-to-day chances of survival dramatically now, before the SHTF, means you must take a long hard look at a specific set of factors that directly and substantially influence the threats you are living under.
There are three major issues that impact your overall chances of survival:
For over 10 years, both heart disease and cancer have remained in spots one and two as the leading causes of death in the United States of America. When deaths caused by these two medical conditions are combined, they account for a grand total of 46% of American deaths.
Over the past three decades, the Centers for Disease Control and Prevention (CDC) have been compiling and reviewing the causes of deaths in America to help doctors develop better preventative tactics.
Violent crime comes in a close second to medical issues on the day-to-day survival threats scale. Personal attacks on the street, and home invasions are the top two ways Americans are injured or killed annually.
Accidental injuries are the most difficult to predict and prepare yourself against, which is why occupational, recreational, and automobile accidents often take a tragic turn.
More than 600,000 Americans die from heart disease, on average, each year. Those at prime risk include: men, people over 55, smokers, obese or overweight Americans, and those with a family history of the disease.
How to Improve Your Chances of Survival from Heart Disease
The leading cause of death in Americans aged 1 to 44 is accidental injury. Accidental deaths are the fourth leading cause of death in Americans overall.
The most common types of accidental deaths include:
How to Reduce Your Chances of Dying in an Accident
Expecting the unexpected is an extremely difficult thing to do. To help reduce your chances of dying from any of the top modes of accidental deaths in the United States:
Far too often, the first warning sign that you are going to have a stroke, is the stroke. Hundreds of thousands of people. Strokes and other cerebrovascular diseases account for approximately 5.2% of annual deaths in America.
Subarachnoid hemorrhages, mini strokes or transient ischemic attacks, and vascular dementia.
Stroke Risk Factors That Are Impossible or Difficult to Control
Stroke Risk Factors You Can Control
How to Reduce Your Risk of Dying From a Stroke
The best way to decrease your possibility of having or dying from a stroke is to have regular screenings with a medical professional and to make healthy choices related to the risk factors that can be controlled and to routinely have screenings.
There is a substantial and distinct link between population density and violent crime rates. In the rural area where I live, there has only been one homicide in over a decade, and that involved the likely transporting of a dead body into the region from a city.
Approximately 65 miles away (a distance that might seem long to city folks but some rural men drive this far to work on a daily basis) in the state’s capitol, there are 100 to 143 homicides on an average annual basis.
Yes, the more people, the more potential for crimes, but when a bit of population per capita math is completed, the difference in violent crime statistics is still astonishing – and the same scenario plays out across the country.
There are almost always significantly more legally owned firearms (per capita, again) in rural areas than urban ones – and more illegally owned guns in cities than in rural areas. This likely plays an essential part in the disparity of homicides by geographic area.
Poverty and unemployment are often cited by the talking heads on television as the reason for violent crime. That might be a good sound bite to attempt to explain away the carnage, but both poverty and joblessness haunt rural areas as much as the urban inner city.
How to Reduce Your Chances of Being a Victim of Violent Crime
Types Of Weapons Used In Violent Crimes
These statistics are from 2017, the most recent reporting year available at the time of publication.
| Weapons | Incidents |
| Handguns | 7,032 |
| Rifles | 403 |
| Shotguns | 264 |
| Other Guns | 3,283 |
| Knives | 1,591 |
| Hammers, Clubs, and other blunt objects | 467 |
| Body – Hands, Feet, fists | 696 |
| Poison | 13 |
| Fire | 103 |
| Narcotics | 97 |
| Drowning | 8 |
| Strangulation | 88 |
| Asphyxiation | 105 |
| Unidentified Weapon | 979 |
| Explosives | 0 |
On average, approximately 55,000 Americans die from pneumonia and the flu each year. The flu is highly contagious and some types of pneumonia can spread from person to person.
Deaths from these medical conditions account for roughly 2% of those that happen in the United States annually. Because pneumonia can cause a reduced amount of oxygen flowing through the body, it too could contribute to the risk of stroke.
Where you choose to live, work, and prep may have the most drastic impact on your chances of day-to-day survival – and is the most controllable risk reducing factor on this list.
In 2018, the latest reporting year statistics available at publication, there were 16,214 homicides in the United States. That figure is a 6.2 percent drop from the year prior.
Where you choose to live and work also may expose you to potentially hazardous environmental conditions. If you work in a city you will be exposed to more air pollution than Americans who live and work in rural areas and the suburbs.
Water quality disparity may also be more prevalent in cities, especially in poor inner city neighborhoods. In some rural areas sanitary sewer systems are still emerging which could expose residents to improperly processed raw human solid waste.
When traveling for work or pleasure, you may be placing yourself at greater risk from accident, injury, or death. If you are using any mode of public transportation or air travel, you are literally placing your life in the hands of a complete stranger. Assuming the individual behind the wheel is well-trained, sober, and mentally stable might be a deadly mistake.
Also, taking for granted the bus, train, plane, or boat is in proper working order and has been maintained by trained professionals might also be an assumption that could get your hurt or killed.
In 2017, the most recent year for FBI statistics at the time of publication, an estimated total of 810,825 people were assaulted in the United States. That estimated shows a one percent increase from the previous reporting year.
The type of personal assault threat can vary widely, from a strong-arm mugging to being accosted at knifepoint in a car jacking, and rape.
There are more than six million car crashes in the United States each year, on average. Approximately three million people are injured in car crashes in America annually – approximately two million of the victims of those accidents are left with permanent injuries. On average, 90 people are killed in car crashes every single day.
The vast majority of car accidents in the United States are caused by reckless driving, speeding, distracted driving, and alcohol.
Prepping should be looked upon as a learning experience – one that never ends. To increase your day-to-day chances of survival you must have an in-depth survival plan in place.
There is no way to 100% decrease the threats we all could face on a daily basis. But, through proper planning, diligence, common sense, and making smart health choices, we can vastly improve our day-to-day chances of survival.
Top 10 Biggest Killers in the United States and How You Can Avoid Them Read More »

When the balloon goes up and you suddenly have to think about cooking your food either away from home or in your home without your current stove working, this will be the podcast you were glad you didn’t miss. Drew picks Doc’s brain about all things camp stoves from high tech tiny wood burners, to liquid gas, compressed gas, dual burners, and even the backyard grill. Whether bugging in or bugging out, there is a stove for your situation and Doc Montana has already thought it through.
Want to comment about this podcast? Sound off below in the comments.
A fun episode with lots of opinions, click on one of the links below to listen now or download to your phone and listen later. Also, if you love the podcast, please leave us a review on iTunes, Stitcher, or Podbeam. It really helps!!!


The post Survival Cache Podcast Episode 17: Camp Stoves For Bug Out appeared first on Survival Cache.
Survival Cache Podcast Episode 17: Camp Stoves For Bug Out Read More »

Hello folks, we have been to the high desert in Northern Utah to do a bit of shooting today. So like all stories there is a good side and a bad side to this, first the good – we were shooting; now the bad – slow moving fingers and shaky hands.
While my fingers were thawing, this article came to mind. I am going to focus strictly on the local effects of cold on the hands in relation to shooting performance. I won’t get into hypothermia or frostbite; I have an idea swimming in my head for another article regarding hidden dangers (over dressing, cold weather dehydration, etc.) of cold weather where I will discuss those issues.
To “set the stage” of this subject we will quickly discuss the term “normal” in regards to hand/finger temperatures. We will call “normal” what people experience in everyday life under comfortable, often indoor conditions. With normal established, let’s look at “cold”, and just to keep it simple, the only terminology we will use is cold.
Cold stress may be present in many different forms, affecting the whole-body heat balance as well as the local heat balance of extremities. Cooling of the whole body or in this case, parts of the body, results in discomfort, impaired sensory and neuro-muscular function and, ultimately, cold injury.
The most obvious and direct effect of cold stress for this subject is the immediate cooling of the skin. The type and magnitude of reaction are determined primarily by the type and severity of cooling. Local cold exposure may cause systemic arousal, what that means is that the increased stress level increases sympathetic nervous activity and, thereby, preparedness for action. When our bodies prepare for action and respond to the cold stimulus, our fight or flight nervous system function kicks in, and the adrenalin begins to dump. This function will work to fight the cold stimulus by giving the muscles stimulation to shiver AND cause the blood vessels in the extremities to begin to squeeze, which results in a reduction of blood flow to muscles and skin. This reduces fine motor skills and makes the “feel” for the trigger much less. That is not a welcome effect when trying to hit the target; great when trying to out run a bear or survive a blizzard, but we are not in those situations.
How do we fix this, the simple answer is to keep our hands warm or wear gloves. Prevention of cooling by means of donning cold-protective clothing, footwear, gloves and headgear interferes with the mobility and dexterity of the shooter. There is a “cost of protection” in the sense that movements and motions can become restricted and more exhausting.
Hand function is very susceptible to cold exposure. Due to their small mass and large surface area, hands and fingers lose heat while maintaining high tissue temperatures (86 to 95ºF).
Accordingly, such high temperatures can be maintained only with a high level of internal heat production, allowing for sustained high blood flow to the extremities. The most expedient way to tell if your hands are beginning to suffer from the cold exposure, and may result in decreased performance is to check for the “White Knuckle Grip.” If your hands look like you are holding the steering wheel of a truck on ice, headed down the hill, you will know the tissues are suffering from a lack of perfusion or blood bringing oxygen to the tissues, and hand grip, finger pull and support hand functions will be affected.
Hand and finger function is directly affected by the temperature of the skin (that is the only way to measure in the field). Fine, delicate and fast finger movements deteriorate when tissue temperature drops by only a few degrees. With more profound temperature drops in the tissues, gross hand functions will also be impaired, eventually, your hands will turn to “clubs” and the fine skill and gross skills will not be possible. You may get to a point where you cannot truly FEEL the gun in your hands.
Significant impairment in hand function is found at hand skin temperatures around 59ºF, and severe impairments occur at skin temperatures about 42 to 46ºF due to the blocking of the function of sensory and thermal skin receptors. The temperature of your fingertips may be more than ten degrees lower than on the back of your hand under certain exposure conditions.
In addition, the viscosity of tissues increases (meaning that instead of everything flowing like oil, it is now moving like sludge), resulting in higher internal friction during motion. With an increase of internal or muscular/tendon friction, smooth is not possible, and jerky motions will be the normal. Isometric (pulling) force output is reduced by 2% per ºF of lowered muscle temperature. Dynamic (general smooth movement) force output is reduced by 2 to 4% per ºF of lowered muscle temperature. In other words, cooling reduces the force output of muscles and has an even greater effect on dynamic contractions. This will have an effect of overall gun handling, and very dramatic effects on trigger pull, and proper grip functions.
There is evidence for different types of acclimatization to long-term cold exposure. Manual (hand dexterity) performance is better maintained after repeated cold exposures of the hand, as we discussed later with the cold water bath and dry fire drills.
Improved hand and finger circulation allows for the maintenance of a higher tissue temperature and produces a stronger cold-induced vasodilatation. What this over the top science geek talk means is – warm up – flex the fingers, shake the hands, get them ready to operate the gun in cold temperatures. Due to the many complex factors that influence human heat balance, and the considerable individual variations, it is difficult to define critical temperatures for sustained work.
There is a simple way to test the effects of cold on your hands and performance, and train yourself to adapt to this environmental issue and improve your performance as much as possible. This simple and free or nearly free acclimatization method will make you less susceptible to cold hand issues. By exposure to cold water from the sink then maybe move to ice water in a bowl, etc., and dry fire drills, make sure to include shooting (dry fire) and gun manipulations, failure drills, etc.
These drills need to be practiced for all shooters, not just for the hand gunners, but hunters with long guns as well. Just to state the obvious – check then recheck that the gun is unloaded, and no ammo is in the room – OK, now we can move forward. Get ahold of a simple and inexpensive surface thermometer from the drug store, the type that just reads the skin temperature, then put your hands in the cold water, use the thermometer and take the skin temperature, run your dry fire drills. You can check your performance differences between warm and cold hands dry fire, use a stopwatch to test speed or function. Eventually, you will see if your acclimatization efforts are giving any value to your shooting and watch for improvement as you proactively train to beat the cold.
If precautions are followed, and a simple warm up can be performed your shooting should not suffer dramatically, it will a little, that is the way it is in cold weather shooting. If you find that you do a lot of cold weather shooting, and exact precision is needed. Try these simple steps to train your body to acclimate to that style of shooting. This combined with simple warm-ups, and you will be less affected and maybe even reach the “golden ring” of the only guy in the group that can shoot as well cold as everyone else does in the warm.
Good luck, and stay safe
| 96.8 – 90*F | Optimal hand and finger dexterity | Good Shooting |
| 90 – 81*F | Effects on finger dexterity, precision, and speed | OK Shooting |
| 81-68*F | Impacted work with small details, reduced endurance | Weak Shooting |
| 68 – 59*F | Impaired gross hand and finger work | Poor Shooting |
| 59 – 50*F | Reduced gross muscle strength and coordination | Very Poor Shooting |
| 46 – 43*F | Blocking sensory and thermal receptors of superficial skin | Dangerous Shooting |
| <50*F | Numbness, manual performance reduced to simple gripping, pushing, etc. | Impossible Shooting |
| <32*F | Freezing of tissues |
Cold Hands Effects on Shooting Read More »

Hiking in the Grand Canyon doesn’t have to be a leg-busting trek to the bottom. There’s a beautiful trail called the (South) Rim Trail that allows you to walk along the South Rim of the Grand Canyon. It’s a wide, easy, and flat trail where you can enjoy the views without breaking a sweat. This Rim Trail hike starts right at the Visitor’s Center and takes you eastward to the legendary South Kaibab Trailhead. You’ll be rewarded with dozens of vista points that don’t have the crowds. At the end, you can hop on a free shuttle bus back to the Visitor’s Center.
The post South Rim Trail: Visitor’s Center to South Kaibab Trail Hike appeared first on HikingGuy.com.
South Rim Trail: Visitor’s Center to South Kaibab Trail Hike Read More »
An easy to follow blueprint for how to pack your own Bug Out Bag with Bug Out Bag Essentials.
Creek is the author of 3 best-selling books about Bugging Out: Build the Perfect Bug Out Bag, Build the Perfect Bug Out Vehicle, and Build the Perfect Bug Out Survival Skills.

If you’re just getting started with building your own Bug Out Bag, I would HIGHLY suggest taking my FREE 5-DAY Bug Out Bag Challenge HERE. Every day, for 5 days, I’ll email you one 5-minute training video. We will discuss 5 of the most important Bug Out Bag categories, including how to choose a backpack. By the end of the 5-day training, you’ll have gathered together some of the most important items for building your own 72-hour disaster survival kit.
The terms “Bugging Out” and “Bug Out Bag” have grown increasingly popular over the last decade and a half. Numerous books (including my own), movies, documentaries, magazine articles, blog posts, and YouTube videos have covered the subject of the Bug Out Bag in magnificent detail. Sometimes, the representation of a Bug Out Bag seems a little more fantastical than practical. Just one Google search about how to make and pack a Bug Out Bag can lead someone down an expensive and time-consuming rabbit hole. Regardless, the truth of the matter is this: No matter who you are, where you live, or what potential threats may exist that could force you to leave your home in a state of emergency, there are essential items that you need to have packed in a kit designed to get you (and your family) through 72-hours of independent survival. This kit is called a Bug Out Bag.
Before we get into it, let’s define our terms, so you know where my head is on the subject. A Bug Out Bag is a pack filled with all the essentials one needs for 72-hours of independent survival. It’s important to put a timestamp on your Bug Out Bag. Most victims of large-scale natural disasters who are forced to leave their own home are able to find safety within a 3-day window of time. Choosing a 72-hour prep window allows you to better control the size and weight (and cost) of your Bug Out Bag.
When it comes to the idea of abandoning your home due to a sudden and imminent threat, it shouldn’t be that much of a stretch for you to understand the validity of such a concern. If you’ve turned on the news in the last few years, you’ve likely noticed the onslaught of wildfires, tornadoes, and hurricanes that have battered the U.S. and its territories alone. Now more than ever, it seems that there are multiple instances of mass devastation taking place—everything from floods, hurricanes, earthquakes, tornadoes, blizzards, hurricanes, and even volcanic eruptions have displaced thousands upon thousands of Americans. These natural disasters decimate roads, vehicles, homes, and hospitals. Often in these circumstances, resource supply chains like food, water, electricity, and fuel become extremely limited or all together unavailable. In certain situations, this could mean death for some.
The essential items contained in a 72-hour Bug Out Bag can be priceless resources for you. Beyond natural disasters, the geo-political status of our world is highly unpredictable. With soaring amounts of debt, unstable economies, and military/political tensions ever-increasing, it’s not hard to see that natural disasters might not be the only cause for a sudden emergency. War is always on the horizon, but it’s not the only threat from humans. Dams burst, infectious diseases get spread, power plants fail and meltdown, pipelines rupture or explode, hazardous waste or cancer-causing materials get leaked into ground water and drinking water supplies, etc. Humankind has not perfected anything, so anything created by humans is subject to error that could yield devastating, fatal results.
There isn’t a backpack brand or style That I would consider the best for a Bug Out Bag. In fact, I suggest most people start with a backpack they already have at home, even if it’s just an old school bookbag. It is important, though, that it be a backpack. You can always upgrade to nicer one later. If you’re just getting started in your quest for how to make a Bug Out Bag, the best one isn’t the one that’s perfect or made from the best material—it’s the one that’s DONE and ready to grab at a moment’s notice. Below is a link to the backpack I currently use as my personal Bug Out Bag:
Creek’s Current Bug Out Bag: https://amzn.to/2E6AHXu
Essentially, there are 12 Categories of gear, tools, and other items you should consider when packing your Bug Out Bag. I’ve highlighted each one below:

I keep shelter very simple. I pack a lightweight backpacking/hiking tent. Bugging Out is all about getting from POINT A (somewhere dangerous) to POINT B (somewhere safe). While I love sleeping in the wilderness in stick-built shelters or under a tarp, I have no interest in doing so during a Bug Out scenario. I want to be DRY, out of the WIND, and have a bit of PRIVACY. And, I want all these as quickly and with as little effort as possible. The best option is a tent. For a FREE CHECKLIST of all the items you want to consider when buying a Bug Out Tent, be sure to sign up for my 5-DAY Bug Out Bag Challenge, and I’ll make this available to you on DAY 1.
Your shelter category should also include sleeping gear, such as a sleeping bag and ground pad.

Large scale natural disasters are notorious for contaminating municipal water sources and knocking out power that allows well pumps to run in more rural areas. Having BOTH fresh drinking water and a reliable solution for sourcing water from lakes, streams, ponds, or other sources in route to your destination are bare necessities to keep in your Bug Out Bag.
I recommend at least 1-liter of fresh drinking water per person, per day, already packed into a Bug Out Bag. For now, I’d suggest using whatever containers are available to you—even if it’s just bottled waters from the grocery store. As you flesh out your kit with a little more detail, you may want to consider a hydration bladder, which integrates into your backpack. This makes carrying up to 64-ounces of water very convenient and easy. I’d also recommend a metal container, which gives you the option to boil in the field if necessary.
In addition to fresh drinking water, you want to pack a reliable way to source more while en-route, if necessary. The best solution for this is a lightweight water filter that filters out Protozoan Cysts and Bacteria. My recommendation for this is the SAWYER Mini Filter System which can be found here: https://amzn.to/38n3Lb7 This is an affordable, lightweight solution that I’ve used countless times in the wild. It functions as a straw and it is simple to use. You can pretty much scoop water out of any natural water source in North America and be confident that you won’t get sick. It does not filter out heavy metals and chemicals, so don’t scoop up water from the rear parking lot of a metal foundry.

When it comes to your Bug Out Fire Kit, you want a GUARANTEED way to make fire. Luckily, this is CHEAP and SIMPLE. Pack 3 things:
1) A disposable lighter (or 6)
2) A Ferro Rod—use this one: https://amzn.to/2PBlALf
3) PET BALLS: PET Balls are cotton balls mixed with Petroleum Jelly. This is the best fire starter known to man, and you can make them right at your kitchen table for almost no money. Take my 5-DAY Bug Out Bag Challenge and I’ll show you how to make them myself. Have you signed up yet????

Bug Out Meals should meet the following 3 criteria:
1) OPEN AND EAT: You should be able to open and eat the meal WITHOUT any prep whatsoever. No adding water, no heating, no mixing, no nothing.
2) LONG SHELF LIFE: Remember, you’re going to be putting this food in a backpack and leaving it in the closet. You don’t want to choose meals that will spoil quickly. Choose meals with at least a 6-month shelf life.
3) HIGH CALORIE: While Bugging Out, you’ll need to put fuel on the human furnace. Leave the rice cakes at home and pack meals that will fuel your body with calories.
Personally, I pack 9 CLIF BARS for my 3-day Bug Out. 3 meals for 3 days = 9. I know that sounds like hardly any food, but I’m OK with that. I hate heavy backpacks, and food is HEAVY. I’ll live. Other foods that would work for a Bug Out Bag are tuna packs, single serving SPAM packs, peanut butter packs, and beef jerky.

My BOFAK (Bug Out First Aid Kit) is the only kit in my Bug Out Bag that’s gotten BIGGER as I learn more about survival and study real life disaster scenarios. While there is a slew of items that could go into a BOFAK, I’ll keep this simple by listing the SIX necessities that most people DO NOT PACK BUT SHOULD:
1) CAT Tourniquet: https://amzn.to/38uxOxU
2) Combat Gauze Celox Rapid Z-Fold (wound packing gauze with hemostatic agent): https://amzn.to/2PctICZ
3) Israeli Compression Bandage (6”): https://amzn.to/2YzVzjr
4) N95 Particulate Respirator: Moldex R95 Particular Respirator
5) Cotton Cravat(s): https://amzn.to/2Pwg5xg
6) SAM Splint: https://amzn.to/38qWFSW
When you’re dirty, tired, stressed and weak, your body has more trouble fighting off infection. In a Bug Out Scenario, when access to medical professionals or facilities might be limited, it’s a good idea to keep as clean as possible. Your hygiene kit should include some quality wipes, a toothbrush, some antibac, and soap at the bare minimum.
One could argue that the ability to properly dress yourself for the environment in which you’re headed is your most important survival skill. I always say that God gave us brains, not fur. A lot of thought should be given to the clothing that you A) WEAR OUT OF THE HOUSE during a Bug Out and B) PACK INTO YOUR Bug Out Bag. You should consider what you’ll need when bugging out in the dead of winter and heat of summer and how this gear affects your pack and space requirements. Beanie hat, gloves, wool socks, boots, poncho, windbreaker, base layer?

Your Bug Out Toolkit is one that serves an infinite number of functions. From cutting wire and hammering stakes to turning bolts and repairing gear, the need for basic hand tools during a Bug Out Scenario cannot be underestimated. At an absolute minimum, these tools should include a quality fixed-blade knife and a quality multi-tool. I’ve listed the ones I suggest below.
· Mora 840MG Camp Knife (Fixed blade but not Full Tang): https://amzn.to/2YLlepu
· Mora Gargerg (Fixed Blade & Full Tang): https://amzn.to/2t3n1KA
· Leatherman Wingman Multitool: https://amzn.to/2Pykv6I
· Leatherman Wave: https://amzn.to/2rFfBgn

Another tool to consider is a folding saw. I’ve used the Bahco Laplander for years and it’s a great saw. Here’s the Amazon link if you want to check it out: https://amzn.to/2t8z3CC. I’ve found saws to be a fantastic tool for cutting firewood and shelter poles. It’s an invaluable tool in the woods and a true luxury in a Bug Out Bag if you have the space & money.

Large scale natural disasters bring out the best—AND WORST—in people. While some people will travel from all the way across the country to help those in need, others will take advantage of our public defenders and first responders being overwhelmed. They will use the cloak of chaos that a large-scale natural disaster presents to loot, rob, steel, and prey on the unprepared. It is an unfortunate truth of every large-scale natural disaster. If you’re serious about prepping a Bug Out Bag, then you should take self defense into consideration. There are two categories of self-defense: LETHAL & NONLETHAL. I’ve made this very simple by listing a few options below:
· HANDGUN: I personally use a GLOCK 19 (9mm). I pack the gun with 1 magazine + 2 extra magazines. Using a handgun safely requires practice and experience. If you don’t want to or aren’t interested in putting in that time (or are otherwise not interested in LETHAL self-defense), NONLETHAL options may be better suited for you.
· PEPPER SPRAY: There are a wide variety of pepper sprays on the market. They are very effective at deterring and stopping an attacker. I’ve always been a fan of Tornado Pepper Spray. Here is their Amazon link if you want more details: https://amzn.to/2RHAz92
· BEAR SPRAY: I personally carry Bear Spray as a deterrent. We have a lot of Grizzly Bears in Indiana and I don’t want to be caught off guard at the latrine with my pants down. The brand I use is: https://amzn.to/38roN8A

Secret document pouches that easily hide below clothing.
If you’re leaving your home because of a large-scale natural disaster, then it’s not hard to imagine it might not be there when you get back. It’s important to take several pieces of important documentation with you, just in case. Having these documents will go a long way to helping you get your life back in order. I keep all of these in my safe and will grab them on my way out the door. Some documents to consider having ready to go are:
· Driver License
· Social Security Card
· Passport
· Birth Certificate
· Pet Vaccination Records
· Insurance documents
· Account Numbers/Passwords
In a recent interview with a family who “Bugged Out” from a Hurricane in Texas, they found it impossible to get CASH. Not only was everywhere closed, but the power was out and the ATMs that did work were out of cash. The lesson here is to include CASH as a part of your documentation stash. You might now be able to get some for a few days.
If your pile of documents feels overwhelming, scan the least important ones and put them on a thumb drive to take with you.
For simplicity, I’ve kept this article straightforward and to the point. Listing 100s of items does nothing but cause people to put off the project of Building a Bug Out Bag. The important thing is to get the key items I’ve mentioned above into a kit. However, there are a slew of other items to consider. I discuss many of them in my FREE BUG OUT BAG TRAINING but wanted to mention a few of the more interesting ones below.

Sillcock Key: A Sillcock Key is a wrench designed to turn on the water spigot at the outside of commercial buildings like office complexes and school. They have a special spigot so that any random Joe Schmo can’t access their water. It requires the use of a Sillcock Key to turn it on. This tool is available at local hardware stores (or on Amazon here https://amzn.to/2LLZEvL) for just a few bucks. This could be a viable option to get water in a Bug Out. It is technically stealing, which I’m not condoning, but maybe you can drop off a few dollars after it’s all said and done.
Faucet to Shower Converter: This is basically a rubber gasket and hose that can be pushed over a faucet to turn it into a shower. Although I like the option of a shower, I’m less interested in that than the idea of being able to direct the water from faucet. I spoke with a couple once who couldn’t fill up their water bottles at a rest stop because they couldn’t fit them under the faucet head. They ended up using a dirty dustpan. Having a little tool like this could have made a huge difference, so I always mention it now. Here is an Amazon link: https://amzn.to/38tR0vo
Small Prybar: A prybar is one of those things that’s hard to improvise in the field. Most often, people just end up trying to use their knife and break off the tip (I’m guilty of that). They’re perfect for prying open windows and even busting locks (pad or door). It’s a handy tool to have around. I carried one in my BOB for a while, but have since taken it out because of weight, but I still like to mention it. Here’s a link to one if you want to see: https://amzn.to/2RIaMxx
Leukotape: Leukotape is a German product that is designed for athletes. It’s a medical tape that sticks to skin, no matter what. I use Leukotape as a part of my blister kit to prevent and/or protect blisters. I used to use Moleskin, but this product works far better. Here’s the Amazon link: https://amzn.to/2RSGDM7

Headlamp Flashlight: A headlamp is an indispensable piece of kit in any Bug Out Bag. It allows you to work or travel in lowlight or dark conditions hands-free. I’ve used many different brands over the years, but my favorite is Petzl. The Tikka is a great model and can be found here: https://amzn.to/38u9VpZ
Battery Backup for Cell Phone: Even during a large-scale natural disaster, our cell phones are STILL one of our best options for long-distance communications. Texting is more reliable when the networks are overwhelmed with callers. Not only should you keep a wall and car charger in your BOB, but an external battery backup is a really smart idea, too. This is one of the heaviest items in my kit, and it’s worth every ounce. I use the Anker PowerCore ( https://amzn.to/34btLD1 ) and it can charge my phone up to 7 times before it needs recharged. This is invaluable during a Bug Out Scenario when the power might be knocked offline or when you’re on the go.
When all is said and done, there is no perfect Bug Out Bag. My personal pack has changed several times over the last 20 years as better gear and products have come to market, and as my tastes have changed. I have no doubt that my current Bug Out Bag will look different five years from now. If you haven’t gathered it yet, this whole endeavor about building a Bug Out Bag is about peace of mind—knowing that you have what you need available to you when you need it. Outside of that, it’s a fun project! I hope that something I’ve shared with you has helped you in your search to find the right items for your bag or maybe it has inspired you to start prepping your own!
Be sure to sign up for my FREE 5-DAY BUG OUT BAG CHALLENGE where I’ll send you one 5-minute video each day for 5 days and teach you about some of the most important items that need to be in your kit.

Remember, It’s not if but when,
CREEK
The post How to Make a Bug Out Bag: Bug Out Bag Essentials appeared first on WillowHavenOutdoor Survival Skills.
How to Make a Bug Out Bag: Bug Out Bag Essentials Read More »
In theory you could do the road trip in one long day, taking about 12 hours. But there are a lot of beautiful small towns to explore, some incredible whale watching to do and one of Canada’s most beautiful and unique national parks to visit.
Join me as I take you on a day to day road trip in Quebec that can take you over a week if you’ve got the time – and the notion of slow travel appeals to you. Enjoy the mix of pristine wilderness and pretty towns and villages along a highway that isn’t a mainstream tourist destination. Check out what to do and where to stay in each location – largely garnered from personal experience with many trips to Quebec over the years.
Some of the highlights you’ll encounter on this Quebec road trip include
If you want to leave your car behind and see some of the small communities along the north shore of the St. Lawrence River there is the option to hop on a working boat. You can find detailed information on the Relais Nordik website.
Explore the north shore of the St. Lawrence between June and mid-September. Weather should be good and businesses will be open. But be sure to book well in advance as there are limited accommodation options in places. If you don’t mind camping, then there is a lot more choice.
Allow at least a day in Quebec City, and more time if you’ve never visited before. Fly in and pick up a rental car.
To book a guided walking tour with Get Your Guide click here.
I recommend Crêperie le billig at 481 Rue Saint-Jean. I have been to this restaurant a few times after I first found out about it on a Quebec City food tour. Order one of their delicious buckwheat crepes with a glass of local hard cider. I’d also suggest Le Tournebroche – an organic rotisserie with locally raised chickens.
For a splurge check out the most photographed hotel in the world – Fairmont Le Chateau Frontenac.
For a great B&B experience at a decent price try Auberge La Chouette in the downtown core.
I can also personally recommend the Hotel Marriott Quebec Centre-Ville and Hotel Chateau Laurier near lots of great restaurants.
For a health and wellness experience with divine food stay at Monastère des Augustines.

Montmorency Falls, just minutes from downtown Quebec City
You’ve got a whole day to knock off the 140 kilometres and you can comfortable drive it in less than two hours.
If you didn’t make it to Montmorency Falls while you were in Quebec City, be sure to stop in and see them. They are 30 metres higher than Niagara Falls.
Next head for the pretty town of Baie St. Paul, just 95 kilometres from Quebec City. It’s a spectacular drive, especially as you drop down into the town. I think you’ll find it reminds you of Old Quebec, without the cobblestones and a tad more compact but very pretty. Browse the art galleries, and blocks of shops, all locally owned. Drive down to the park on the bay and enjoy the views.
When you’re hungry either pick something up at Boulangerie à Chacun Son Pain or grab a bite at Le Germain Hotel Charlevoix, where the train comes in from Quebec City.
Should you want to spend a night, stay in Le Germain Hotel Charlevoix or one of the cute B&B’s.
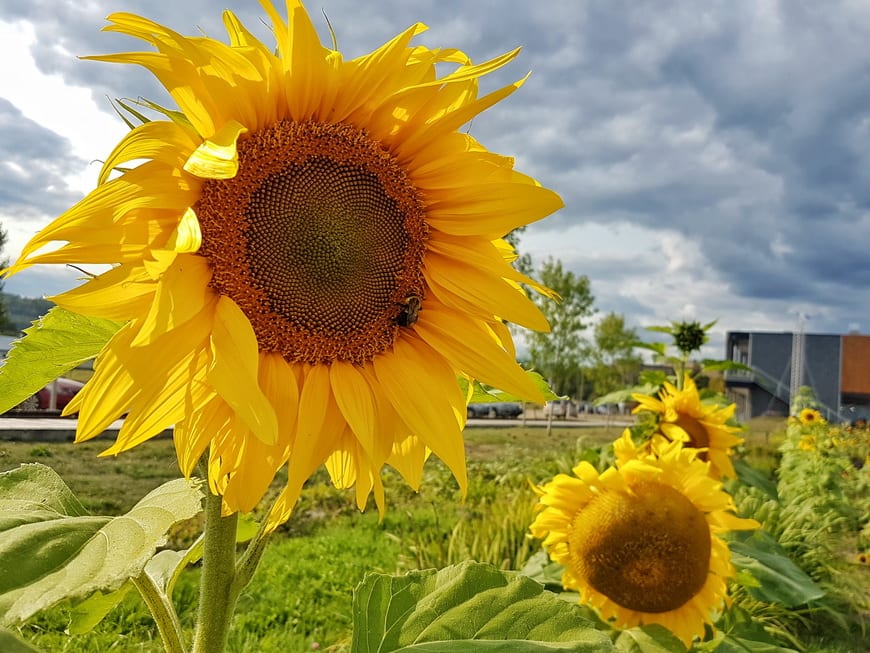
Sunflowers in Baie St. Paul add a blast of colour
The drive from Baie St. Paul to La Malbaie along the north shore of the St. Lawrence River is a stunner. I did it in winter – under grey skies and it was still very beautiful. I guarantee if you’re a photographer you’ll want to stop at numerous points along the way.
Once in La Malbaie you can visit the Gardens of Quatre Vents. Tours only take place four times in a summer so plan accordingly if you love visiting gardens.
Head to Mont Grand-Fonds for some hiking. It’s the end point of the week long Charlevoix Traverse – and a downhill and cross-country ski destination in winter so you can count on a large network of trails.
Fairmont fans will want to stay in the beautifully situated Fairmont Le Manoir Richelieu. It’s unlikely you’ll want to leave the premises.
For a less expensive option that comes rated as superb check out Hotel-Motel Castel de la Mer.
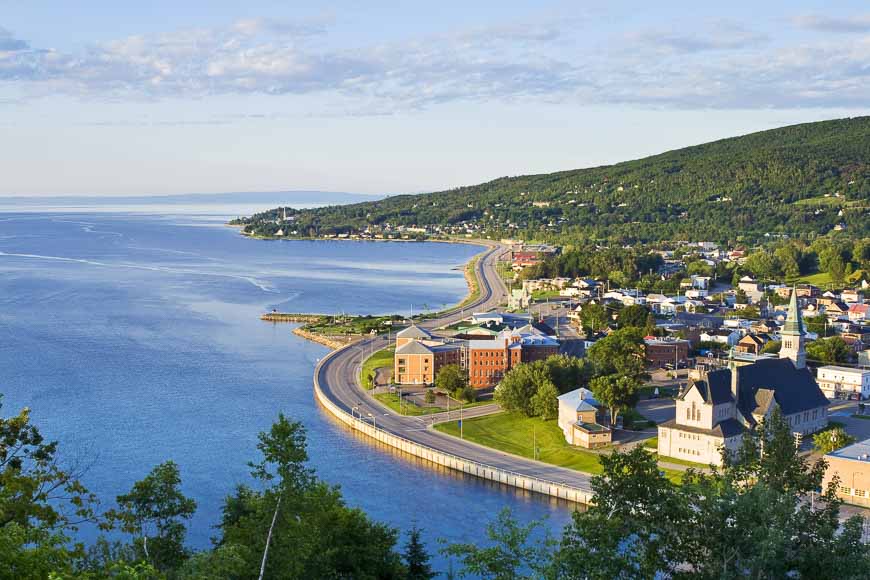
The second largest city in Charlevoix, La Malbaie owes its economic prosperity to tourism (Fairmont Manoir Richelieu, Casino de Charlevoix and several fine inns) – Photo credit: Tourisme Charlevoix – Robert Chiasson
Opposite Cap-à-l’Aigle, is Pointe-au-Pic, with the train station nearby and Fairmont Le Manoir Richelieu – Photo credit: Tourisme Charlevoix, André-Olivier Lyra
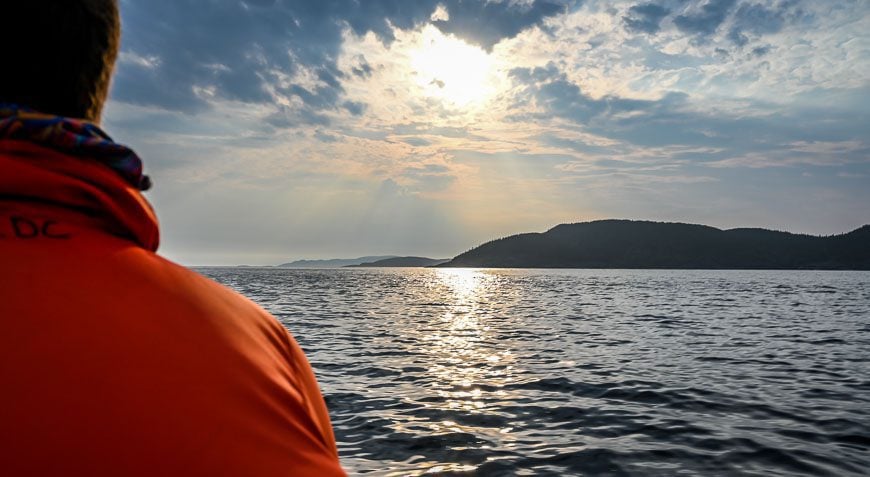
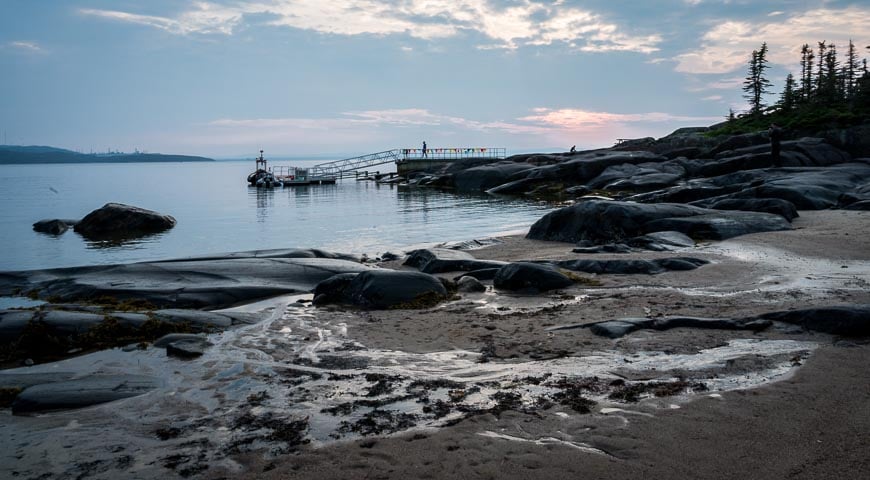
The distance from La Malbaie to Tadoussac is short – just 74 kilometres, but it does involve a 10 minute ferry crossing from Baie-Saint-Catherine to Tadoussac. There is another option if you want to detour to Saguenay via Highway 170 and 172. It’s a beautiful drive and I do suggest it seeing at least part of Saguenay Fjords National Park on the return trip (see Day 8 below).
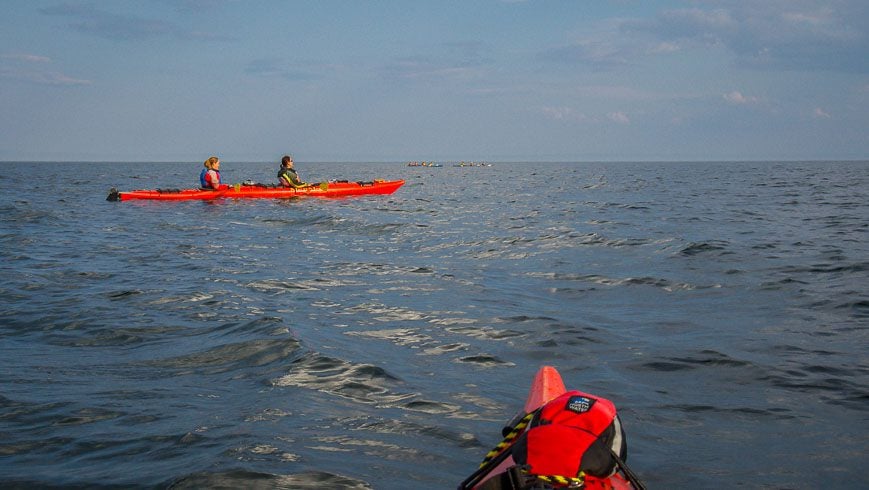
Tadoussac, a small village located at the mouth of the Saguenay River where it meets the St. Lawrence River, is famous as a centre for whale watching. Beluga whales are commonly seen at the mouth of the river – or even up the Saguenay River, but unfortunately I never saw them on my visit.
Read: Kayaking with Whales in the St. Lawrence River

Crossing the Saguenay Fjord on the ferry

Hotel Tadoussac

Tadoussac beside the river

On a Quebec road trip stop at the Marine Mammal Interpretation Centre in Tadoussac

The Chapelle du Tadoussac built in 1747
Waiting for the whales to resurface near Les Bergeronnes on a kayaking trip with Mer et Monde
It will take you just 2.25 hours to reach Baie Comeau without stopping. It’s another five hours to Sept-Îles from Baie Comeau so it’s certainly possible to do the drive comfortably in a day, but you’d have to nix a lot of the suggested stops.
On the way to Baie Comeau visit Parc Nature in Pointe-aux-Outardes – a peninsula with over 30 kilometres of beaches and sandy areas. Try and spot some of the 200+ bird species and 300 plant species that have been sighted here. And end the day if you’re so inclined, sleeping in a bird’s nest.
There’s a new bike path on the peninsula to explore that ends in Pointe-Lebel. It sits at the confluence of the St. Lawrence and Manicouagan Rivers – a place where the tides work their magic forming massive sandbars – so it’s also a perfect spot for a beach walk.
With Baie Comeau at the entrance to the Manicouagan-Uapishka UNESCO World Biosphere Reserve, there’s plenty of nature to explore if that’s what you’re after. Check out the fascinating Jardin des glaciers where you can “feel the 4 kilometre Laurentian ice sheet under your feet”.
Otherwise, stroll through Baie-Comeau’s pretty downtown checking out the boutiques.
If you’re after river views choose Hôtel le Manoir Baie-Comeau. See the photo below.
Le Grand Hôtel is a great choice if you want a downtown location.

View of the Manoir de Baie-Comeau from the St. Lawrence River in Baie Comeau – Photo credit: Mathieu Dupuis/Le Québec maritime
Seventy five minutes and 94 kilometres east out of Baie Comeau is the road to Pointe-des-monts. The 98 foot tall lighthouse, built in 1830, is the second oldest along the St. Lawrence River. Enjoy superb views up and down the river. You can also spend the night in the lightkeeper’s cottage on the property.
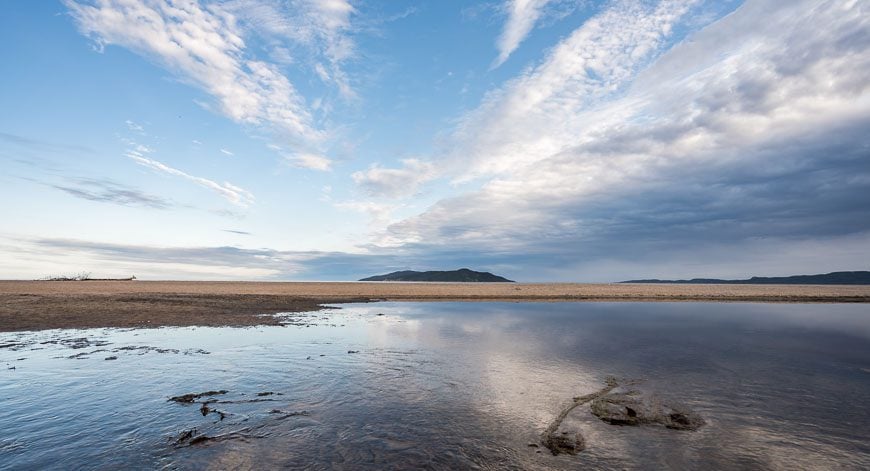
Continue to Sept-Îles, about a two hour drive away. Plan to spend the night in the city so you can take advantage of a boat trip and explore the seven island archipelago. This is prime whale watching country again, but even if you don’t see anything, it’s fun to check out the deep-water port from the water and to explore Grand Blasque Island.
Grand Blasque is the only island in the archipelago that offers campsites. Though they are beautiful, be warned that they look across to an industrial complex, off in the distance – and you can hear some noise.
If you don’t plan to camp, you can hike the trails on the islands, do some beach combing and take advantage of all the photographic opportunities. Birding is excellent too.
You can eat inside a giant lobster trap called the Le Casse-Croute du pêcheur lobster shack. It’s down on the water and definitely worth doing. Les Terrasses du Capitaine is another solid choice.
I stayed in Hôtels Gouverneur Sept-Îles on the main strip. Rooms aren’t fancy but they are comfortable. And the hotel is minutes away from everything. Another good choice is Hôtel Sept-Îles with its own private beach area.
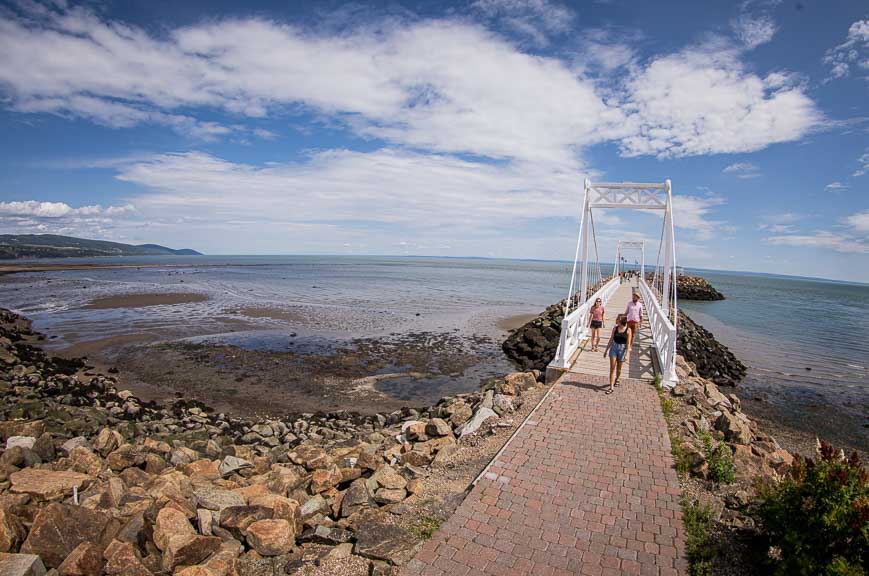
Beautiful beaches around Sept-Iles
Whale watching out of Sept-Iles
Sea birds seen on a whale watching tour
A stop at Grand Basque Island on the whale watching tour
It’s a 2.5 to 3 hour drive, depending on road construction, to cover the 219 kilometres to reach Havre-Saint-Pierre.
On this part of the Quebec road trip be sure to stop at the impressive 35 metre high Manitou Falls, about 35 minutes north of Sept Îles. There’s a walk from the parking lot past the upper falls – which are remarkable in themselves – down to thundering Manitou Falls. Bring a plastic bag to protect your camera as there is a lot of mist from the falls, even along the trail.
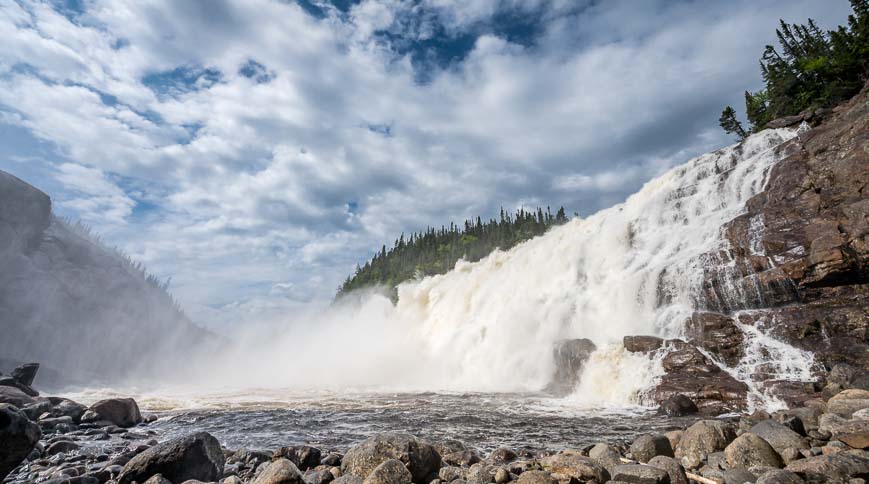
35 metre high Manitou Falls
Also be sure to stop in at the Mingan Island Cetacean Centre, a research organization dedicated to studies of both marine mammals and marine ecosystems. Visit the centre to learn about the whales that live in the St. Lawrence River via several rooms with very interesting displays.
There is the opportunity on occasion to join researchers on their vessels. If that is of interest be sure to contact them well in advance of your road trip.

Stop in at the Mingan Island Cetacean Centre – an interesting stop on a Quebec road trip
If you’re hungry – coming or going to Havre-Saint-Pierre, I’d recommend a stop at the food truck outside the cetacean centre for a delicious lobster sandwich.
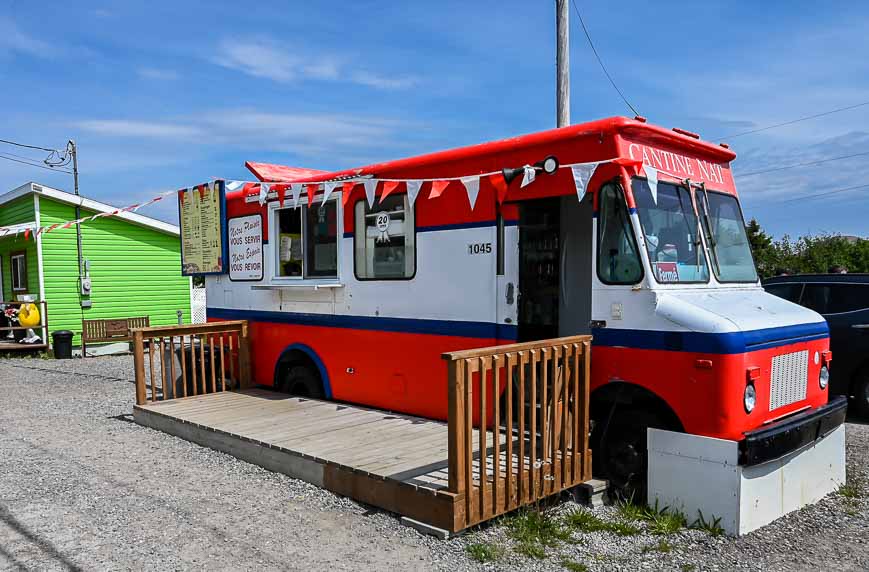
On your Quebec road trip stop at Longue-Pointe-de-Mingan for lunch
In town stay in Auberge Boreale.
In Mingan Archipelago National Park Preserve you have three overnight options – camping on a number of the islands, an oTENTik experience or best of all – a stay in a beautiful lightkeeper’s cottage on Îles aux Perroquets. Visit the Parks Canada website to learn the details about camping and overnight stays on the islands in the Mingan Archipelago.
Read: A Lighthouse Stay in Quebec’s Mingan Archipelago

View from the lighthouse of Ile aux Perroquets
I admit that I have not done the drive to Kegaska, the easternmost village at the end of Highway 138. But I’d love to. This looks like such a pretty area and for me there’s always something special to get to the end of a road. Note that the highway changes from pavement to gravel, eight kilometres east of Natashquan.
Get into exploring mode on this part of your Quebec road trip and stop where the wind blows you. Enjoy fabulous views of the St. Lawrence River as it widens. If you could see for hundreds of miles, the shore near Corner Brook, Newfoundland would pop into few.
There are places to camp and some B&B’s along the route. Check out the Cote Nord website for a full listing of campgrounds.
Visit the Quebec Original website for a listing of B&B’s in Natashquan.
In Kegaska stay in Auberge Brion. You can find them on Facebook or call them at 418-726-3738.

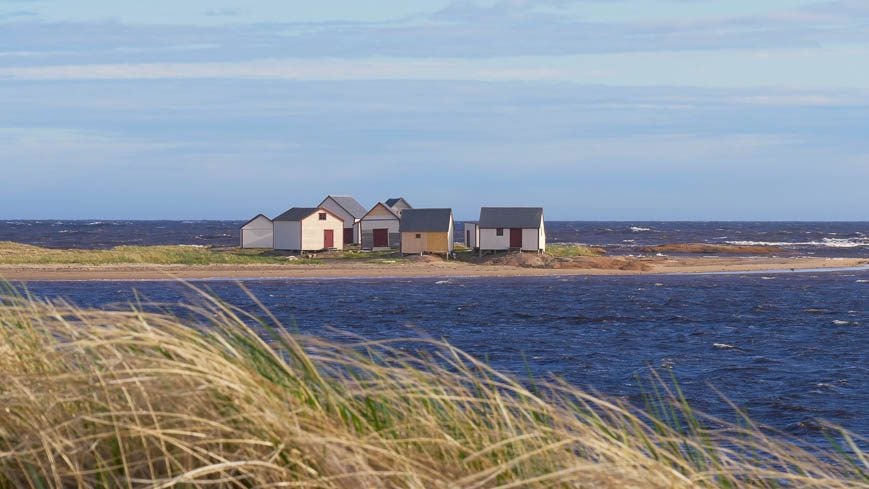
Pretty scenery around Baie Joan Beetz (between Havre-Saint-Pierre and Natashquan) – Photo credit: Mathieu Dupuis/Le Québec maritime
View of Les Galets from Natashquan – Photo credit: Thibault Touzeau/Le Québec maritime
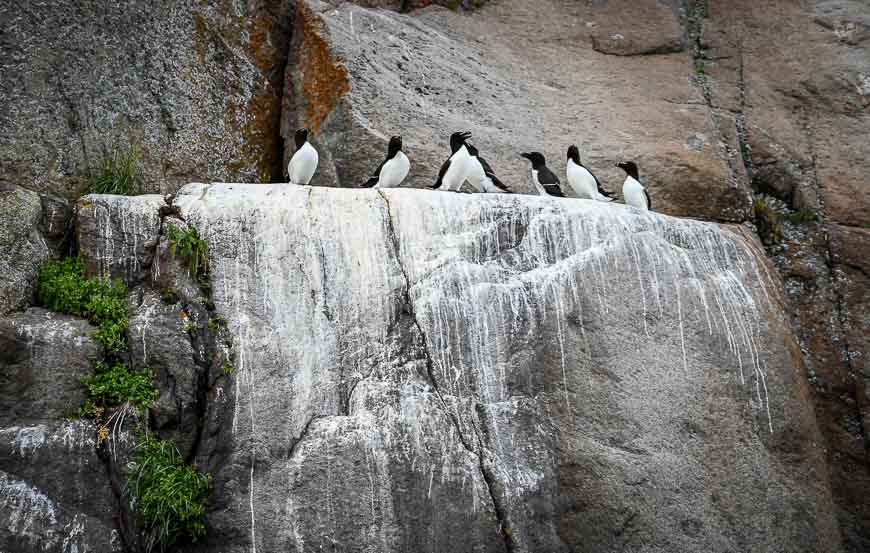
The Mingan Archipelago National Park Reserve is comprised of close to 1,000 islands and islets scattered off the coast of eastern Quebec. Look for an abundance of large limestone monoliths, some dating back 450 million years. These fantastically shaped rocks, carved by nature are a big reason to visit the park for nowhere else in Canada “will you see such an abundance of these rocky sentinels.”
Two towns provide boat access to the Mingan Archipelago – Longue-Pointe-de-Mingan and Havre-Saint-Pierre. In Longue-Pointe book a tour with Famille Loiselle. Apart from seeing whales and other marine creatures, one of the big highlights is all the puffins you’ll see especially on Île aux Perroquets.
Read: A Trip to Mingan Archipelago National Park in Quebec

Go on a boat excursion to Mingan Archipelago National Park Preserve

Beautiful rock formations in Mingan Archipelago National Park Preserve
While not technically along the north shore of the St. Lawrence River, a side-trip to the Saguenay area is highly worthwhile. You can access it from Tadoussac via Highway 172. If you do that you could drive to Saguenay and return along Highway 170 to meet Highway 138.
I stayed in one of Quebec’s Most Beautiful Villages – L’Anse-Saint-Jean – and would highly recommend it. This is where my kayaking tour started. I stayed at Auberge la Fjordelaise, across from the beach and loved the ambiance of the hotel.

One of Quebec’s “Most beautiful Villages” L’Anse-Saint-Jean
Today is an easy drive back to Quebec City. It’s time to reflect on all the places you’ve visited, the people you’ve met and the nature you’ve been privileged to see. If you’re already thinking about another Quebec road trip I’d recommend the Gaspe region. My friend’s at Offtrack Travel have written a detailed post that takes you from Montreal to the Gaspé so check them out if you’re into road-tripping.
Click on the photo to bookmark to your Pinterest boards.

The post Quebec Road Trip: Quebec City to Havre-Saint-Pierre appeared first on Hike Bike Travel.
Quebec Road Trip: Quebec City to Havre-Saint-Pierre Read More »
Today is an episode of TSP Rewind, commercial free versions of past podcast episodes. Today’s episode was originally Episode-1195- Ben Falk on The Resilient Farm and Homestead and was originally published on August 27th, 2013 The following are the original show … Continue reading →
Episode-124- TSP Rewind – Ben Falk on The Resilient Farm and Homestead Read More »
Featured photo: Mailsparky
Worried that your kid cannot read a map? Want to teach children some basic map reading skills quickly and effortlessly? Find out how learning map navigation can be useful for your child’s education and how you can make learning fun.

In the era of GPS navigation, the actual map reading skills are becoming a thing of the past, something only a few young people can do. If however, you are terrified by the idea of your kids being pushed around by robots, you may want to teach them some essentials while they are still young. It’s no secret that even educated adults occasionally lose their way simply because Google keeps rerouting their trips. And if you want your child to actually use his head when searching for an optimal road (as opposed to relying on the tech alone), get your toddler sun hat ready — we’re going outside for map reading and land navigation lesson!
One of the surest ways to start with your child’s map reading lessons is to combine theory with practice. Even though our learning modalities differ, visual learning combined with short field-trips is surely the easiest way to teach your kid navigation essentials quickly. For starters, print out a detailed map of your immediate environment. It can be anything — from several neighboring houses to a larger area, including parks, some shops, etc. As long as your child knows this neighborhood, it’s going to be easy for them to compare the actual reality with a printed map version. Sounds an easy start, right?

When your kid understands the basics of how map navigation works, it’s the high time to explain a bit more theory. One of the surest ideas on how to improve map reading scores is to start small. In a way, a map is nothing but a simple drawing with symbols. Some of these symbols — like rivers, pools, etc. will be instinctively understandable for your child. Others, like roads and railways, will need more explaining on your part.
So, once you’ve walked through your neighborhood, come back home to learn some theory. Don’t push it, though. For younger kids, too much info in one day can be overwhelming. So, it’s better to start with your theoretical map reading practice the next day.
The next stage of reading map coordinates is another field trip — this time, a longer one. Take a weekend trip someplace and teach your kid map reading as you drive. If you want to speed this process up a bit, you may also have the child compare online map routes with a printed map version. Just your like your first mini field trip out, this experience is going to be fun, visual, and pretty much self-explanatory. Besides, no matter how useful reading a map for kids maybe, you should not completely discard tech education. Your child will have a chance to compare an online map with a printed one and, eventually, should be able to plan one’s itineraries better.

There are plenty of ways to make map reading practice fun. You can print out a larger map of your area and mark places you’ve already visited. If you travel with kids, this map can be even larger. Mark the places you’ve already seen with flags, stickers — anything your child likes and can relate to. This will only make the whole experience more rewarding.
Or, you could draw a map of your immediate neighborhood and start a treasure hunt. Such an idea will take a bit of time, patience, and preparation on your side, but it will definitely be exciting for the child. If you’re somewhat a lazy parent (and who can blame you?) and do not want to bury coins in the park, how about asking your child to hide the treasures for you to find them?
Finally, you can always try the easy way out and download a couple of interactive apps. Stack the States, for example (available both on iOS and Android), comes at just three bucks but can teach children plenty of things about map navigation and US geography. Once you’re there, you may want to check out other applications for children. There are plenty of tools that can make you rethink the whole education process and make learning fun.
Do you think map reading skills are vital for children? Or would you rather go with today’s flow and have children rely on tech alone?
Author’s bio: Beatrice Callan is a former elementary school teacher with over 10 years of teaching experience, Beatrice is currently a stay-at-home mom of two and a part-time blogger. She specializes in children’s psychology and education. An active advocate of interactive learning, Beatrice endlessly searches for ways to make education fun and game-like.