In order to survive the Oregon Trail, pioneers relied on foods that meet the most basic requirements: easy to grow, easy to store, and calorically dense. #urbansurvivalsite #pioneers #foodstorage #shtf #survivalfood
Thanks to Rob Pincus, I have found a cleaner copy of Colonel John Boyd’s Aerial Attack Study (AAS). It was recreated by Mr. Mark Hart from the declassified 1964 version. The recreation is much easier on the eyes than the reproductions of the original mimeographed edition that are generally available.
Prior to Colonel Boyd’s AAS, fighter combat was viewed by the majority of fighter pilots as an intuitive skill rather than one that could be codified. Some conceptual principles had been developed along with elementary tactics such as the Thach Weave, but Boyd was the one who wrote the definitive book. Only Major General Frederick “Boots” Blesse had preceded Colonel Boyd in writing a book, No Guts No Glory, about jet fighter combat. Major General Blesse’s book wasn’t the exhaustive treatise on the subject that the AAS was.
Search for “long range shooting” and you’ll likely be overwhelmed.
There will be articles about optics, cartridges, barrels, stocks, and triggers. You’ll see terms like Coriolis and spindrift and station pressure.
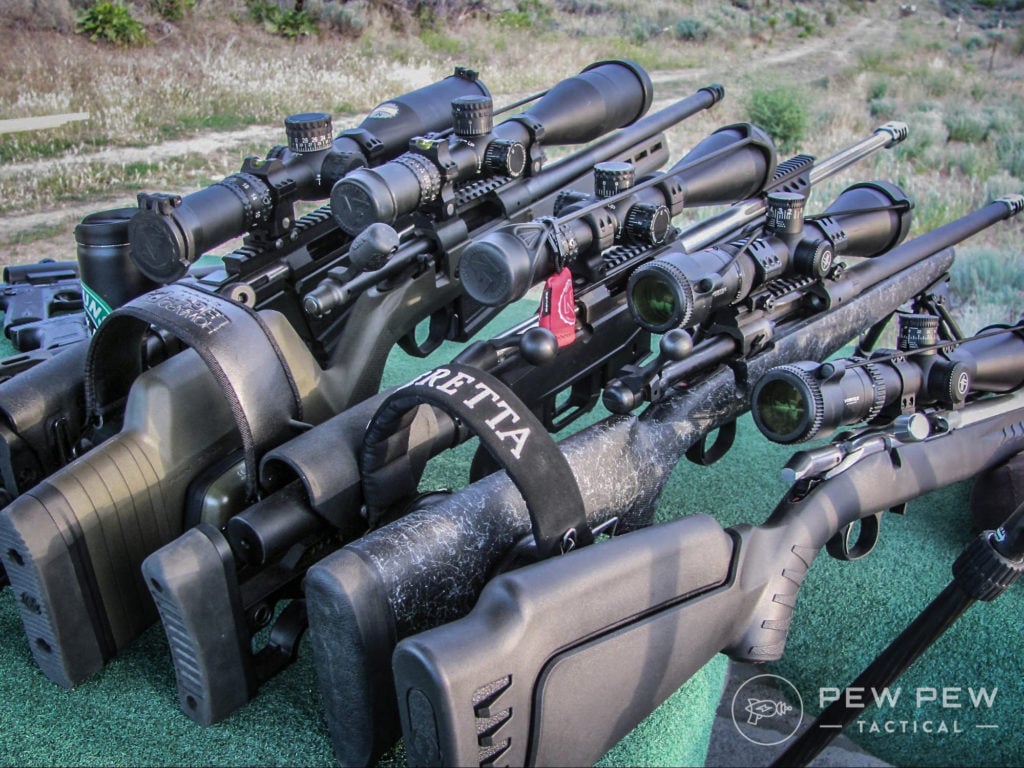
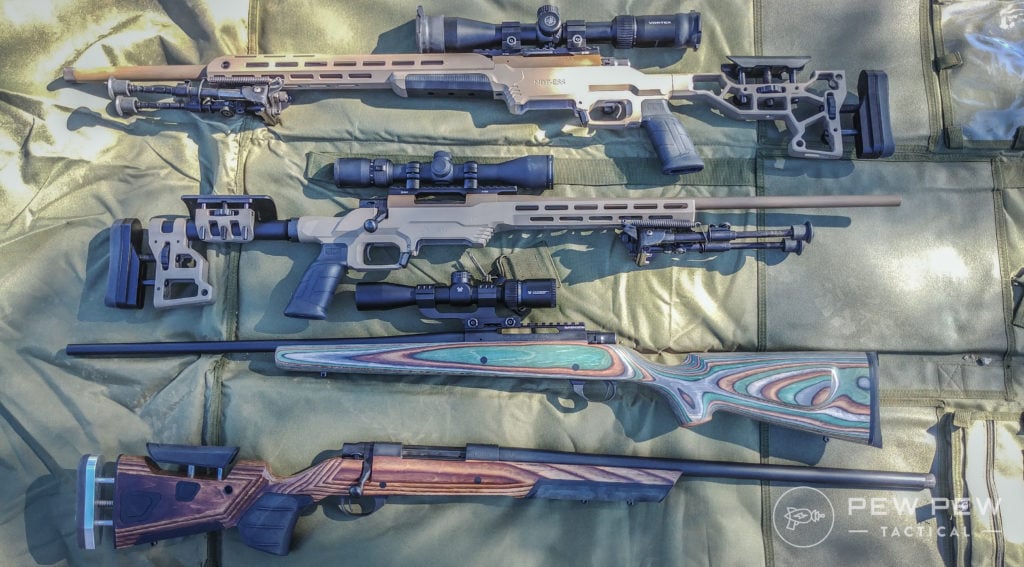
A herd of long-range rifles means a good day no matter where you are!
It’s like the shooters who practice the dark art of long range precision shooting are speaking a language known only to a select few.
But rest assured, shooters of all backgrounds, experience, and skill levels can learn the ins and outs of long range shooting.
We’ll walk you through some of the basics so you can get started. Then decide if you want to go down the rabbit hole.
Table of Contents
Loading…
What is Long Range Shooting?
Long range is a subjective term and every shooter has a distance that, for them, is considered long range. It might be experience or it might be equipment related.
HBH 1000 Known Distance Range
For someone brand new to the rifle making a shot at 100 or 200 yards may be a very big deal. If you are shooting an iron-sighted lever gun in .357 magnum, long range for you is likely 150 yards or so.
The man, the myth, the legend — Jerry Miculek hitting a 1,000 yard shot with a 9mm revolver
However, I’m going to assume that for most shooters, long range means hitting targets at distances like 800 or more yards.
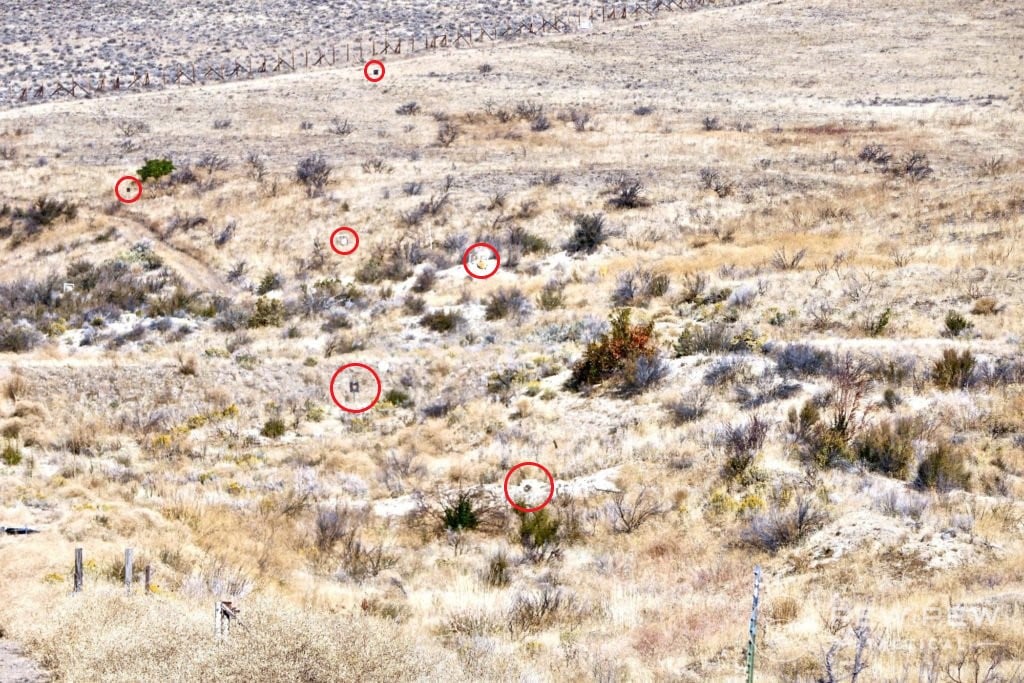
Just think, a 30-inch wide target at 1000 yards is the same as hitting a 3-inch target at 100 yards… sort of.
Both targets are just 3-MOA (Minutes of Angle). In order to hit that 3-MOA target, some basics are needed.
Steel at 300, 428, 505, 637, 718, and 1000 yards
Just to be clear though, reading this article will not make you an expert marksman. There is a lot more to talk about and a lot more detail to cover.
This is just the first taste of what long range shooting is, we’ll be covering more topics and in more depth soon!
Basic Gear
Of course, you need a rifle, scope and quality ammunition. I don’t think you need to go crazy spending a ton of money to hit targets at long range.
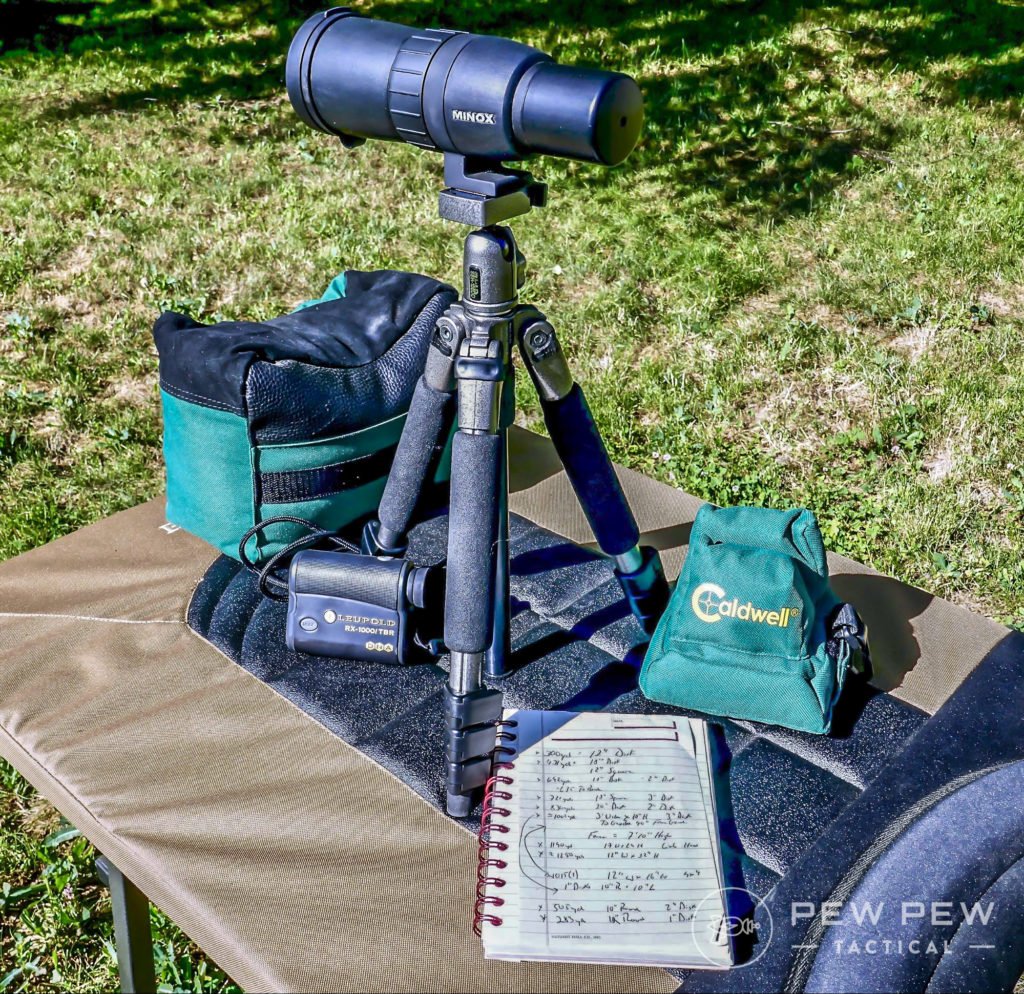
Solid rests, a range finder, spotting scope, and a notebook are some basics that are helpful
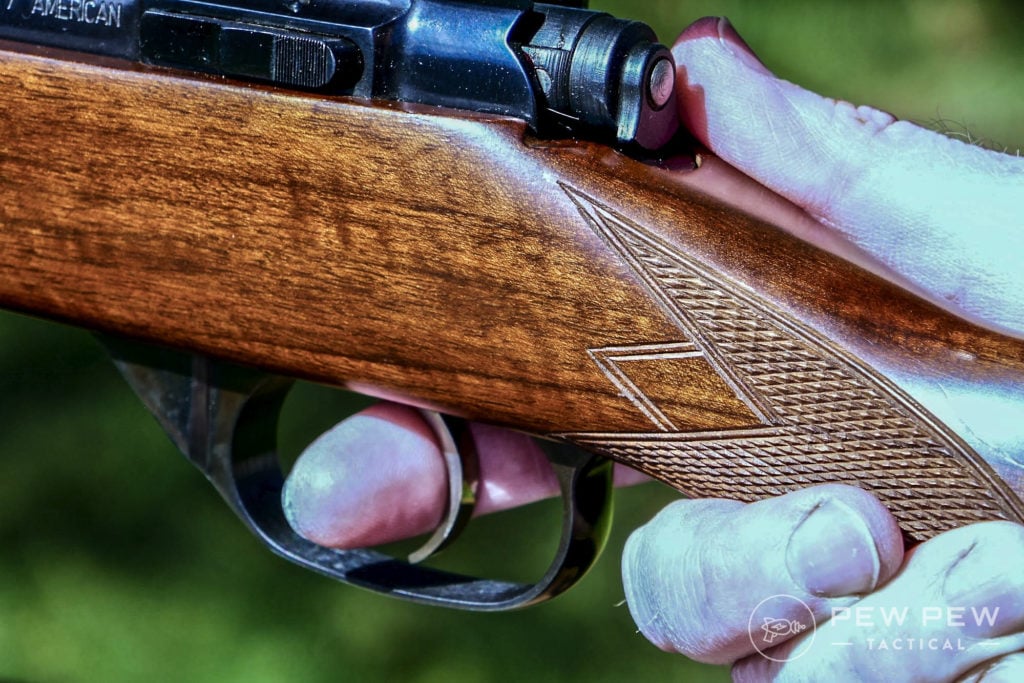
What you do need is a rifle capable of 1-MOA or less at 100 yards with a good trigger. Take a look at the Ruger American Predator or Howa 1500 as entry-level long-ranger plinkers.
Howa 1500 in MDT and Boyds‘ – top to bottom: MDT ESS, MDT LSS-XL Gen 2, Boyds’ Platinum, Boyds’ AT-One
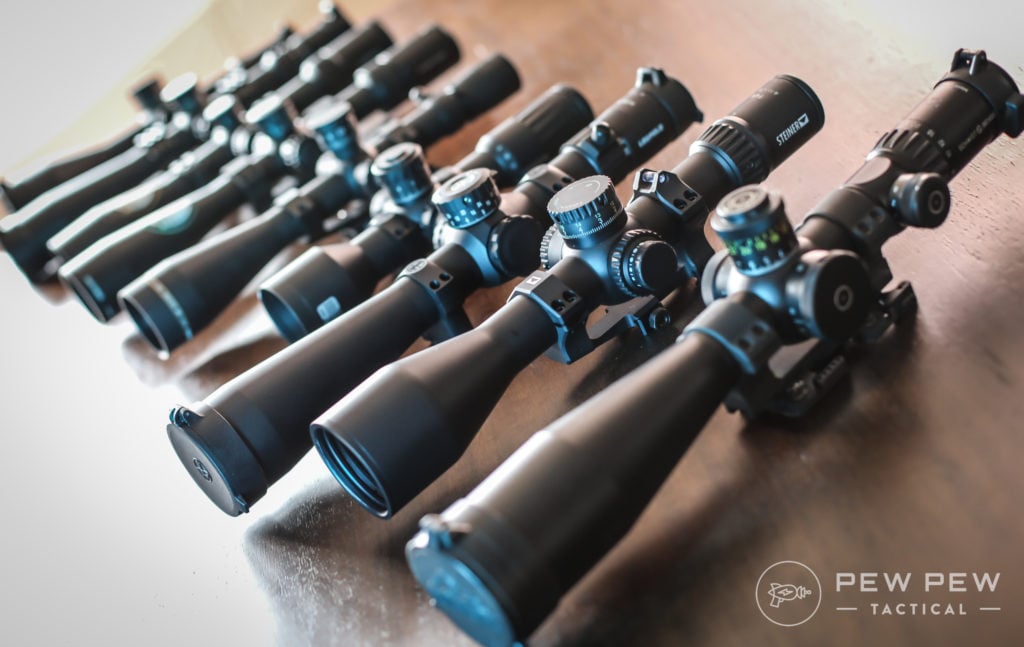
Your optic doesn’t need to be a top of the line Nightforce. But, you do need a scope that allows you to see the target clearly at all ranges and has repeatable turret adjustments.
A zero stop is nice, but not absolutely necessary. Just remember how many clicks you came up for your last shot, then dial back to zero before your next shot at a different distance.
Factory loads or handloads; both work just fine in an accurate rifle
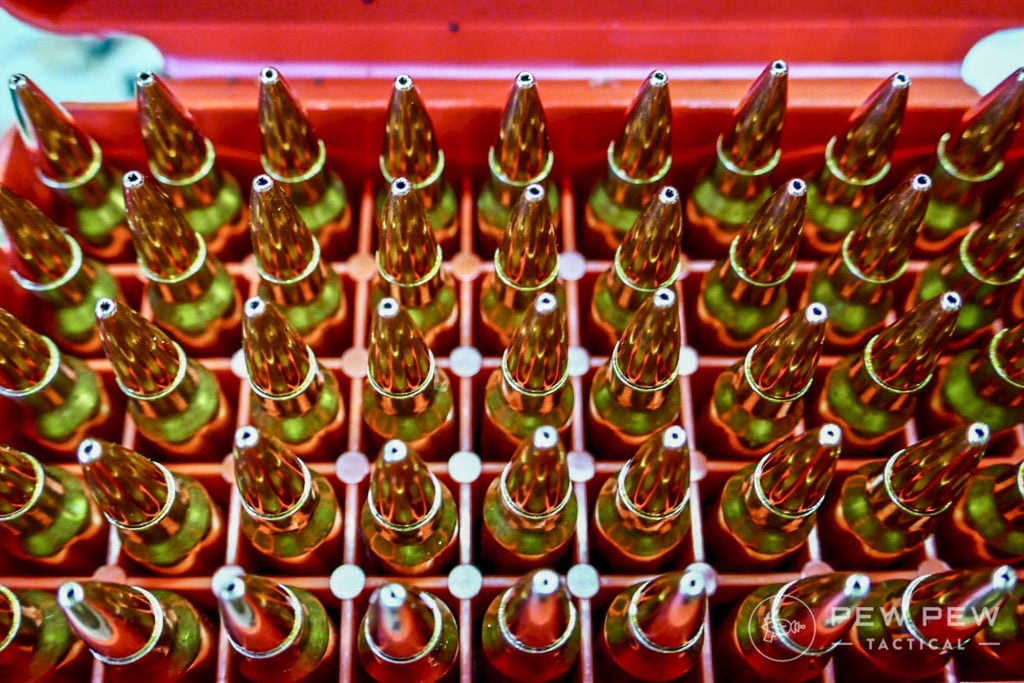
Factory ammunition today is incredible. You can buy very high-quality ammo with high-BC bullets made to perform at long range.
Rifles in calibers that do not recoil much allow you to see bullet impacts on target and, if the conditions are right, you can see the bullet trace all the way to the target. This helps you determine if your elevation and windage corrections are right for the target you are engaging in.
For rifles chambered in 6 and 6.5 Creedmoor, you can expect a barrel life of about 2500 to 3000 rounds.
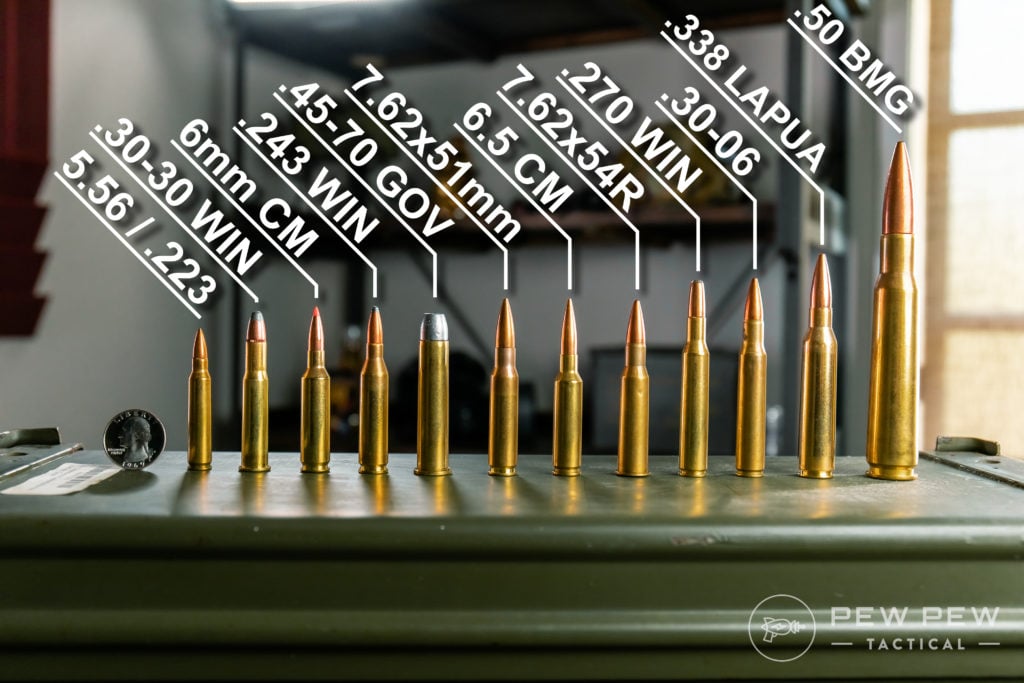
Some of the most popular rifle calibers
If you opt for the lowly .223 Remington you will probably get about 7000-10,000 rounds of accurate shooting and save money on ammo.
You don’t need the latest and greatest to make hits a long way out if you are doing your job correctly.
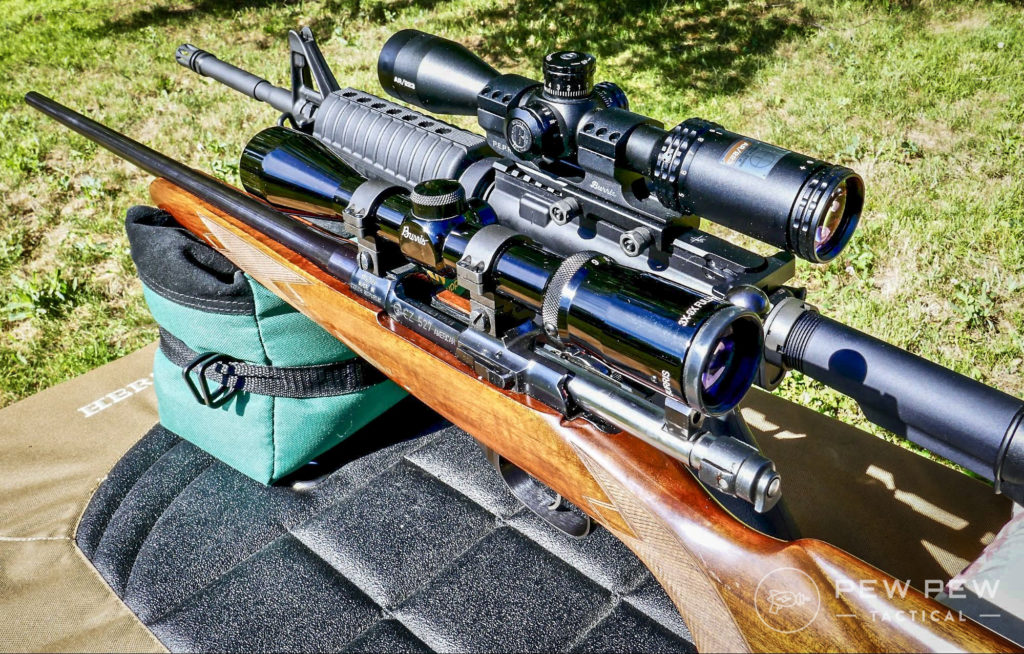
Don’t discount AR’s or Modern Sporting Rifles. With the proper ammo, consistent hits out past 700 yards are very possible.
The CZ 527 & Rock River Entry Tactical are both sub-½ MOA rifles. Hits beyond 700 yards are not uncommon for these rifles.
A rangefinder is helpful if you don’t know the range to the target. You can estimate the range using the scope reticle, but only if you know the dimensions of the target.
So unless you are at a range that has the distances marked you need some way to determine how far away the target is so you can make the correct scope adjustments. If you have a rangefinder you use for hunting that will be fine, most will work reliably out to about 800 yards.
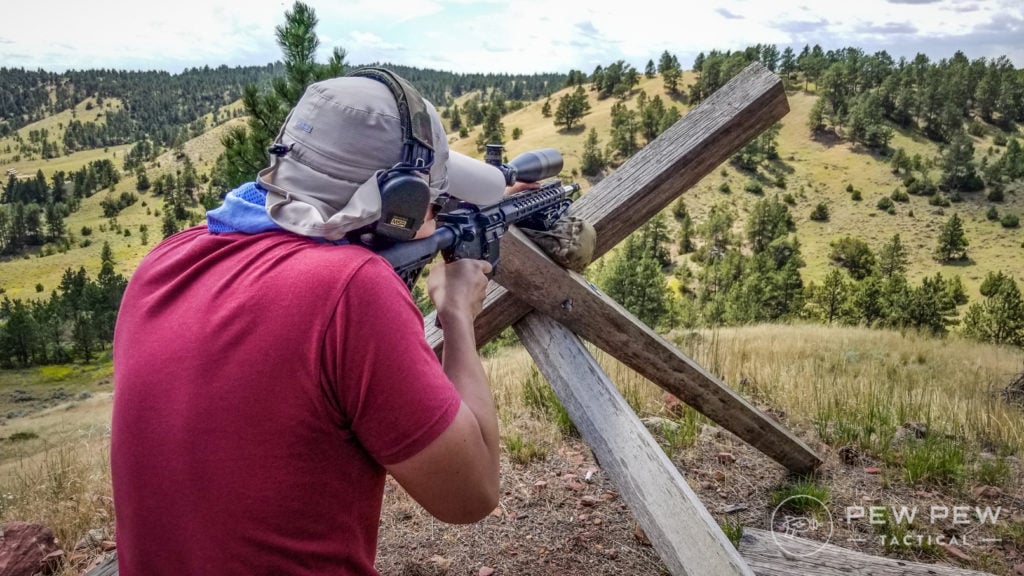
A quality bipod on your rifle helps to make shooting prone or off some sort of natural or man-made support much easier.
We always recommend a shooter invest in a Harris Bipodthat has the ability to swivel so no matter the terrain, the gun can be fired from a perfectly level attitude.
If you don’t have a bipod, you can use your backpack, sandbags or something similar to rest the forearm of your rifle. The key is a stable platform to shoot from.
For more choices check out our Best Bipods article.
You will need a rear bag to support the butt of the rifle. This can be as simple as a couple of old socks filled with rice and knotted tight. I use old shot bags filled with varying amounts of old tumbler media.
var PPT_APS = PPT_APS || {};
PPT_APS[43443] = {
“id”: “43443”,
“title”: “Caldwell DeadShot Boxed Combo Front and Rear Bag”,
“img”: “https://www.pewpewtactical.com/wp-content/uploads/2019/05/Caldwell-DeadShot-Shooting-Bag-Combo-1024×692.jpg”,
“tag”: “”
};
They are lightweight, can be stacked and combined as needed and provide a way for me to apply pressure by squeezing to adjust the vertical alignment of my rifle.
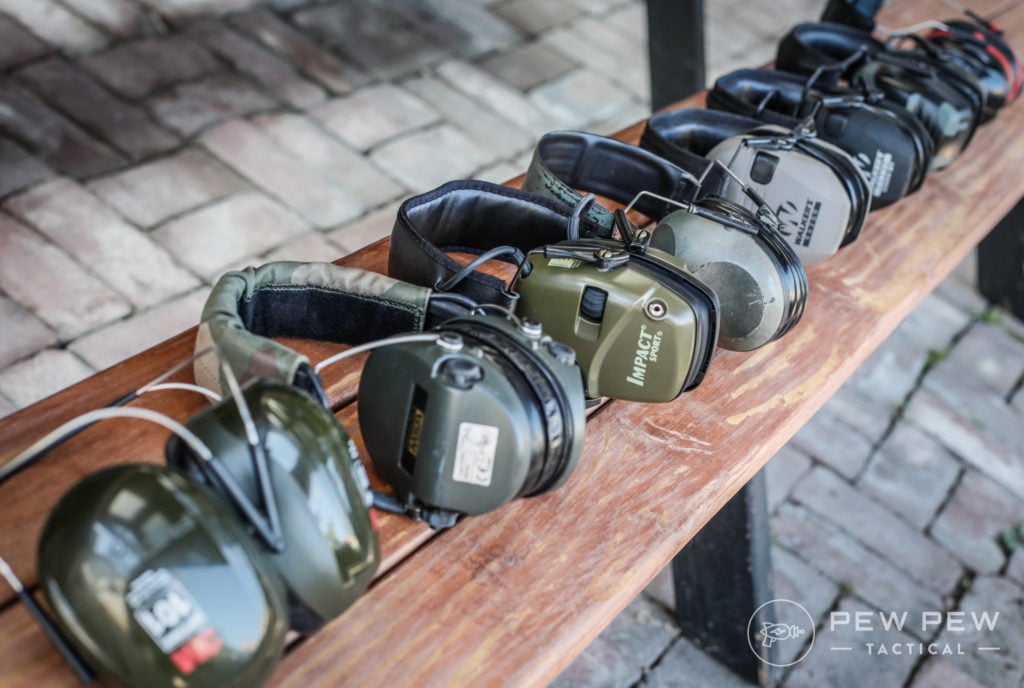
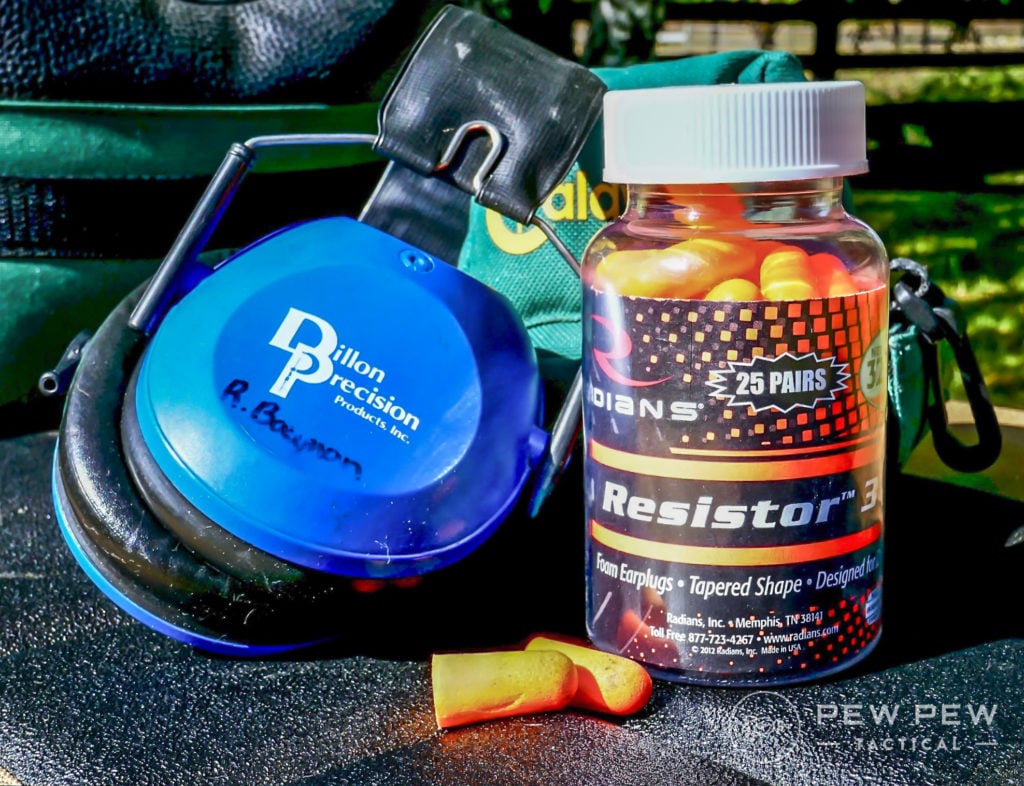
Proper hearing protection is a must. Most folks who delve into long range shooting will install a muzzle brake of some sort to reduce or eliminate recoil.
Tested Shooting Ear Protection Muffs
No matter how you slice it, brakes are loud.
I normally wear quality shooting earplugs under my ear muffs. You only get one chance with your hearing, take time to protect it as much as you can.
Double up on your ear pro. Rifles with brakes are extremely loud!
As you shoot, you will begin to learn how your rifle and ammo perform at various ranges. There have been several articles that discuss various apps that allow you to enter the important data for your rifle, optic, and ammo choices.
Then, as you begin to stretch out the range, the app calculates how much you need to dial up the scope and how much windage you need to dial or hold depending on the conditions.
The app will also help to verify the velocity of your bullets depending on your hits. If you are sailing rounds way over the target, likely your bullet is moving faster than you think it is. The info on the cartridge box may not be correct for the conditions you are shooting in.
.223 Handloads For Long Range Shooting
If you have powder that is sensitive to temperature changes, your velocity may also increase or decrease. You can make adjustments in the app to correct for velocity variations.
For a new long-range shooter, the Shooter App is easy to use and you can store a ton of info in it.
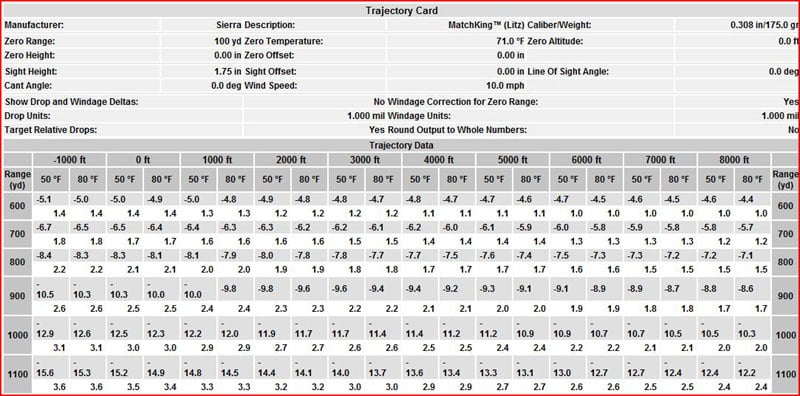
If you don’t have an app yet, go to JBM Ballistics and print a “drop chart” for your rifle. I have used it quite a bit this summer and the adjustments have been pretty close for the range I have access to.
Ballistic card made with JBM Ballistics
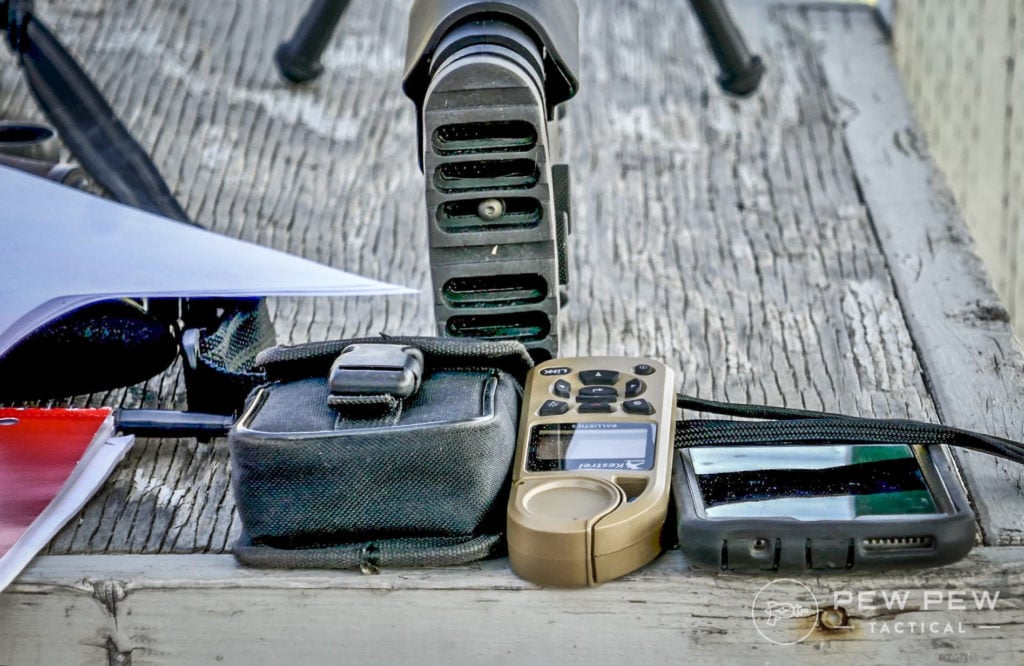
Wind Meter
TheKestrel 2700weather meter is packed full of features! This little tool will allow you enter critical atmospheric data into to your app and help you make better adjustments to your optics.
A range finder, a wind meter, and smartphone make long range shooting much simpler.
Things like elevation, barometric pressure, humidity, and temperature all affect the flight of your bullet.
For sure the little wind speed indicator is key. If you know how hard and from what direction the wind is blowing you know how much windage you need to dial or hold.
A wind meter is nice but not absolutely necessary. If you really want to “buy once, cry once” the Kestrel 5700 Elite has a ton more features, but at a much higher price.
Obviously you need to have some understanding and grasp of good shooting technique to consistently hit at long range.
Don’t expect to be ringing every shot the first time out, precision shooting is about consistency and practice.
We could write volumes, and volumes have been written, on how to be a better and more accurate shooter. But right now — let’s just cover the basics.
Breathing
A lot has been written regarding breathing and heartbeat over the years. Don’t get too hung up on taking in a deep breath, letting out half, holding and breaking the trigger at just the right time.
I like to breathe normally as I get my rifle aligned and level. Once I am on target I let my breathing slow and relax as much as possible. I tend to squeeze off my shot just as my lungs reach the bottom of the exhale.
Breathing exercises are relaxing and useful.
At this point, my heartbeat is slowest, and because I am not trying to hold my breath, my body doesn’t tense up and my heart rate doesn’t speed up as my heart and brain search for fresh oxygen.
Trigger Control
Today’s rifles either have great triggers or can be upgraded with a great trigger. For a rifle used exclusively from a bench or competition a trigger of around 2 pounds that breaks cleanly will improve your shooting.
If your rifle is doing double duty in the field as a hunting arm I would suggest adjusting your trigger to around 3.5 – 4 pounds.
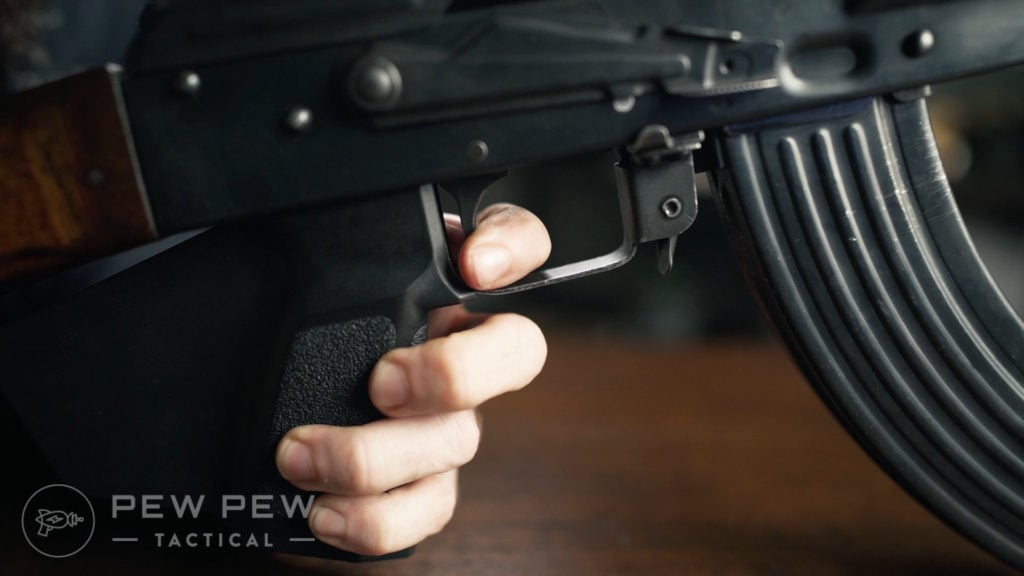
Use the area on your index finger just beyond the last joint
When you place your finger on the trigger you want to use the area on your index finger just beyond the last joint. If you press on this area you can feel a hard, bony structure. You want that bony section of your finger on the trigger.
This gives you a consistent feel and a consistent finger placement. If you use the pad of the index finger you have a ‘mushy’ feel to your trigger squeeze. In addition, if your hands are cold, you often cannot feel the ends of your fingers and if you use the pad of your finger you cannot tell how much pressure you are putting on the trigger.
Gripping the Gun
When shooting from the bench let the bench and the bipod and the rear bag do all the work. For most rifles you are going to use for long-range shooting, recoil is minimal and you don’t need to hold the gun in a death grip.
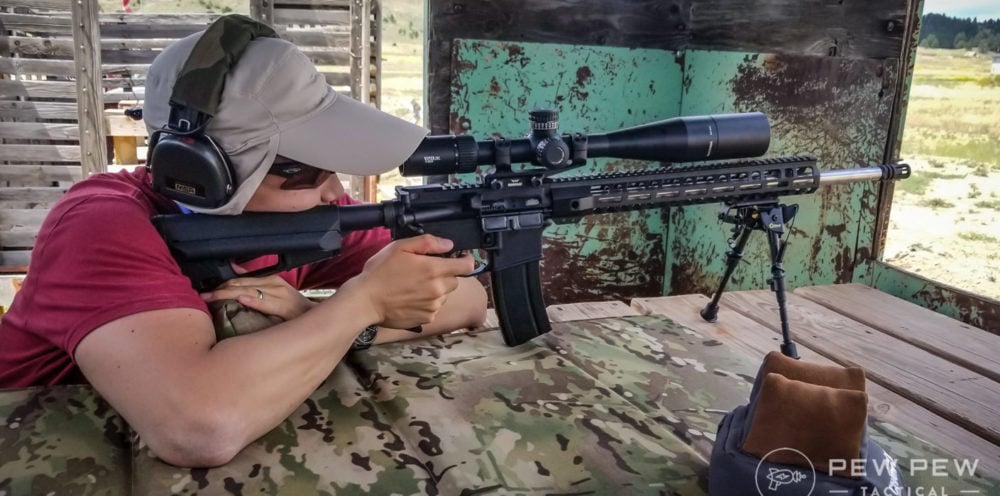
Be sure you adjust your seat so you are sitting directly behind the gun. You want to line up with your shoulders square to the target and not be angled off to the side.
Off a bench or off a tank trap, square up!
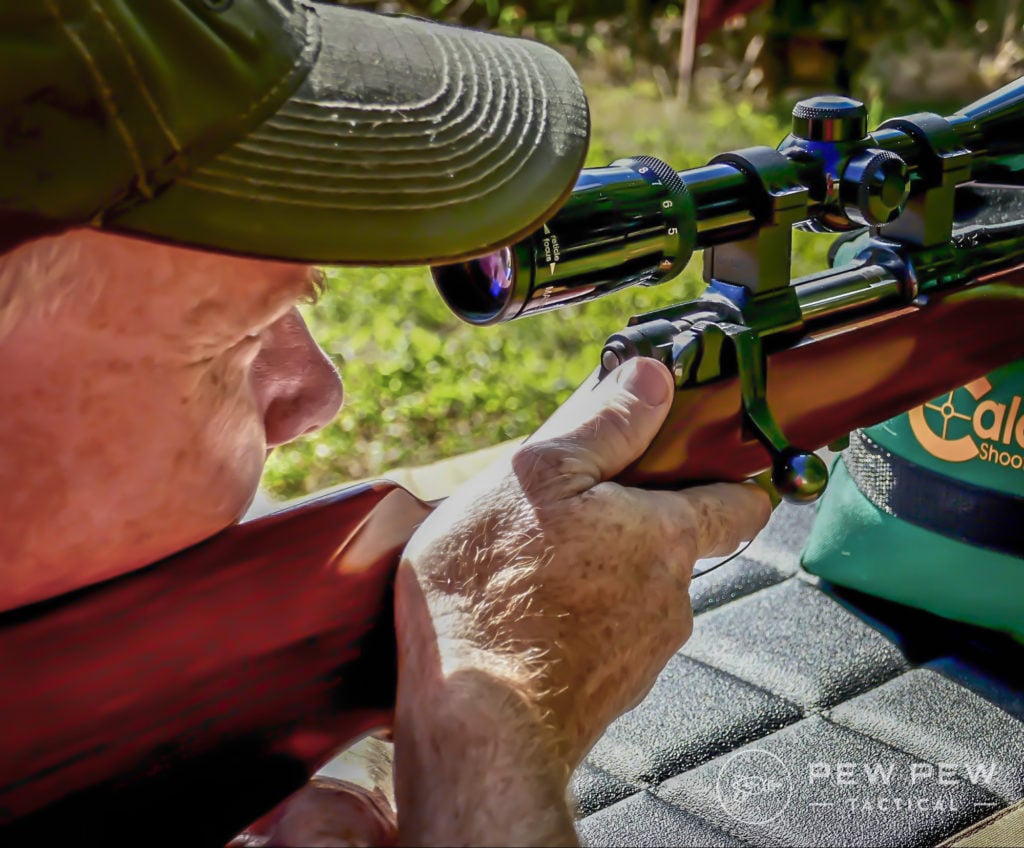
Your strong hand or the hand you squeeze the trigger with is going to rest on the grip area with your trigger finger indexed outside the trigger guard until you are ready to shoot.
Use your remaining three fingers to gently pull the gun into your shoulder pocket. The gun needs to be firmly anchored to your shoulder, but not to the point you are really pulling hard.
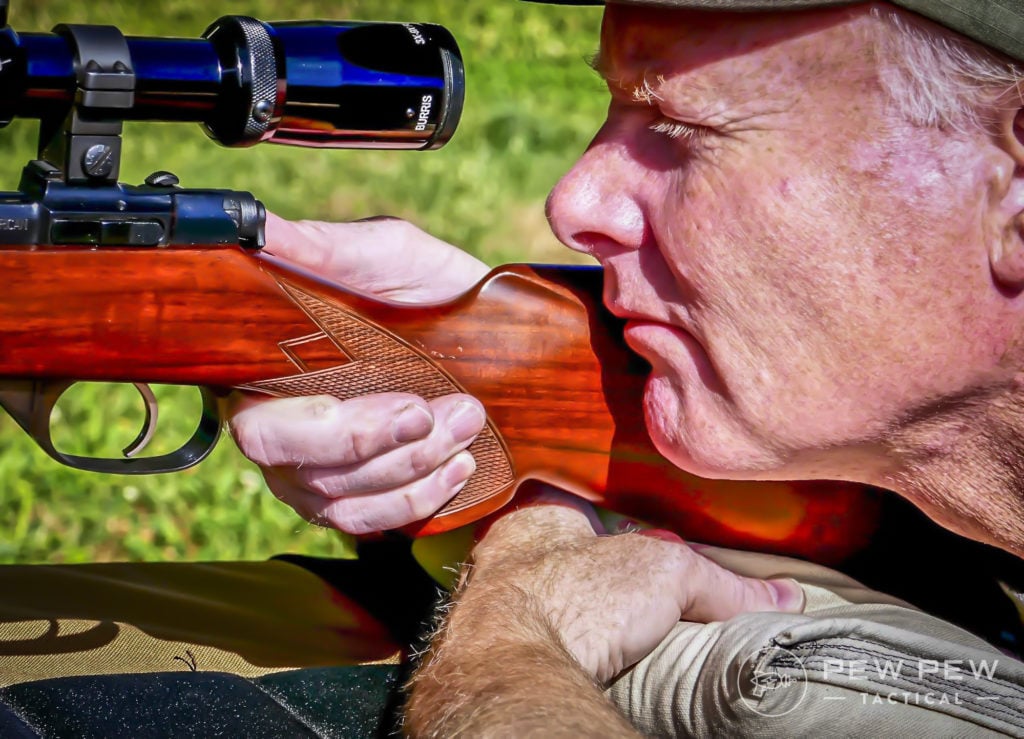
Your thumb should rest on top of the grip, or if using a stock with a pistol grip, be resting along the side. You do not need to grip the gun with your thumb.
Thumb on top of the grip, you don’t need your thumb wrapped to have a steady grip!
If using a bipod, lean forward a bit to ‘load’ the legs of the bipods once you are well-positioned.
Be sure your cheek has good contact with the stock and that you can clearly see the entire image through your scope. On a fixed stock rifle you have fewer options for adjustment than with a modular stock or chassis, but you should still be able to comfortably align your body and your eye to the optic.
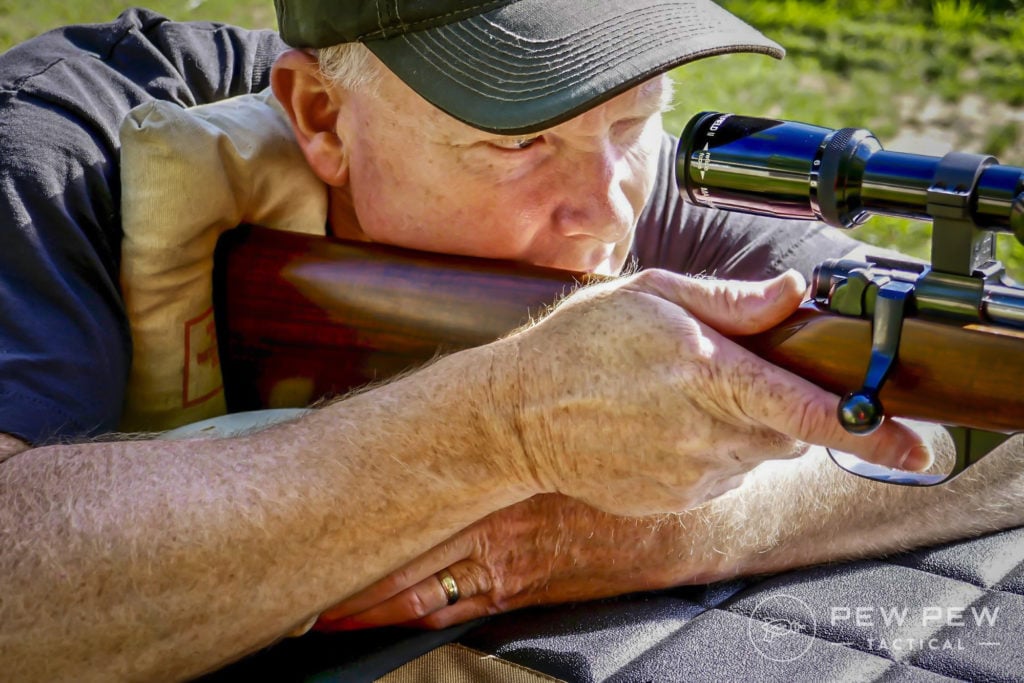
Your ‘off’ hand controls your rear bag.
Squeezing your rear bag to adjust your hight and aim while also giving yourself a solid shooting rest.
By squeezing the bag you raise the butt of the rifle and your scope reticle will move down in relation to your target. If you ease pressure on the bag the reticle climbs and moves higher.
By using the bag you control the movement of the vertically and, to some extent, horizontally. Your left elbow and forearm are resting nearly flat on the bench at this point.
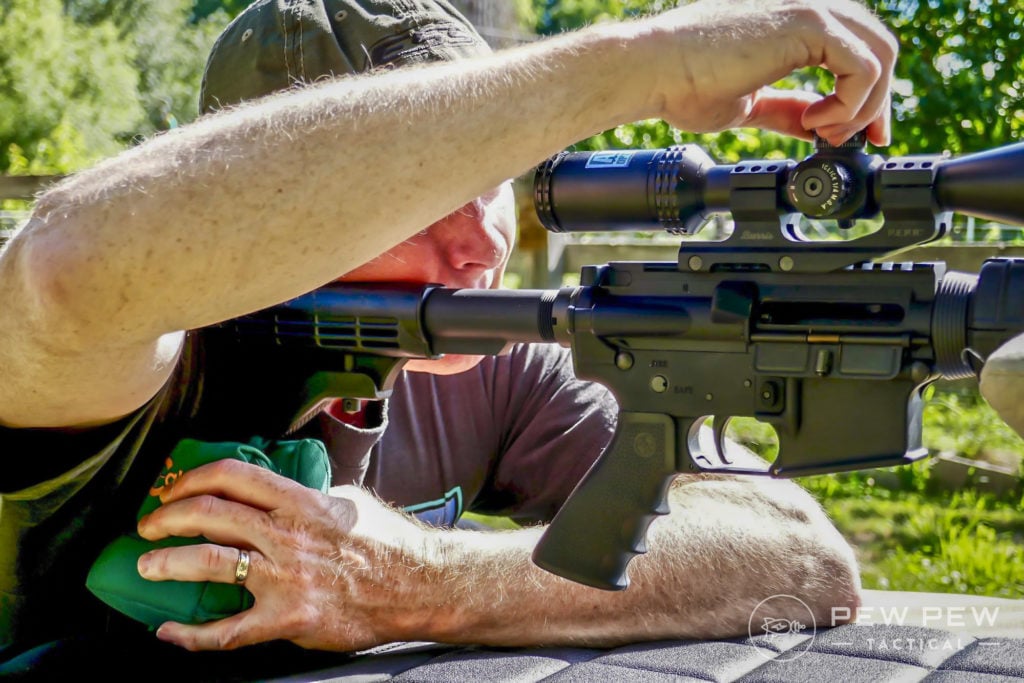
Your trigger hand is going to make any vertical or horizontal turret adjustments, make parallax adjustments, squeeze the trigger and work the bolt.
Trigger hand to adjust the scope
Shooting and Follow Through
When you are aligned with the target and have your optic dialed in for the distance and the wind conditions you are ready to shoot.
If you are letting the gun rest on the bipod and rear bag and not placing any unnecessary pressure on the grip, the rifle should recoil straight back and come to rest very near the center of the target you were holding on.
Even with big calibers like .50 BMG, the rifle will remain relatively flat with proper shooter technique.
Keep your eyes open through the shot. Today’s optics will allow you to see not only your impact on the steel, but in many cases you will see the bullet trace all the way to the target.
This only happens if your follow-through is good and you let the rifle recoil naturally. Don’t fight it.
If you are shooting a lightweight mountain rifle, you may want to invest in a shooting pad, or simply place a sandbag between your shoulder and the butt of the rifle.
For real thumpers, a bag of shot or sand can make your day much more pleasant.
You may also find that a lightweight rifle or one with a thin barrel profile will shoot better if held more tightly and with some additional pressure forward into the bipod.
If you are doing your job you should be able to reach up with your trigger hand, work the bolt, and be ready to shoot again very quickly. Don’t raise your cheek off the stock.
Don’t move your head. Just work the bolt, acquire your target and fire again.
Dry Fire Practice
We are all capable of training more and getting better regardless of the type of rifle we are shooting and the type of shooting we normally do.
One of the biggest reasons shooters miss or fail to shoot consistently small groups is flinching.
I know… you never flinch. You’re not afraid of recoil. Your gun doesn’t kick very hard.
I’m willing to bet that if we take some time and do the Ball and Dummy Drill, nearly every shooter will flinch at some point.
At 1000 yards it takes very little movement of the rifle to cause a miss. A microscopic flinch will make you miss.
Take a few minutes every week to do some dry fire practice. Set up in your yard, or depending on your neighborhood and neighbors, in your house and garage and practice dry firing.
Remove all the ammo from your practice area and double and triple-check that your gun is unloaded and pointed in a safe direction.
Shoot from prone with your normal set up and supports. Really focus on getting a good sight picture and squeezing the trigger so smoothly that when the hammer falls the reticle does not move from the center of the point you are holding on.
Exaggerate your follow-through. Don’t blink or close your eyes. Have someone watch to see if your eyes close when the hammer falls.
Now, work the bolt and do it again, and again, and again.
The top shooters in every discipline spend way more time dry firing than they do running live fire drills.
When you do get to the range take a few minutes to go through some dry fire exercises to get relaxed and comfortable with the gun before you start sending rounds downrange.
If you don’t normally have access to a long range, practice shooting the best groups you can at 100 yards, over and over and over.
One of the best long-range shooters I know spends most of his live fire practice in prone on the 100-yard range.
Homework
It might seem like we just covered a lot of information, but this is just the very start of the first course when it comes to long range precision shooting!
You’ll want to get more information, to start you off I highly recommend Ryan Cleckner’s Long Range Shooting Handbook — it is truly a definitive source for beginners to precision shooting.
Long range shooting is more available and more achievable than ever before.
Rifles are better than ever, and paired with some good ammo with high-BC bullets, long shots are makeable with just about any cartridge you care to try with.
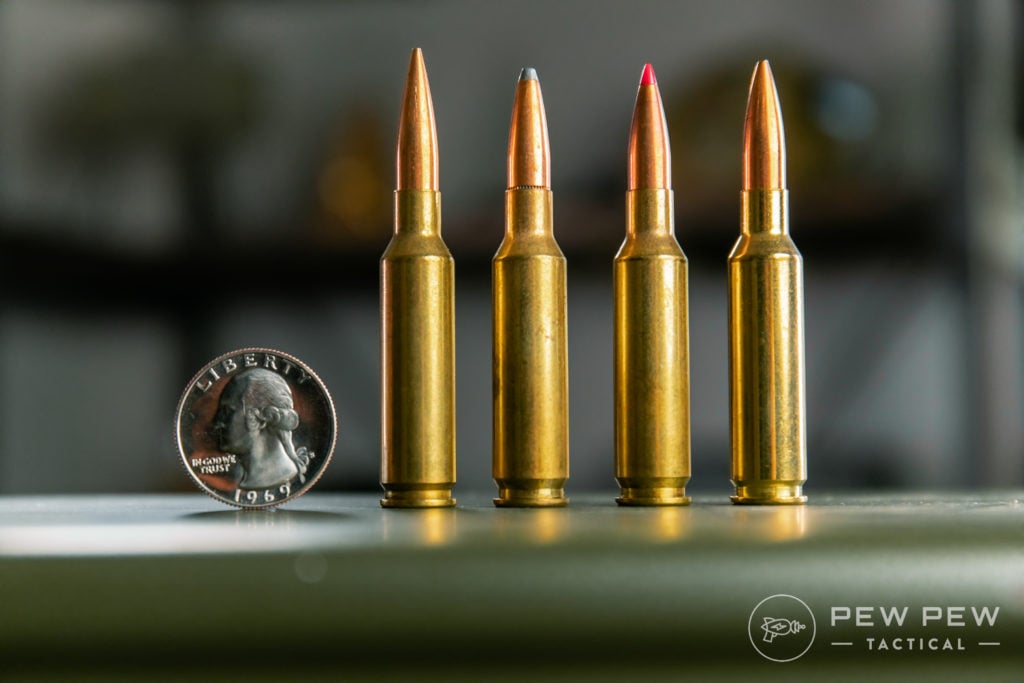
Assorted 6.5 Creedmoor (L to R: Federal FMJ, Soft 129gr, Ballistic Tip 120gr, Gold Medal 140gr)
Optics that used to be exotic are now commonplace and within the budgets of most shooters.
The bottom line though is your training and practice. You can’t just buy your way to long-range precision. Learn to read the weather and the wind.
Learn and practice your basic shooting fundamentals. Dry fire a lot.
Just like anything, the more work you put in, the luckier you seem to get. And those shots that seem out of reach initially, begin to be commonplace and you start looking farther out on the horizon and wonder, “can I hit that rock way over on the other side of the canyon?”
Tell us about your long range shooting experiences and the things you do to train for competitions or open-country hunting!
Looking to take an AR-15 long range? Check these out!
Every day I bring you an item on Amazon that I personally use or has been purchased by many members of the audience and I have researched enough to recommend. Today’s TSP Amazon Item of the day is Barina LED …Continue reading →
Search for “long range shooting” and you’ll likely be overwhelmed.
There will be articles about optics, cartridges, barrels, stocks, and triggers. You’ll see terms like Coriolis and spindrift and station pressure.
A herd of long-range rifles means a good day no matter where you are!
It’s like the shooters who practice the dark art of long range precision shooting are speaking a language known only to a select few.
But rest assured, shooters of all backgrounds, experience, and skill levels can learn the ins and outs of long range shooting.
We’ll walk you through some of the basics so you can get started. Then decide if you want to go down the rabbit hole.
Table of Contents
Loading…
What is Long Range Shooting?
Long range is a subjective term and every shooter has a distance that, for them, is considered long range. It might be experience or it might be equipment related.
HBH 1000 Known Distance Range
For someone brand new to the rifle making a shot at 100 or 200 yards may be a very big deal. If you are shooting an iron-sighted lever gun in .357 magnum, long range for you is likely 150 yards or so.
The man, the myth, the legend — Jerry Miculek hitting a 1,000 yard shot with a 9mm revolver
However, I’m going to assume that for most shooters, long range means hitting targets at distances like 800 or more yards.
Just think, a 30-inch wide target at 1000 yards is the same as hitting a 3-inch target at 100 yards… sort of.
Both targets are just 3-MOA (Minutes of Angle). In order to hit that 3-MOA target, some basics are needed.
Steel at 300, 428, 505, 637, 718, and 1000 yards
Just to be clear though, reading this article will not make you an expert marksman. There is a lot more to talk about and a lot more detail to cover.
This is just the first taste of what long range shooting is, we’ll be covering more topics and in more depth soon!
Basic Gear
Of course, you need a rifle, scope and quality ammunition. I don’t think you need to go crazy spending a ton of money to hit targets at long range.
Solid rests, a range finder, spotting scope, and a notebook are some basics that are helpful
What you do need is a rifle capable of 1-MOA or less at 100 yards with a good trigger. Take a look at the Ruger American Predator or Howa 1500 as entry-level long-ranger plinkers.
Howa 1500 in MDT and Boyds‘ – top to bottom: MDT ESS, MDT LSS-XL Gen 2, Boyds’ Platinum, Boyds’ AT-One
Your optic doesn’t need to be a top of the line Nightforce. But, you do need a scope that allows you to see the target clearly at all ranges and has repeatable turret adjustments.
A zero stop is nice, but not absolutely necessary. Just remember how many clicks you came up for your last shot, then dial back to zero before your next shot at a different distance.
Factory loads or handloads; both work just fine in an accurate rifle
Factory ammunition today is incredible. You can buy very high-quality ammo with high-BC bullets made to perform at long range.
Rifles in calibers that do not recoil much allow you to see bullet impacts on target and, if the conditions are right, you can see the bullet trace all the way to the target. This helps you determine if your elevation and windage corrections are right for the target you are engaging in.
For rifles chambered in 6 and 6.5 Creedmoor, you can expect a barrel life of about 2500 to 3000 rounds.
Some of the most popular rifle calibers
If you opt for the lowly .223 Remington you will probably get about 7000-10,000 rounds of accurate shooting and save money on ammo.
You don’t need the latest and greatest to make hits a long way out if you are doing your job correctly.
Don’t discount AR’s or Modern Sporting Rifles. With the proper ammo, consistent hits out past 700 yards are very possible.
The CZ 527 & Rock River Entry Tactical are both sub-½ MOA rifles. Hits beyond 700 yards are not uncommon for these rifles.
A rangefinder is helpful if you don’t know the range to the target. You can estimate the range using the scope reticle, but only if you know the dimensions of the target.
So unless you are at a range that has the distances marked you need some way to determine how far away the target is so you can make the correct scope adjustments. If you have a rangefinder you use for hunting that will be fine, most will work reliably out to about 800 yards.
A quality bipod on your rifle helps to make shooting prone or off some sort of natural or man-made support much easier.
We always recommend a shooter invest in a Harris Bipodthat has the ability to swivel so no matter the terrain, the gun can be fired from a perfectly level attitude.
If you don’t have a bipod, you can use your backpack, sandbags or something similar to rest the forearm of your rifle. The key is a stable platform to shoot from.
For more choices check out our Best Bipods article.
You will need a rear bag to support the butt of the rifle. This can be as simple as a couple of old socks filled with rice and knotted tight. I use old shot bags filled with varying amounts of old tumbler media.
var PPT_APS = PPT_APS || {};
PPT_APS[43443] = {
“id”: “43443”,
“title”: “Caldwell DeadShot Boxed Combo Front and Rear Bag”,
“img”: “https://www.pewpewtactical.com/wp-content/uploads/2019/05/Caldwell-DeadShot-Shooting-Bag-Combo-1024×692.jpg”,
“tag”: “”
};
They are lightweight, can be stacked and combined as needed and provide a way for me to apply pressure by squeezing to adjust the vertical alignment of my rifle.
Proper hearing protection is a must. Most folks who delve into long range shooting will install a muzzle brake of some sort to reduce or eliminate recoil.
Tested Shooting Ear Protection Muffs
No matter how you slice it, brakes are loud.
I normally wear quality shooting earplugs under my ear muffs. You only get one chance with your hearing, take time to protect it as much as you can.
Double up on your ear pro. Rifles with brakes are extremely loud!
As you shoot, you will begin to learn how your rifle and ammo perform at various ranges. There have been several articles that discuss various apps that allow you to enter the important data for your rifle, optic, and ammo choices.
Then, as you begin to stretch out the range, the app calculates how much you need to dial up the scope and how much windage you need to dial or hold depending on the conditions.
The app will also help to verify the velocity of your bullets depending on your hits. If you are sailing rounds way over the target, likely your bullet is moving faster than you think it is. The info on the cartridge box may not be correct for the conditions you are shooting in.
.223 Handloads For Long Range Shooting
If you have powder that is sensitive to temperature changes, your velocity may also increase or decrease. You can make adjustments in the app to correct for velocity variations.
For a new long-range shooter, the Shooter App is easy to use and you can store a ton of info in it.
If you don’t have an app yet, go to JBM Ballistics and print a “drop chart” for your rifle. I have used it quite a bit this summer and the adjustments have been pretty close for the range I have access to.
Ballistic card made with JBM Ballistics
Wind Meter
TheKestrel 2700weather meter is packed full of features! This little tool will allow you enter critical atmospheric data into to your app and help you make better adjustments to your optics.
A range finder, a wind meter, and smartphone make long range shooting much simpler.
Things like elevation, barometric pressure, humidity, and temperature all affect the flight of your bullet.
For sure the little wind speed indicator is key. If you know how hard and from what direction the wind is blowing you know how much windage you need to dial or hold.
A wind meter is nice but not absolutely necessary. If you really want to “buy once, cry once” the Kestrel 5700 Elite has a ton more features, but at a much higher price.
Obviously you need to have some understanding and grasp of good shooting technique to consistently hit at long range.
Don’t expect to be ringing every shot the first time out, precision shooting is about consistency and practice.
We could write volumes, and volumes have been written, on how to be a better and more accurate shooter. But right now — let’s just cover the basics.
Breathing
A lot has been written regarding breathing and heartbeat over the years. Don’t get too hung up on taking in a deep breath, letting out half, holding and breaking the trigger at just the right time.
I like to breathe normally as I get my rifle aligned and level. Once I am on target I let my breathing slow and relax as much as possible. I tend to squeeze off my shot just as my lungs reach the bottom of the exhale.
Breathing exercises are relaxing and useful.
At this point, my heartbeat is slowest, and because I am not trying to hold my breath, my body doesn’t tense up and my heart rate doesn’t speed up as my heart and brain search for fresh oxygen.
Trigger Control
Today’s rifles either have great triggers or can be upgraded with a great trigger. For a rifle used exclusively from a bench or competition a trigger of around 2 pounds that breaks cleanly will improve your shooting.
If your rifle is doing double duty in the field as a hunting arm I would suggest adjusting your trigger to around 3.5 – 4 pounds.
Use the area on your index finger just beyond the last joint
When you place your finger on the trigger you want to use the area on your index finger just beyond the last joint. If you press on this area you can feel a hard, bony structure. You want that bony section of your finger on the trigger.
This gives you a consistent feel and a consistent finger placement. If you use the pad of the index finger you have a ‘mushy’ feel to your trigger squeeze. In addition, if your hands are cold, you often cannot feel the ends of your fingers and if you use the pad of your finger you cannot tell how much pressure you are putting on the trigger.
Gripping the Gun
When shooting from the bench let the bench and the bipod and the rear bag do all the work. For most rifles you are going to use for long-range shooting, recoil is minimal and you don’t need to hold the gun in a death grip.
Be sure you adjust your seat so you are sitting directly behind the gun. You want to line up with your shoulders square to the target and not be angled off to the side.
Off a bench or off a tank trap, square up!
Your strong hand or the hand you squeeze the trigger with is going to rest on the grip area with your trigger finger indexed outside the trigger guard until you are ready to shoot.
Use your remaining three fingers to gently pull the gun into your shoulder pocket. The gun needs to be firmly anchored to your shoulder, but not to the point you are really pulling hard.
Your thumb should rest on top of the grip, or if using a stock with a pistol grip, be resting along the side. You do not need to grip the gun with your thumb.
Thumb on top of the grip, you don’t need your thumb wrapped to have a steady grip!
If using a bipod, lean forward a bit to ‘load’ the legs of the bipods once you are well-positioned.
Be sure your cheek has good contact with the stock and that you can clearly see the entire image through your scope. On a fixed stock rifle you have fewer options for adjustment than with a modular stock or chassis, but you should still be able to comfortably align your body and your eye to the optic.
Your ‘off’ hand controls your rear bag.
Squeezing your rear bag to adjust your hight and aim while also giving yourself a solid shooting rest.
By squeezing the bag you raise the butt of the rifle and your scope reticle will move down in relation to your target. If you ease pressure on the bag the reticle climbs and moves higher.
By using the bag you control the movement of the vertically and, to some extent, horizontally. Your left elbow and forearm are resting nearly flat on the bench at this point.
Your trigger hand is going to make any vertical or horizontal turret adjustments, make parallax adjustments, squeeze the trigger and work the bolt.
Trigger hand to adjust the scope
Shooting and Follow Through
When you are aligned with the target and have your optic dialed in for the distance and the wind conditions you are ready to shoot.
If you are letting the gun rest on the bipod and rear bag and not placing any unnecessary pressure on the grip, the rifle should recoil straight back and come to rest very near the center of the target you were holding on.
Even with big calibers like .50 BMG, the rifle will remain relatively flat with proper shooter technique.
Keep your eyes open through the shot. Today’s optics will allow you to see not only your impact on the steel, but in many cases you will see the bullet trace all the way to the target.
This only happens if your follow-through is good and you let the rifle recoil naturally. Don’t fight it.
If you are shooting a lightweight mountain rifle, you may want to invest in a shooting pad, or simply place a sandbag between your shoulder and the butt of the rifle.
For real thumpers, a bag of shot or sand can make your day much more pleasant.
You may also find that a lightweight rifle or one with a thin barrel profile will shoot better if held more tightly and with some additional pressure forward into the bipod.
If you are doing your job you should be able to reach up with your trigger hand, work the bolt, and be ready to shoot again very quickly. Don’t raise your cheek off the stock.
Don’t move your head. Just work the bolt, acquire your target and fire again.
Dry Fire Practice
We are all capable of training more and getting better regardless of the type of rifle we are shooting and the type of shooting we normally do.
One of the biggest reasons shooters miss or fail to shoot consistently small groups is flinching.
I know… you never flinch. You’re not afraid of recoil. Your gun doesn’t kick very hard.
I’m willing to bet that if we take some time and do the Ball and Dummy Drill, nearly every shooter will flinch at some point.
At 1000 yards it takes very little movement of the rifle to cause a miss. A microscopic flinch will make you miss.
Take a few minutes every week to do some dry fire practice. Set up in your yard, or depending on your neighborhood and neighbors, in your house and garage and practice dry firing.
Remove all the ammo from your practice area and double and triple-check that your gun is unloaded and pointed in a safe direction.
Shoot from prone with your normal set up and supports. Really focus on getting a good sight picture and squeezing the trigger so smoothly that when the hammer falls the reticle does not move from the center of the point you are holding on.
Exaggerate your follow-through. Don’t blink or close your eyes. Have someone watch to see if your eyes close when the hammer falls.
Now, work the bolt and do it again, and again, and again.
The top shooters in every discipline spend way more time dry firing than they do running live fire drills.
When you do get to the range take a few minutes to go through some dry fire exercises to get relaxed and comfortable with the gun before you start sending rounds downrange.
If you don’t normally have access to a long range, practice shooting the best groups you can at 100 yards, over and over and over.
One of the best long-range shooters I know spends most of his live fire practice in prone on the 100-yard range.
Homework
It might seem like we just covered a lot of information, but this is just the very start of the first course when it comes to long range precision shooting!
You’ll want to get more information, to start you off I highly recommend Ryan Cleckner’s Long Range Shooting Handbook — it is truly a definitive source for beginners to precision shooting.
Long range shooting is more available and more achievable than ever before.
Rifles are better than ever, and paired with some good ammo with high-BC bullets, long shots are makeable with just about any cartridge you care to try with.
Assorted 6.5 Creedmoor (L to R: Federal FMJ, Soft 129gr, Ballistic Tip 120gr, Gold Medal 140gr)
Optics that used to be exotic are now commonplace and within the budgets of most shooters.
The bottom line though is your training and practice. You can’t just buy your way to long-range precision. Learn to read the weather and the wind.
Learn and practice your basic shooting fundamentals. Dry fire a lot.
Just like anything, the more work you put in, the luckier you seem to get. And those shots that seem out of reach initially, begin to be commonplace and you start looking farther out on the horizon and wonder, “can I hit that rock way over on the other side of the canyon?”
Tell us about your long range shooting experiences and the things you do to train for competitions or open-country hunting!
Looking to take an AR-15 long range? Check these out!
The Kalashnikov is the most famous…and now it’s time for its long boi version.
Pictured: Soviet SAW, rocks on Tattooine
When we had a chance to checkout the Soviet solution to an AK-style squad automatic weapon, it should come as no surprise that we jumped at the opportunity!
Check our our full video review:
And be sure to subscribe to our YouTube channel for the newest reviews every week.
Table of Contents
Loading…
But First, Some History
We generally find giving a bit of background context to set the stage is useful in understanding the importance of any historically relevant gun we cover – in this case, we’ll be exploring the origins of the Soviet RPK before we dive into the nitty gritty of Atlantic’s Romanian iteration.
It’s the early 1960s, and the Soviet military is looking to standardize their small arms and infantry weapons, as most militaries of the time were. The concept of the squad automatic weapon is a relatively new one.
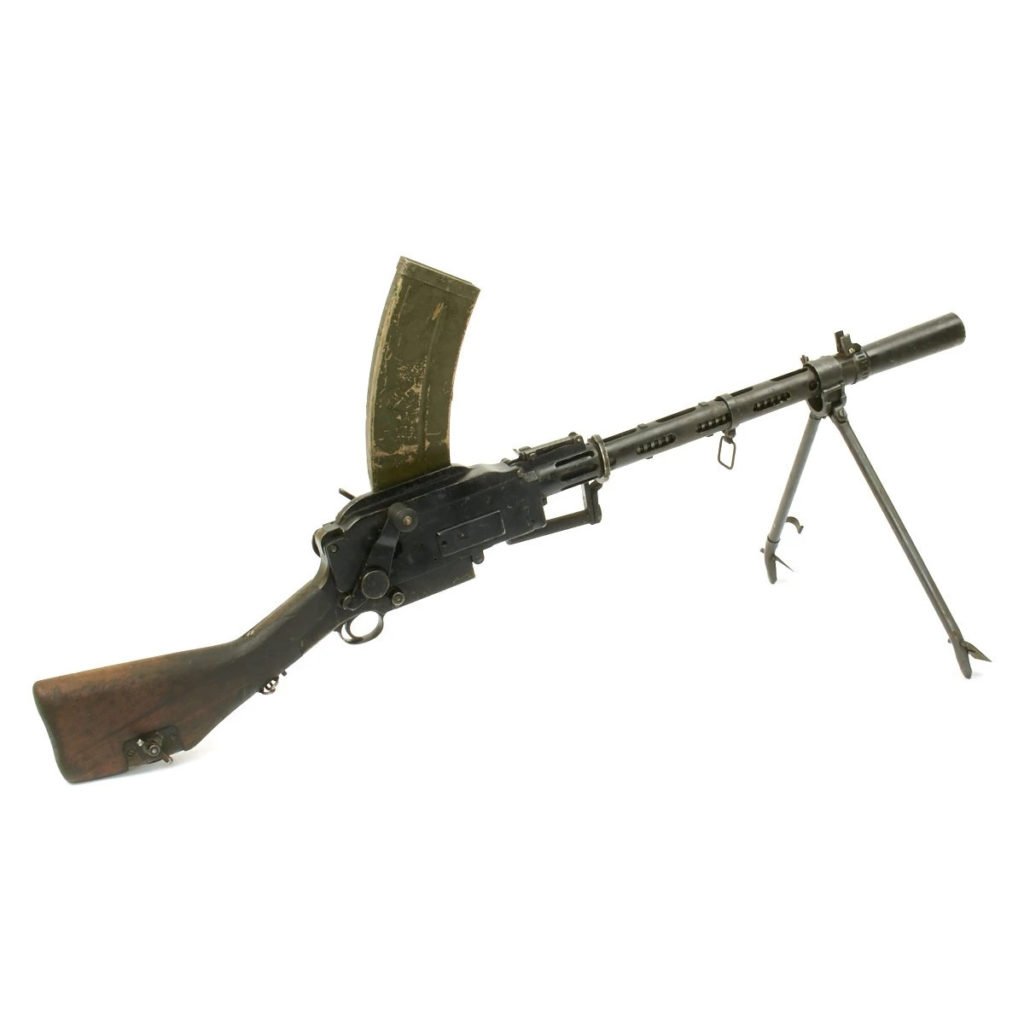
While guns like the Madsen were the first to be employed in this role, most fully automatic support style weapons were still chambered in full size rifle cartridges and required one or more assistant gunners to be utilized effectively.
The Madsen – a mobile automatic weapon that generally didn’t need assistant gunners to be employed effectively.
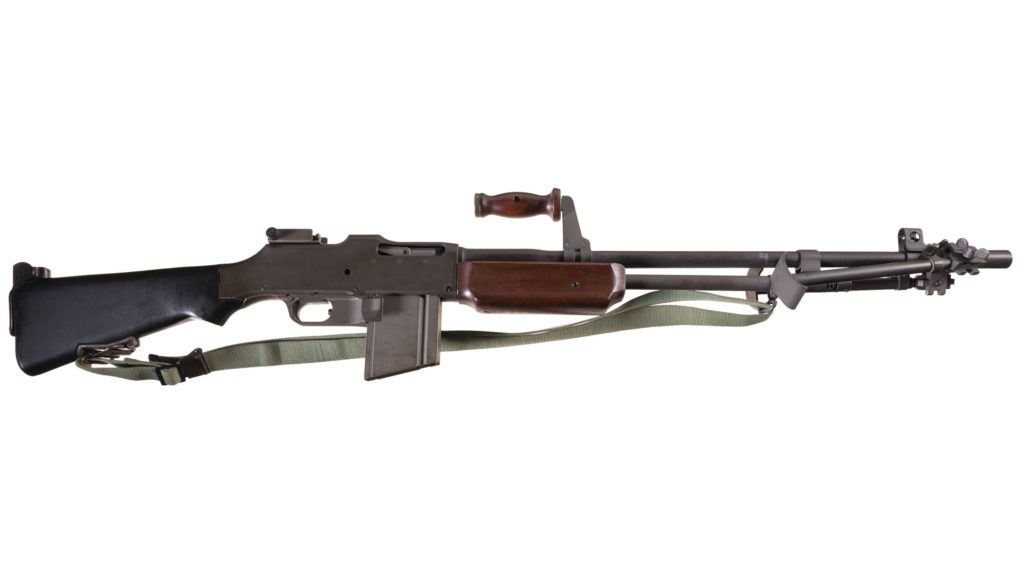
The American BAR is another step in a similar direction, although notably it was still limited to 20 round box magazines and obviously was still chambered in .30-06.
“Bottom of the channel, sir. The bitch tried to drown me.”
The point being that many modern militaries began to understand the importance of having a highly mobile source of automatic fire integrated into infantry squads and fireteams.
Fast forward to late WW2 and firearms designer Vasily Degtyaryov had finalized plans for the Ruchnoy Pulemyot Degtyaryova – or, Degtyaryov’s light machine gun – the Soviet RPD.
RPD in use with Soviet Motor Rifles
Designed to replace the DP28, the Soviet RPD was one of the world’s first belt fed machine guns chambered in an intermediate rifle cartridge – utilizing the same 7.62×39 round as the AK-47, essentially making it a precursor to the modern squad automatic weapon.
The RPD would come to replace the DP28 – the iconic machine gun utilized by the Soviets during WW2 and into the 50s.
The RPD saw substantial use throughout the cold war’s numerous proxy fights, but was eventually replaced during a bid for parts and training standardization by Kalashnikov’s RPK during the early 1960s.
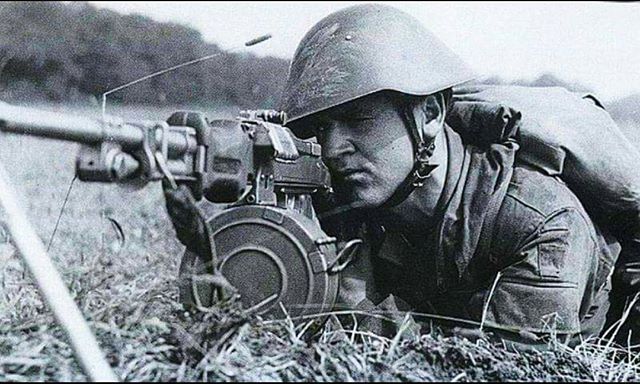
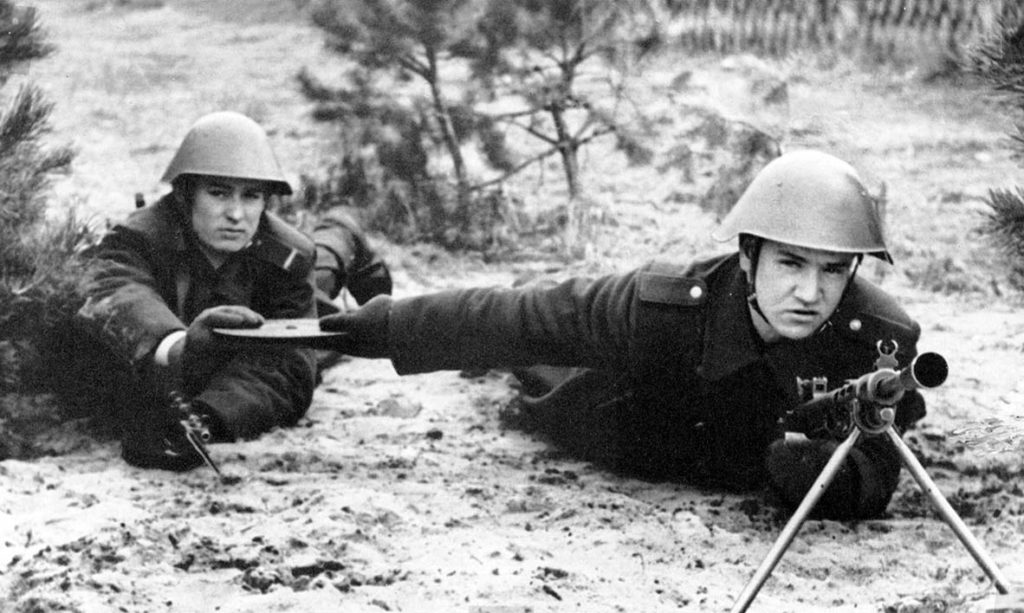
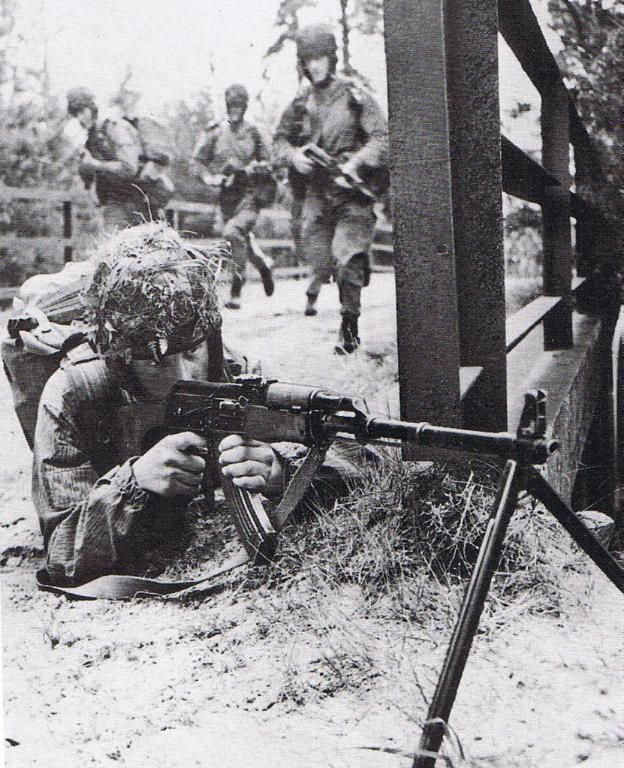
The RPK in use with East German Paratroopers
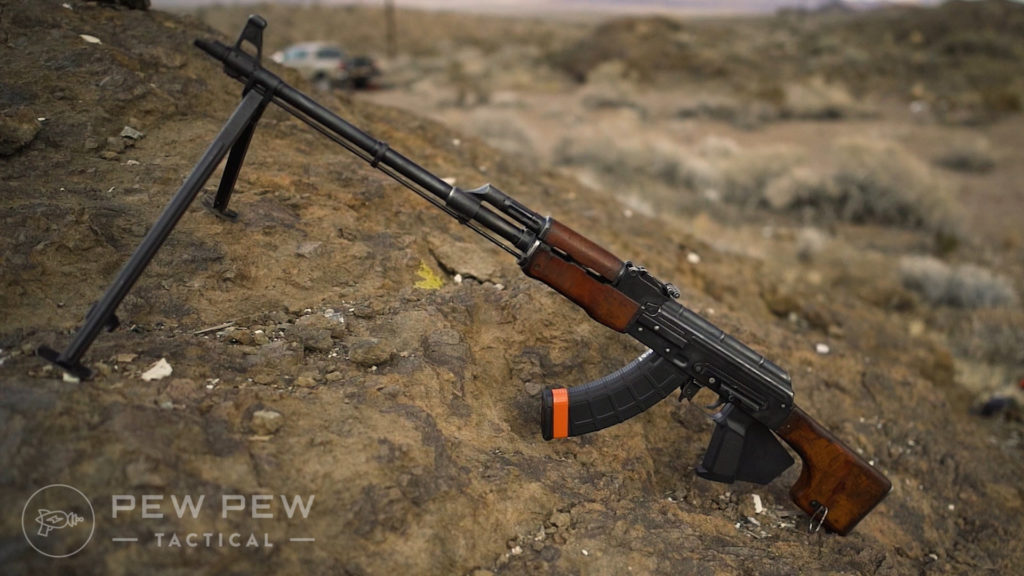
The RPK itself is essentially a beefed up AKM – introducing a thicker receiver and heavier barrel to stand up to sustained automatic fire, and ditching the under barrel cleaning rod for a deployable bipod as well.
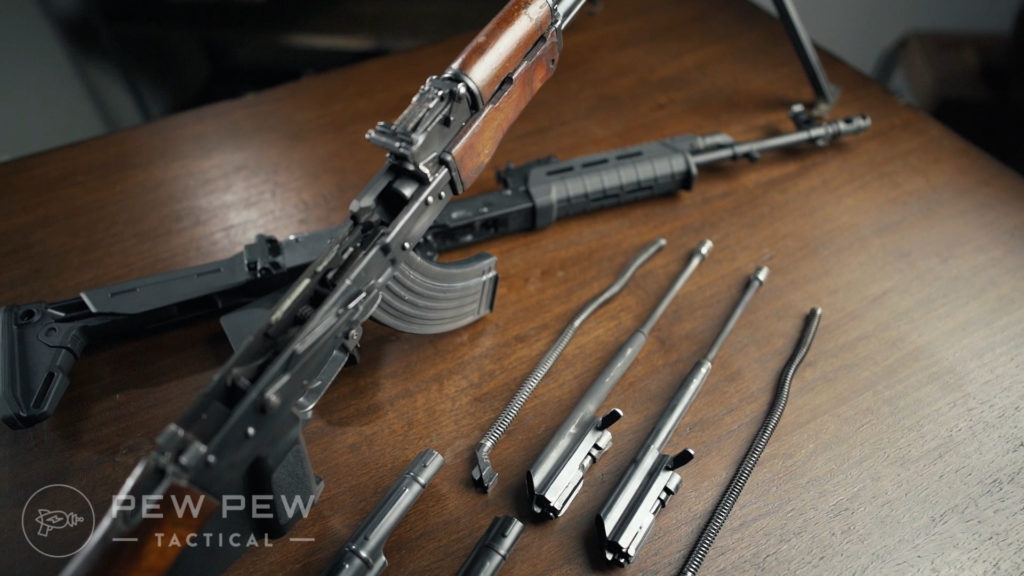
Bolt Carrier Assemblies of both the Romanian RPK and a PSAK47.
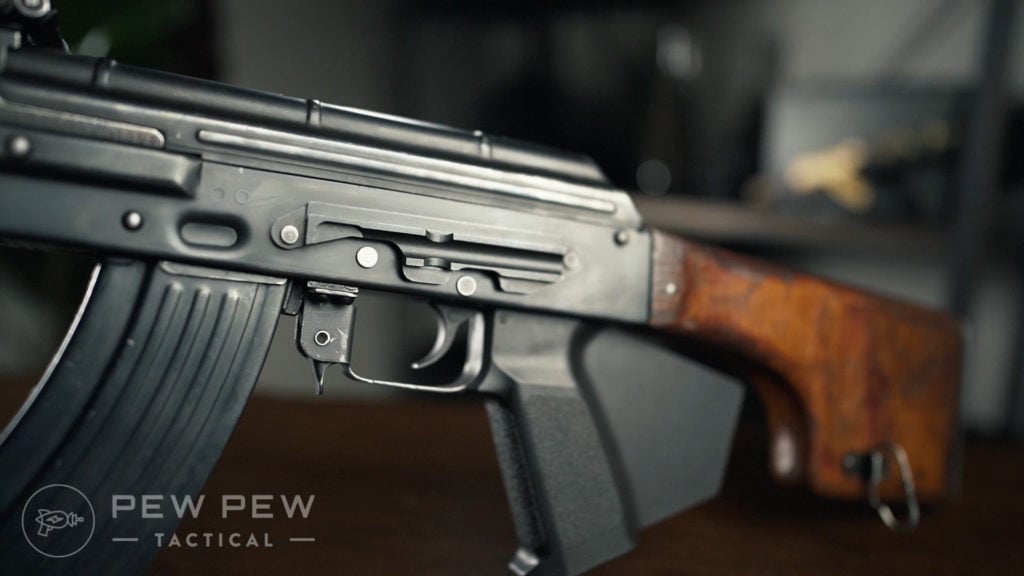
The RPK utilized the same bolt and bolt carrier found on all AK series rifles, as well as the familiar fire controls located on the right side of the receiver.
Essentially, the RPK is just a bigger AK, and if you’re concerned with making sure that your peasant conscript army doesn’t get confused with learning and memorizing the function and layout of all of your infantry weapons, the standardization makes a ton of sense.
The RPK also ditched the RPD’s belt fed system and introduced longer, 40 round magazines or 75 round drums – meaning that the gun could be fed from the rest of the squad’s normal AK magazines if needs be.
The ability to feed the gun from normal magazines carried by your squadmates is a net positive in an emergency.
The Rifle Itself – Romanian MD-64 RPK
So where’s that leave our Romanian blaster?
As a former Soviet satellite state, Romanian arms manufacturer Fabrica de Arme Cugir produced RPK clones locally known as the MD-64 using the original Soviet specifications.
Atlantic’s RPK is assembled by M13 industries, and is built on hand selected MD64 parts kits – utilizing entirely original Romanian made parts mated with a US-made Childers Guns receiver, Green Mountain Chrome lined RPK barrel, and ALG fire control group.
The gun is billed as a ‘battlefield pickup’, meaning that the American made parts have been artificially weathered to closely match the surplus aesthetic of the parts kits themselves, and honestly the gun looks great!
That gorgeous patina thoooooo
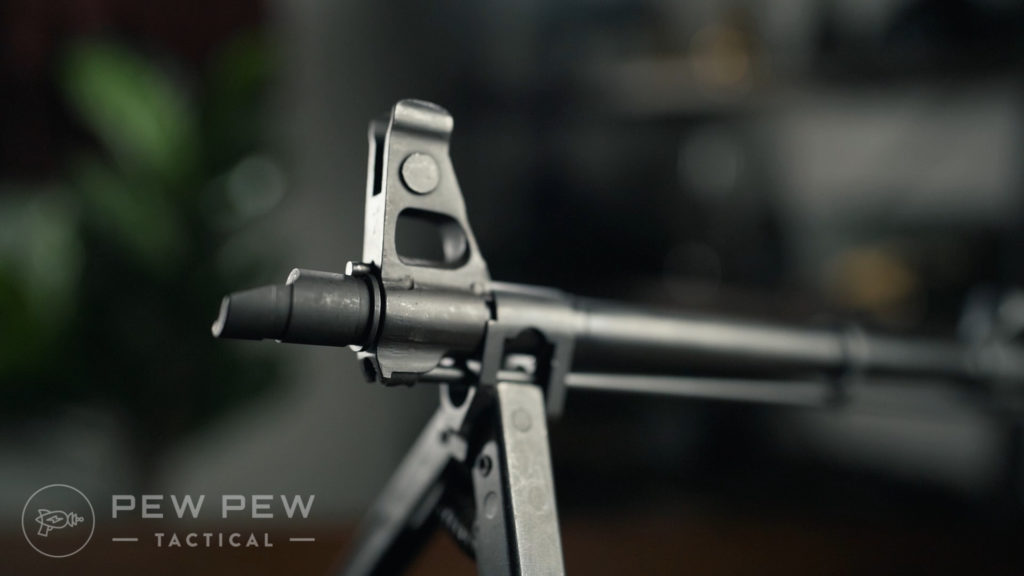
Slightly anachronistically, the gun also includes a dovetail optics rail mounted on the left side of the receiver, and an AKM style slant muzzle brake.
The ‘slant’ style brake is a feature added to the AKM series rifles, and was not present on original Soviet RPKs.
Because Soviet small arms designations are an absurd Kafka-esque nightmare, this would technically make the gun an RPKL – as the -L suffix denoted that the gun included a dovetail rail specifically intended for the NSP-3 night vision optic.
Pictured: The most insane way to issue light machine guns with different optics packages.
The dovetail will fight most standard AK side rail mounts and other purpose-built optics meant to utilize it, however, such as our Midwest Industries mount, and the Russian-made PSO or Kobra sights.
what is this facial expression? ????
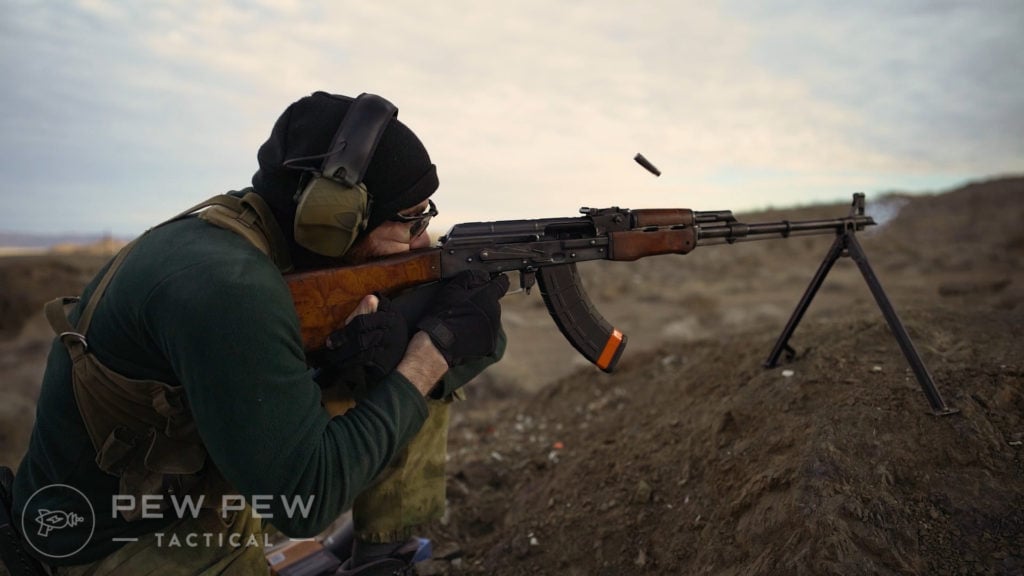
Off To The Range!
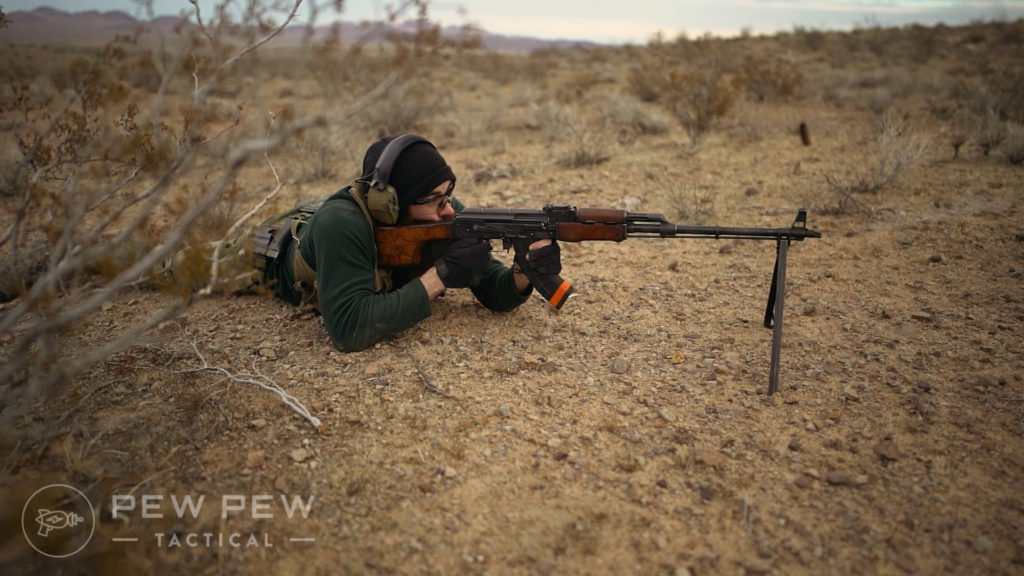
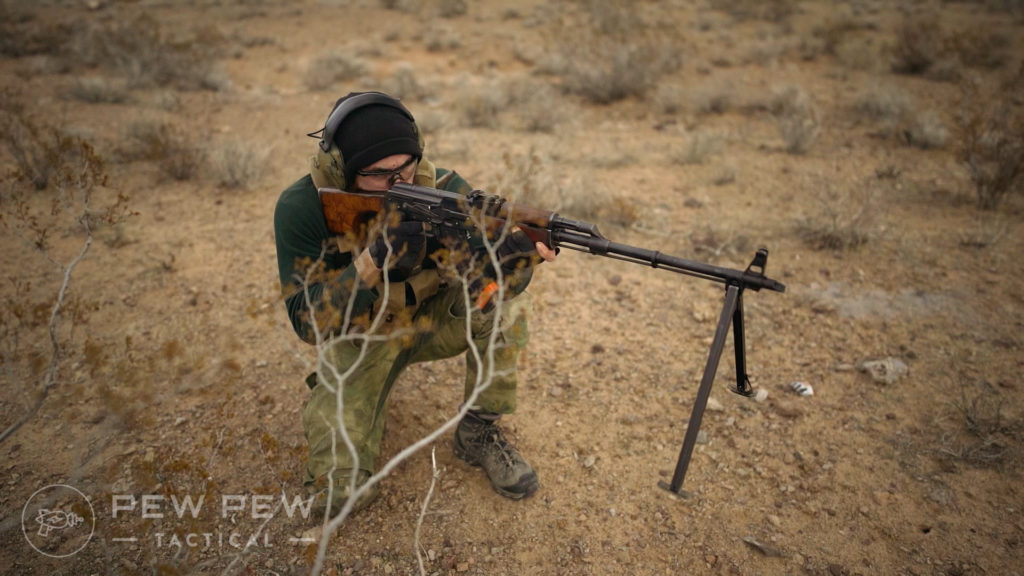
Firing the RPK is an absolute blast! Although the gun is obviously devised as a support weapon and ours is locked to semi-automatic, burning through a mag on a longboi with a bipod still gives us that distinctive warm and fuzzy feeling.
straight blappin’
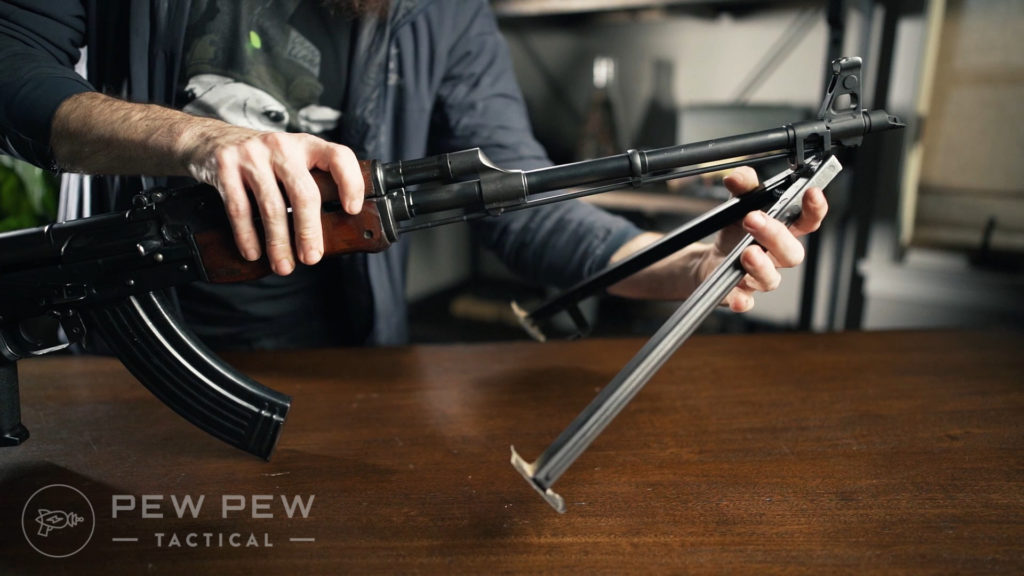
While quite simple, the bipod does its job admirably. When not in use, it locks in place underneath the barrel via a small locking latch.
To deploy it, you release the latch and let the springs do their magic – opening the bipod legs enough to allow them to swivel forward and lock into place beneath the front sight block.
whoosh
You’ve got a tiny bit of traverse, but the bipod itself doesn’t have much swivel functionality, so you’ll have to physically move the gun to engage different targets laterally.
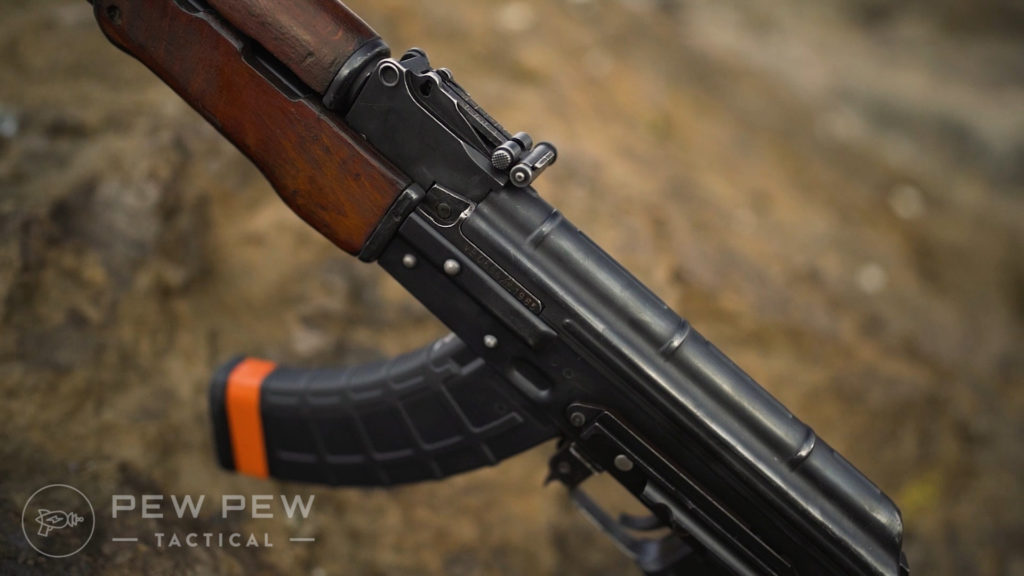
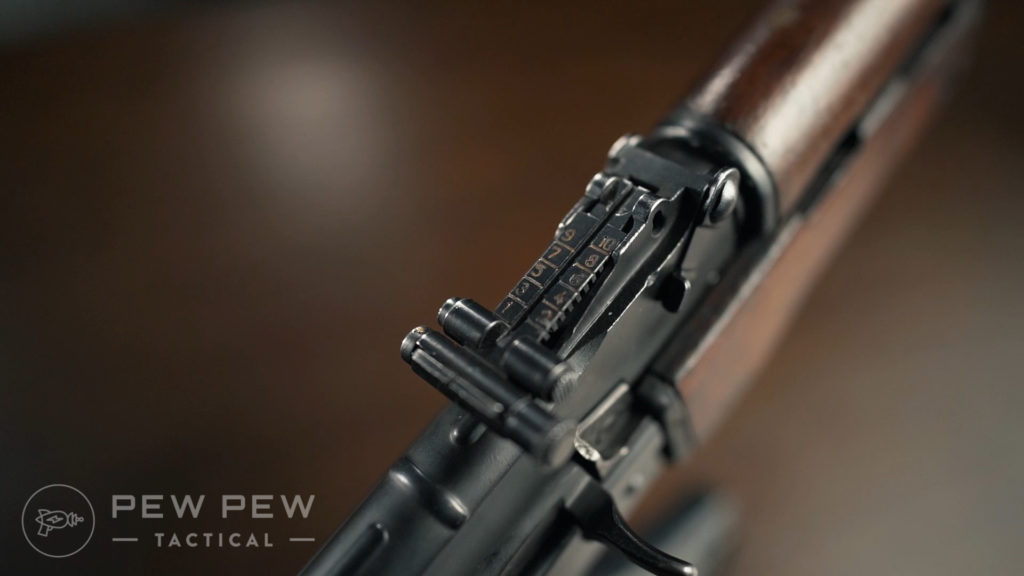
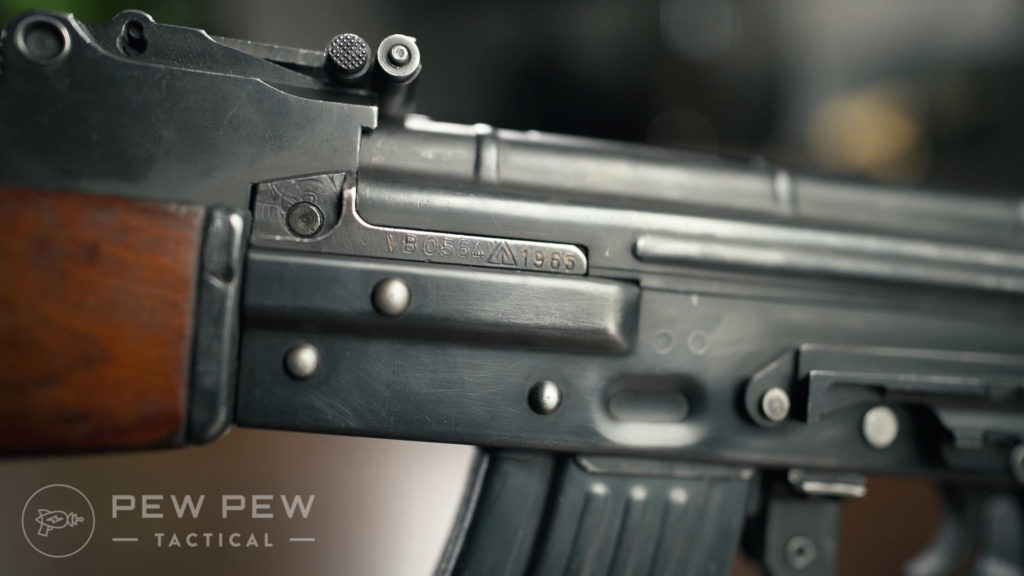
The sights themselves are what you’d expect from an AK patterned rifle, with the notable addition on the RPKs of a knob that controls windage. Why the Soviets thought you’d need specific windage adjustment on a gun meant for suppressing and saturation fire, we’re not sure, but hey! It’s neat.
The windage knob is the rearmost cylinder behind your normal elevation adjustment controls.
Our particular RPK is comprised of matching 1965 dated stamps throughout, which is neat knowing that this rifle and all of its parts kit components have lived together in one iteration or another for 50 some odd years.
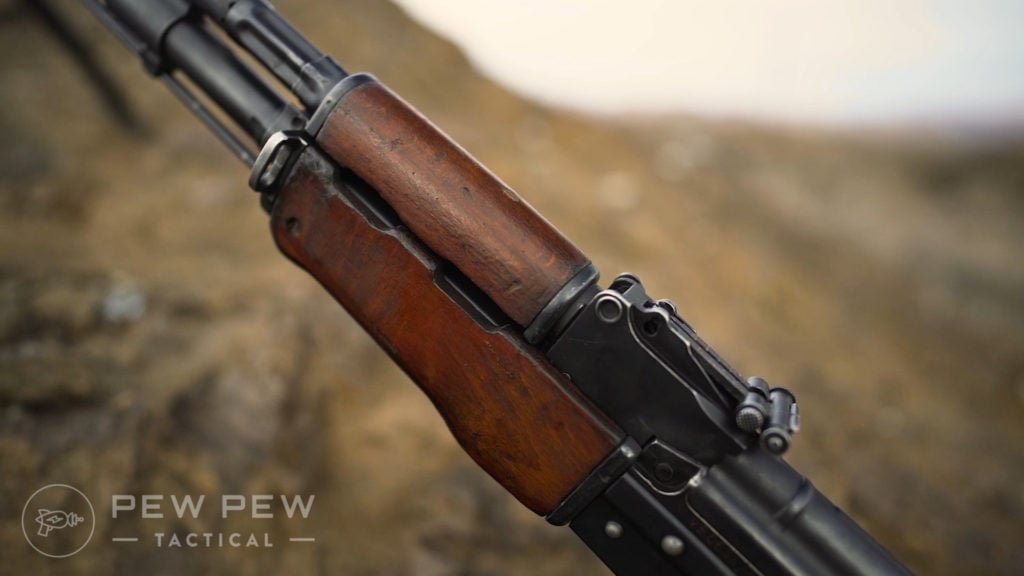
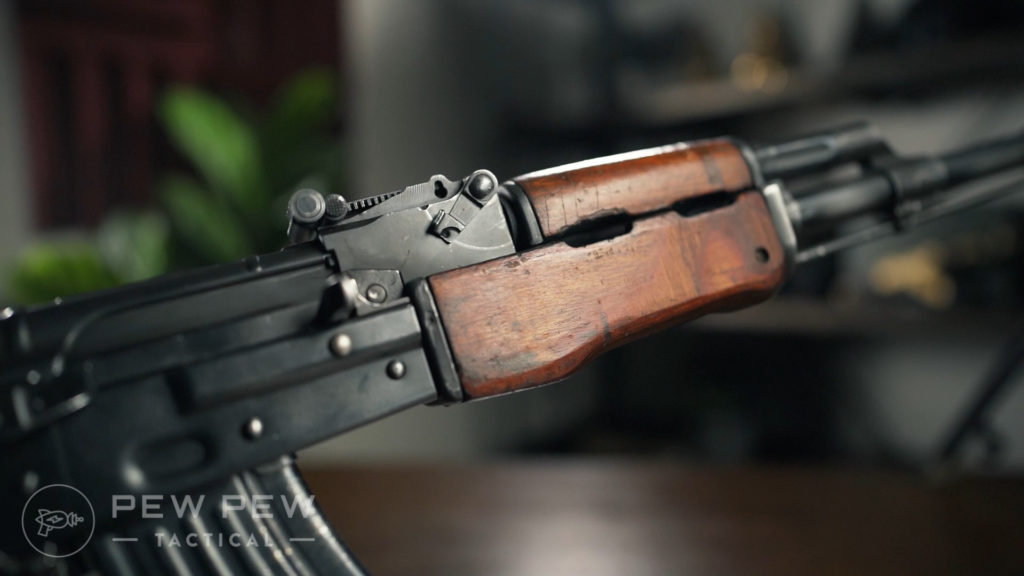
The wood featured on the handguards and stock are beautifully stained and full of patina and character.
A particular aesthetic gripe of ours is the weird blonde and deep red stains we see on a lot of American made AKs – whereas the actual Combloc stuff tends to be much less flashy, especially when it’s beat to shit through years of use.
One… sort of disconcerting part of the handguards is what might be several ‘notches’ cut into the right side of the upper handguard itself.
You can draw your own conclusions as to what that might mean, and they may just be innocuous wear marks unrelated to creepy kill counts, but combined with the fact that the Romanian military would have only ever deployed this in anger to put down the December of ’89 revolution and… well, yikes.
😬😬😬
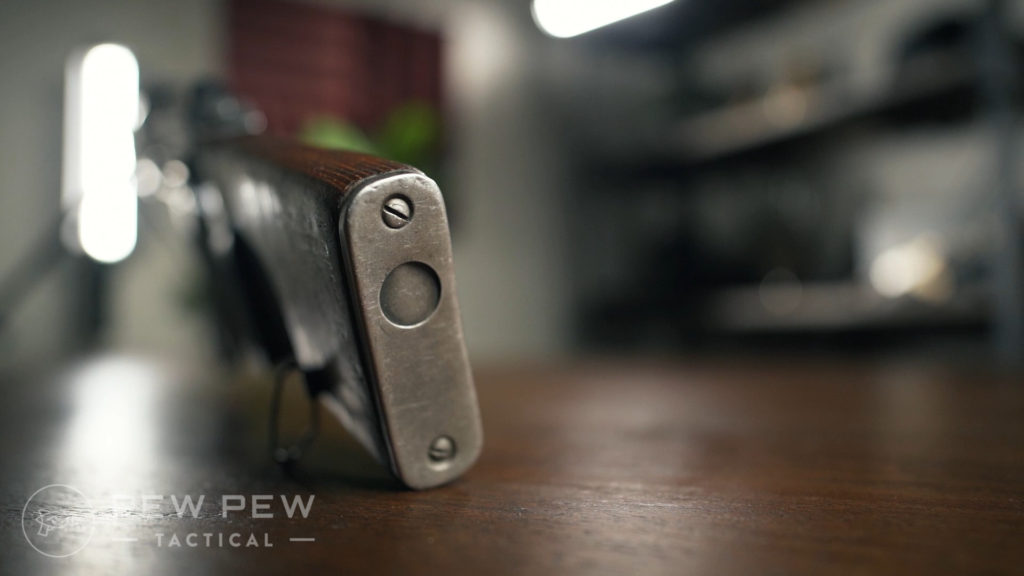
The gun’s got the iconic RPK clubfoot stock in the rear as well, which includes a steel buttplate with a compartment for stowing a cleaning kit.
Your standard steel buttplate
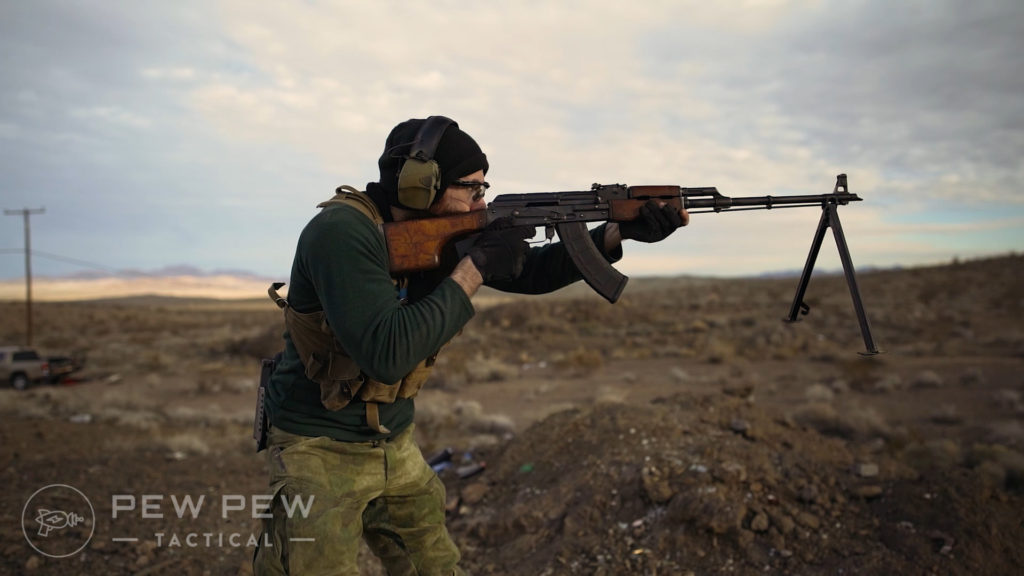
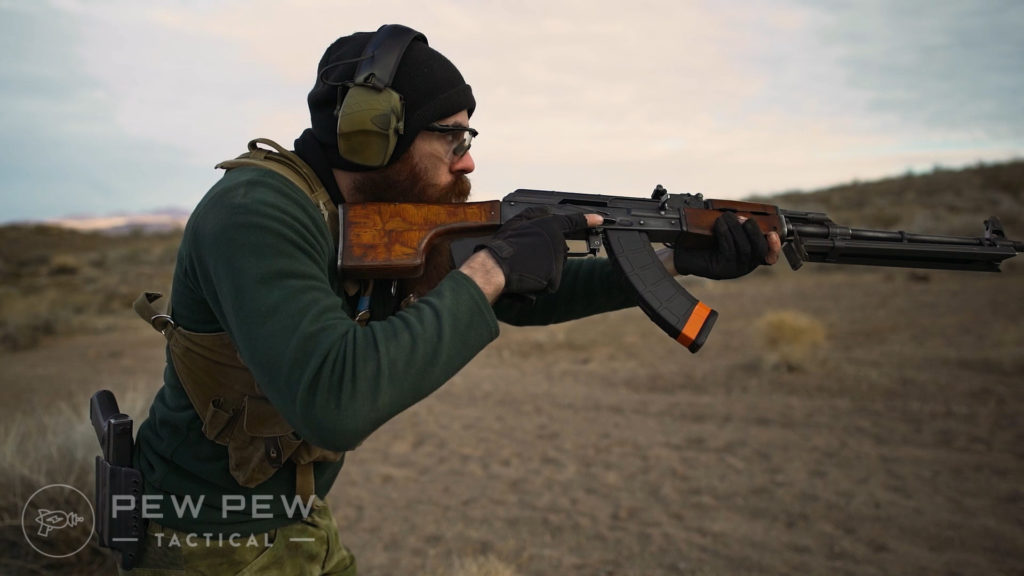
The stock is obviously designed to maximize stability when shooting from the prone, and as is common with a lot of soviet weaponry from the era, feels absolutely odd when trying to fire while standing with anything close to a modern grip.
I’m not sure what to do with my hands…?
The gun feels very similar to an SKS in that regard – wherein the length of pull on the stock compared to the overall length of the gun is going to throw you off if you’re used to ARs, adjustability or the game-changing western concept known as… comfort. 😎
Obviously, the RPK’s barrel is quite humongous, and as such its center of gravity is going to be way out front the handguards themselves, but the gun’s not necessarily meant to be fired from the shoulder, so that’s not really a fair criticism
A fun thing to note is that the Romanian RPK is one of the few Combloc RPKs that share specs with the original Soviet guns, meaning that if you want to trick the gun out with aftermarket parts and components meant for the original RPK — they should drop right in here.
This stands in contrast to the Yugo and Serb made Zastava RPKs which utilize an entirely different rear trunion for the stock, among other differences.
Don’t ask us why you’d want to go tricking out a historical throwback gun, but… you can.
While we didn’t bother shooting groups with what’s essentially a civilian version of a support weapon, anecdotal evidence suggests that shooting from the bipod does indeed effect point of impact, as it’s mounted directly to the barrel itself.
Again, maybe something to be aware of if you’re concerned about accuracy whatsoever, but we weren’t – this is a fun range toy to burn mags through, not a precision weapon.
Walk those shots in like the rest of us, dorks.
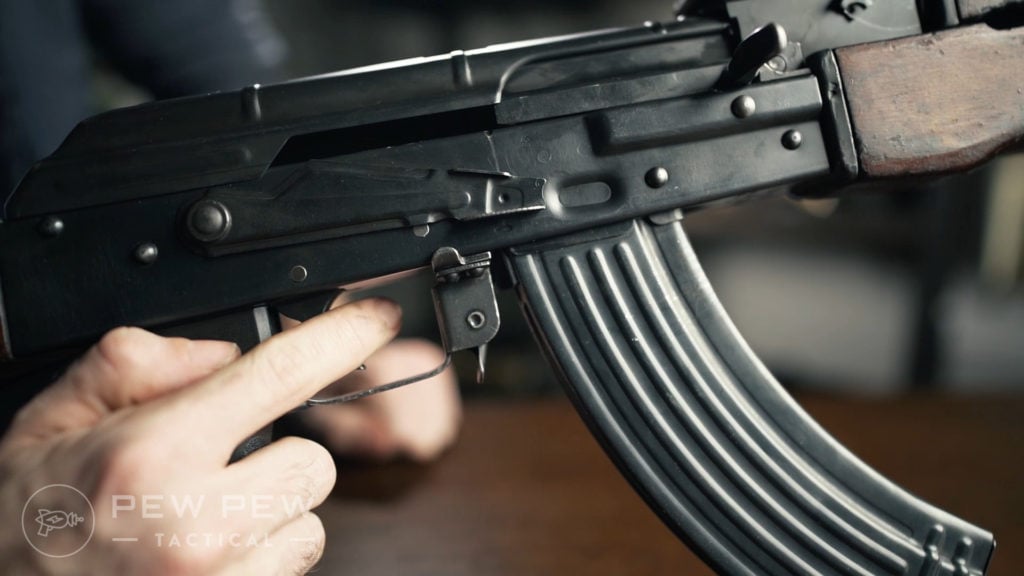
The trigger itself is pretty decent and has relatively minimal creep and takeup before breaking.
Of particular note is that Atlantic is totally willing to ship these to California as long as you slap on a grip fin bought from them to make the gun featureless – which we quite enjoy.
This does feel a tiny bit wonky, however.
However, compared to an AR where a grip fin doesn’t feel that different once you’re used to it, fins on AKs can feel downright odd, and are going to change the angle at which your finger engages the trigger if you’re following proper shooting technique.
It doesn’t lessen the fun of blasting away on this thing too much, but be aware all the same.
*click*
By the Numbers
Reliability 5/5
Surprising no one, the Romy RPK ate every shitball combloc lacquered-cased 7.62×39 round we fed it with zero issues. It’s an AK at heart – were you expecting anything less?
Accuracy 3/5
Perhaps this isn’t quite fair as we didn’t spend a lot of time gauging accuracy or even bother shooting groups, but the 3/5 score is meant to reflect the point of impact when shooting off the bipod.
The irons are reasonably accurate without adjustment, but you’re definitely going to notice a difference once you’re leaning into the bipod that’s mounted directly to the barrel.
Ergonomics 3/5
Again, it’s an AK with a huge ass barrel. Ergonomics are not it’s strong point off the shoulder, but the gun is a breeze to shoot from the bipod or in the prone position.
Its center of gravity is quite a bit forward of a standard AK, but this is mitigated by using the gun in a way similar to its intended role.
Looks 5/5
The gun is downright hot, and there’s no denying it. Atlantic did an amazing job matching the overall wear and tear on the American-made parts with the authentic patina of the MD-64 parts kit the rifle is built around. Bravo!
Customization 3/5
While RPK aftermarket accessories are available, you’re going to be a bit limited. In theory, the rifle should be able to accept a host of Zenitco products if you’re brave enough to throw down the cash for them (and partake in the modifications necessary to get them to fit correctly), but overall, this probably isn’t why you’re taking a serious look at this gun.
Bang for the Buck 4/5
For dorks like us, snagging a rad piece of Commie history for a little over a grand is a steal, and the gun itself as a pleasure to shoot. If that sounds up your alley, we’d recommend keeping a close eye on Atlantic – as the Romanian RPKs go quite quickly when they’re available!
Overall 4/5
Parting Shots
All in all, the Romanian RPK is another super cool piece of history if you’re at all into AKs and cold war communist gats, as I definitely am.
At about $1,200 when they’re in stock, you’ll have to decide if this collector’s piece is worth the wallet pain yourself.
But considering actual Soviet-made RPKs are essentially unobtanium, this is likely going to be your best bet if you’re trying to snag something closely related to one of the world’s first magazine fed squad automatic weapons.
Which of you throw down the cash on historically relevant firearms? Would you like to see us continue to play with old gats? Let us know in the comments below! For some more awesome Combloc you can feel, take a look at the Best AK-47s!
This article has been contributed by Anne Marie Duhon. Anne Marie is a wife, mother of six and a full time off-gridder. She and her husband currently live in a totally off grid 200 sq foot “tiny home” and are in search of (again) that elusive perfect spot to call home. Besides being a wife and mother she, and her family, have raised many different animals on their various homesteads and have lived and loved being off the grid and many miles from the nearest paved road. She would like to share her first hand experiences and help others to learn to live and love living off grid and being as self reliant as possible.
Yes, believe it or not, it can be done.
No, it won’t be an easy thing but it has and is being done all over the world for a lot longer than air conditions have been around.
I remember when I was a very young girl my parents putting in our first air conditioner and us kids laying on the living room floor basking in the cool air. Air conditioning as we know it now has only been around for like 40 years or so. Man has always looked for a way to stay cool in the summer.
Low-Tech Tips on Keeping Cool in the Summer
Here are some ideas and tips to make your air conditioner less summer more bearable:
If you can switch up your work schedule. Put the outside chores for early in the morning or later in the evening and leave the hottest part of the day for inside the house or just sitting around.
Wear cool clothes but do cover up. I find I am cooler in my skirts than in my shorts! Always wear a hat or a bonnet when working outside. Clothes make shade for your body and protect it from the direct rays of the sun.
Drink a lot! Water or Gatorade is better than soda for you but really it is all about the cool drink cooling you off from the inside.
Don’t eat a heavy meal during the hottest part of the day. The body creates heat digesting food and will just make you hotter.
Seek shade just like animals do. Find the coolest place in the house; a basement, the north side of the house, the part of the house that is under a tree and shaded things like that.
Try getting wet if only your feet (I’m soaking my piggy’s in a bucket of cool water right now as I write this and it helps!) Dampen your head/hair and put a cool wet rag on your neck. You will be surprised at how much that really does help.
If it is really hot hit the library and enjoy their air conditioning! Or go to the city pool (not me I’m WAY too shy!) or walk the mall.
And Some More Involved Tips…
Those ideas are low tech and cheap! Here are a few that are a little more involved:
Fans! The moving air will help dissipate your sweat making you feel much cooler. Try putting a big block of ice (like what you would get for a cooler) behind the fan so the air gets sucked over the ice and it will drop the temp in a small room noticeably.
If you live in a dry hot climate try “swamp coolers” or evaporative fans. These are fans that have little hoses and nozzles on them that spray a fine mist in the air.
Cover south facing windows during the day to keep out the sun and open windows on the cooler north side or ones that are located under trees. This is just the reverse of what you would want to do in the winter.
Open windows at night to bring the cooler night air in and close them during the day to retain the cool air for as long as possible.
Tips on Building a “Summer-Proof” Home
If you know in advance of building your home that you are not going to be having air conditioning here are some ideas that you can incorporate into the build:
Make for sure that there are large deciduous trees shading the south and west sides of the house. Trees release water vapor from their leaves when they “breathe” and it is much cooler under a tree!
Build your house out of rock, stone or concrete. Works great for both winter and summer by storing heat in the walls and keeping the inside cooler/warmer.
Heck build your house underground! Even just the depth of a normal home deep will keep the house cooler in the summer because of the mass of earth around it on all sides. Go real crazy and build your home in a cave!
If you are building a “normal” stud frame home bulk up on insulation in the walls and ceiling and situate the windows and doors for maximum air flow throughout the home.
Put awnings over the very necessary south windows to shade out the high hot summer sun but allow the lower cooler winter sun in to passively warm the house in the winter. Make all windows insulated or double-paned.
Summer is not an easy time for man or beast but we all can make it as long as we think and take precautions.
That and you will become accustomed to not having air conditioning it is called acclimating and when you go to an air conditioned place you will find it uncomfortably cold! It usually takes about two weeks of dealing with the heat and sweating like a horse before you are acclimated but after that you will see your spoiled friends gasping and sweating while you just motor on!
Within the prepping community there seems to be endless debate about too many stuff, ranging from personal defense tools, all the way down to canning or type of livestock to raise, variety of potatoes, and so on. I won´t go … Continued
One thing we know is the current food system works, shocked that I said that? Okay when is the last time you had money, wanted food and could not get any? This is true in most of the world, people …Continue reading →


 Yes, believe it or not, it can be done.